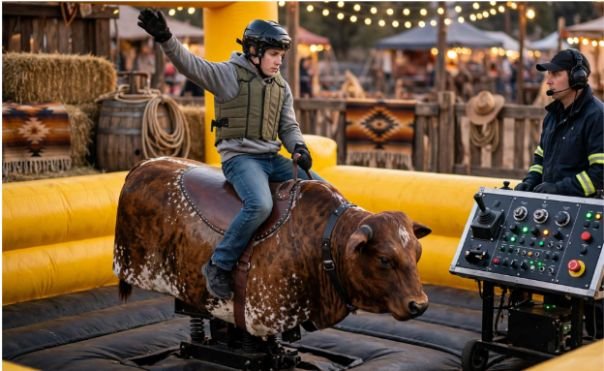
The control panel can look intimidating when you first stand beside a mechanical bull. There are buttons, speed settings, timers, switches, and a joystick that appears capable of launching a rider into the next county.
In practice, mechanical bull controls explained for beginners becomes much simpler once you separate the ride into two systems. The operator controls the machine. The rider controls balance, grip, posture, and reactions.
That distinction changed how I understood the ride. I stopped viewing it as one complicated system and began seeing it as a conversation between the console and the rider.
The Two Types of Mechanical Bull Control
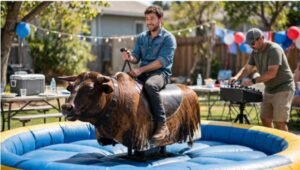
A rider does not steer a mechanical bull in the traditional sense. The machine follows commands from an operator standing at a separate control console.
The operator controls movements such as spinning, bucking, rolling, speed changes, and stopping. The rider responds by shifting body weight and maintaining a stable center of gravity.
Think of the operator as the driver and the rider as the suspension system. One creates movement. The other absorbs and counters it.
Understanding How does a mechanical bull work can also clarify how the motorized base converts console commands into physical movement.
How the Operator’s Control Console Works

Commercial mechanical bulls vary by manufacturer and model. However, most operator consoles contain similar core features.
A current Galaxy Multi Rides console, for example, can include preset programs, a manual joystick, adjustable spin and buck settings, timers, stop buttons, and a spin-disable switch.
Manual Joystick Controls
The joystick gives the operator direct control over the bull’s movement.
Moving the joystick forward or backward commonly controls pitching or bucking. This motion raises and lowers the front of the bull. Moving the joystick sideways controls spinning or rolling, depending on the machine’s design.
The operator can combine these directions to create more complex movement. A slow backward pitch followed by a gentle turn feels manageable. A fast pitch combined with a sudden spin feels far more demanding.
A responsible operator makes gradual changes. Sharp, unpredictable inputs can challenge an experienced rider, but they are unsuitable for someone learning the basics.
Buck and Spin Speed Settings
Many systems allow the operator to control bucking and spinning separately. This separation matters because each movement challenges the rider differently.
Bucking shifts the rider forward and backward. Spinning creates sideways force and can pull the rider away from the center. Combining both movements greatly increases the difficulty.
On some commercial systems, the manual joystick offers ten speed levels. Manufacturers also provide adjustable controls for spin and buck intensity.
For a beginner, I prefer a low bucking speed with either no spin or a very slow rotation. This lets the rider learn one movement before handling several forces at once.
Automatic Ride Programs
Modern consoles may offer preset programs that automatically create a sequence of movements.
Galaxy Multi Rides lists programs such as Soft, Medium, Hard, Greenhorn, Cowboy, and Redneck Games on some models. The Greenhorn setting is intended as a beginner competition level, while Cowboy is designed for more experienced riders.
Automatic programs help operators deliver consistent rides. They also reduce the need to create every spin and buck manually.
However, a preset name does not replace operator judgment. The operator must still consider the rider’s age, size, comfort, physical ability, and experience.
Timers and Competition Displays
LED timers measure how long the rider remains on the bull. Some consoles show the current ride time and the best time achieved during an event.
The timer usually starts when the ride begins and stops when the rider falls or releases the riding strap. Certain systems connect their automatic programs directly to digital clocks.
The timer adds excitement, but it should never pressure an operator to increase the difficulty too quickly. A controlled ten-second ride teaches more than an uncontrolled three-second launch.
Mechanical Bull Safety Controls
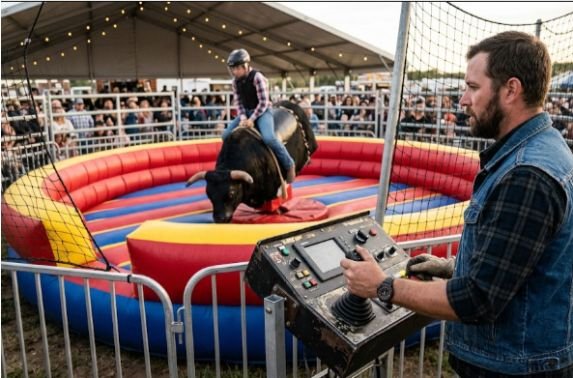
Safety controls are not optional decorations. They allow the operator to stop movement before a minor loss of balance becomes a harder fall.
Emergency Stop Button
The emergency stop is usually a large, highly visible button. Pressing it cuts or interrupts power to the movement system.
Some consoles use a keyed emergency stop. The key helps prevent unauthorized guests or children from activating the bull without a trained operator present.
Before running a ride, the operator should know exactly where every stop control is located. That is not something to learn after the rider begins slipping.
Automatic Stop Sensor
Some machines include a sensor that stops the bull when the rider falls or releases the strap.
Galaxy describes its Automatic Stop Sensor as a system that stops the ride when the rider comes off.
This feature provides an additional layer of protection, but it does not replace an alert operator. Sensors can support safe operation. They cannot evaluate rider posture, fear, fatigue, or unsafe behavior.
Spin and No-Spin Switch
A spin-disable switch lets the operator remove the rotating motion while retaining controlled bucking.
This setting is useful for first-time riders because rotation often causes immediate disorientation. Galaxy states that its spin/no-spin control can disengage spinning, including when accommodating younger riders.
Removing spin also helps riders practice forward and backward weight shifts without managing sideways force.
How Riders Control Their Bodies
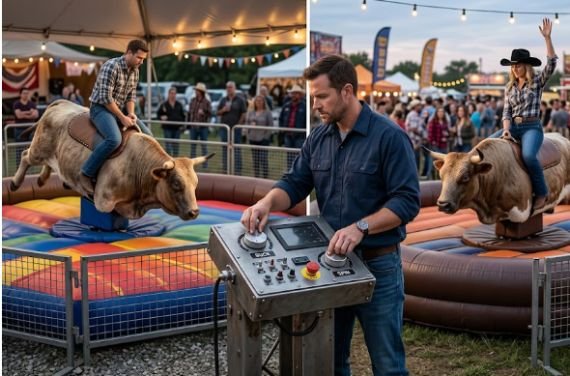
The rider cannot override the console. However, body position strongly affects how long the rider remains centered.
Thigh Grip and Lower-Body Stability
I use my inner thighs and knees to maintain contact with the bull’s body. The goal is a firm clamp, not a panicked squeeze.
Over-gripping creates fatigue and stiffness. A steady thigh grip keeps the lower body secure while allowing the hips to move.
The rider should sit close to the center instead of sliding toward the rear. A centered seat provides more room to respond in every direction.
Riding-Hand Position
The dominant hand normally holds the rope or leather strap.
An overhand or underhand grip may be used, depending on the handle and rider preference. I keep my elbow slightly bent rather than locking the arm straight.
That bend acts like a shock absorber. A rigid arm transfers every movement directly into the shoulder and upper body.
The grip should feel secure but releasable. Riders should never wrap the rope around the wrist or hand.
Free-Hand Counterbalance
The non-gripping hand stays free and raised.
This hand works as a counterweight. When the bull turns left, moving the free arm right can help keep the upper body centered. The movement should remain responsive rather than theatrical.
I once assumed the raised hand was mainly part of the rodeo style. After riding, I realized it functions like the balancing pole used by a tightrope walker.
Hip and Upper-Body Movement
The hips should follow the bull while the upper body counters its direction.
When the bull’s head drops, I shift my hips forward and allow my shoulders to move slightly back. When the front rises, I move forward enough to avoid falling behind the motion.
Staying loose matters. A stiff rider becomes one solid lever that the machine can easily tip. A relaxed rider can absorb several smaller movements through the hips, knees, elbow, and shoulders.
What a Beginner Ride Should Look Like
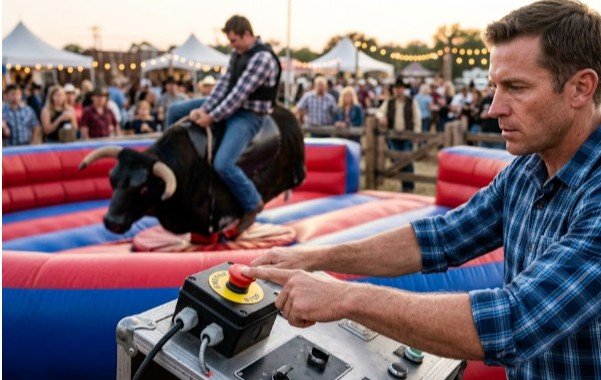
My preferred beginner sequence lasts about 20 seconds and adds one challenge at a time.
During the first five seconds, the bull moves slowly without spinning. The rider checks the grip, seat position, and free hand.
During the next five seconds, the operator adds a gentle forward and backward pitch. The rider practices moving the hips without pulling hard on the strap.
The third stage introduces a slow turn. The operator watches whether the rider remains centered or begins leaning outside the rotation.
Only during the final stage should the operator slightly increase one setting. Increasing bucking and spinning together makes it difficult to identify which movement caused the rider to lose balance.
This staged approach is my original control test: change one variable, watch the response, and adjust only after the rider regains a centered position.
Common Mechanical Bull Control Mistakes
The most common operator mistake is increasing the intensity before the rider understands the current movement. Speed should follow control, not replace it.
Another mistake is treating every rider equally. A tall adult, a smaller teenager, and an experienced rodeo rider respond differently to the same setting.
Riders often make the opposite mistake. They try to overpower the machine by pulling the strap and squeezing with maximum force.
That approach usually makes the body rigid. Better control comes from a stable lower body, a flexible hip hinge, a bent riding arm, and an active free hand.
Operators should also avoid becoming distracted by the timer or crowd. Their attention belongs on the rider’s position, grip, comfort, and fall direction.
Frequently Asked Questions
1. What does the joystick control on a mechanical bull?
The joystick typically controls pitching, bucking, spinning, or rolling, although the exact directional layout varies between manufacturers and models.
2. What setting should a beginner use on a mechanical bull?
A beginner should start with low-speed bucking and little or no spin while learning grip, posture, and weight-shifting techniques.
3. Does a mechanical bull stop automatically when someone falls?
Some commercial systems use automatic fall or strap-release sensors, but the operator must still watch the rider and use the stop control when needed.
4. Are mechanical bull controls difficult to operate?
The basic controls are straightforward, but safe operation requires manufacturer training, careful rider assessment, constant attention, and familiarity with emergency procedures.
Easy Does It, Cowboy
The biggest lesson from mechanical bull controls explained for beginners is that more speed does not create a better first ride. Better control does.
The operator should introduce one motion at a time. The rider should focus on staying centered rather than fighting every movement.
Start without spin, keep the bucking gentle, and practice for several short rounds. Once the rider can stay loose and balanced, the operator can add difficulty gradually. The goal is not to survive a surprise. It is to understand the movement before the bull turns up the attitude.