Author: Wyatt Harmon

  • Mechanical Bull Riding Tips for Beginners That Work

    Mechanical Bull Riding Tips for Beginners That Work

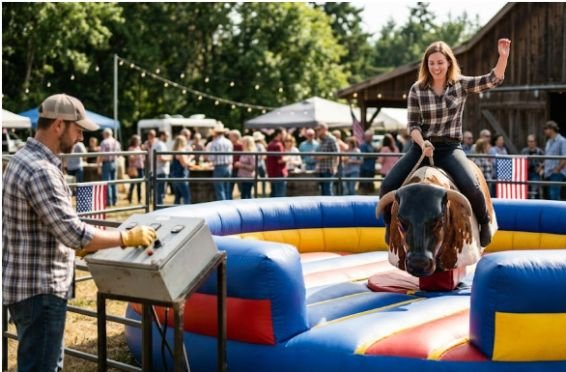
    The first time I climbed onto a mechanical bull, I assumed strength would keep me in the saddle. I squeezed every muscle, held my breath and fell almost immediately. The most useful mechanical bull riding tips for beginners are not about overpowering the machine. They are about controlling tension, reacting early and staying centered.

    My most effective technique is simple: anchor with the legs, absorb movement through the torso and adjust before the next turn. Once I stopped treating the ride like a wrestling match, I stayed mounted longer and felt more in control.

    Why Beginners Fall So Quickly

    Most first-time riders become rigid as soon as the bull moves. They tighten their shoulders, lock their elbows and lean too far in one direction.

    A rigid body cannot adapt quickly. When the bull changes direction, the rider’s entire body moves as one stiff unit. That makes a small shift feel much larger.

    I use a different approach. My thighs stay active, but my waist, shoulders and free arm remain responsive. My lower body creates stability while my upper body manages balance.

    This “anchor, absorb, adjust” method is the original framework I use to remember the correct technique:

    • Anchor with the thighs and riding hand.
    • Absorb motion through a relaxed torso.
    • Adjust your weight before the movement becomes extreme.

    Prepare Before Getting on the Bull
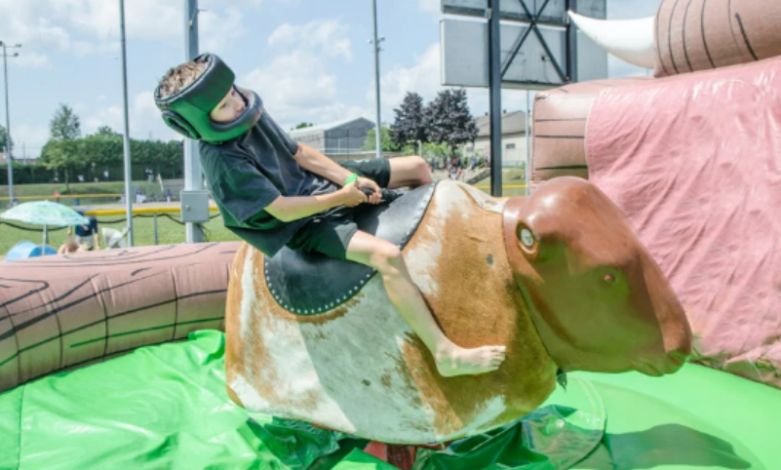
    Prepare Before Getting on the Bull

    Good riding starts before the operator presses the controls. A quick safety check can reduce avoidable risks and help you focus on technique.

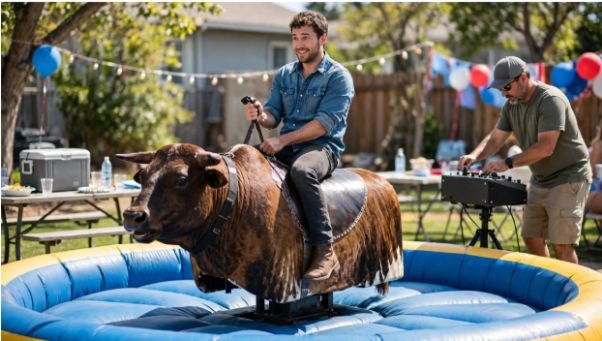
    Mechanical bulls are also popular unforgettable attractions for corporate events because they combine spectator entertainment with an activity guests can try at their own comfort level. When one is part of a larger event, proper setup and operator supervision become even more important.

    Ask for a Beginner-Friendly Ride

    Tell the operator that this is your first attempt. Ask for a low speed and gentle movement pattern.

    A responsible operator should explain the rules, show you how to hold the strap and confirm that you understand how to dismount. Amusement ride safety standards cover areas such as operation, maintenance, inspection and operator procedures.

    Do not allow friends to pressure the operator into increasing the difficulty. Your first goal is learning how the machine moves, not setting a party record.

    Check the Landing Area

    The inflatable landing surface should appear fully inflated, unobstructed and large enough to surround the bull. Avoid riding when people, shoes, drinks or equipment remain inside the inflatable area.

    The U.S. Consumer Product Safety Commission advises following manufacturer instructions and using inflatable devices on suitable, properly prepared surfaces.

    Remove Loose Accessories

    I remove my hat, watch, long earrings, necklace and anything stored in loose pockets. These items can fall, distract me or catch against clothing.

    Long hair should be secured in a ponytail, braid or bun. Clear vision matters when the bull begins changing direction.

    Use the Correct Mechanical Bull Grip
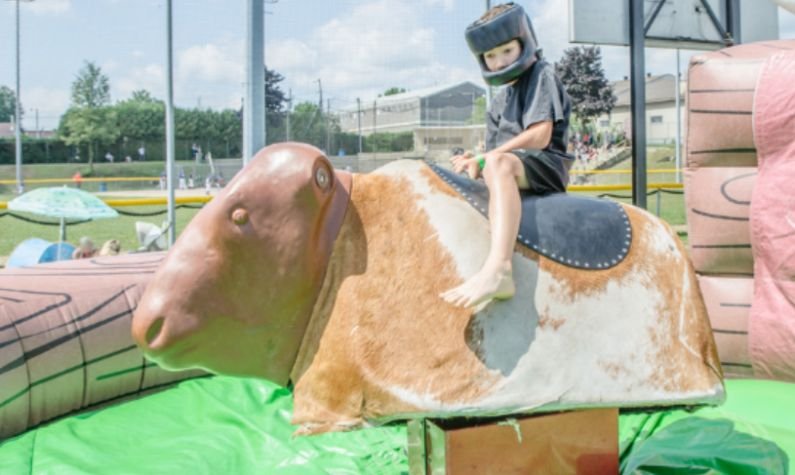
    Use the Correct Mechanical Bull Grip

    A secure grip provides stability without freezing the shoulders. These mechanical bull riding tips for beginners work best when the riding hand and free hand perform different jobs.

    Hold the Strap With One Hand

    Use your dominant hand to hold the rope, handle or leather strap. Wrap your fingers securely without twisting your wrist into an uncomfortable position.

    Many riders prefer placing the palm upward because it can create a firm connection with the strap. However, follow the operator’s instructions and the specific equipment design.

    Avoid holding on with both hands unless the operator specifically directs you to do so. A two-handed grip can square the shoulders and limit your ability to counterbalance.

    Use Your Free Hand for Balance

    Raise your non-riding hand around shoulder or head height. Keep the elbow bent and responsive.

    I treat my free arm like the balancing pole used by a tightrope walker. When the bull turns left, the arm can move right. When the bull drops forward, the arm can shift behind me.

    Do not wave wildly. Small corrections usually work better than dramatic movements.

    Master the Best Mechanical Bull Riding Position

    Correct posture gives you space to react. Poor posture forces you to recover after your balance has already disappeared.

    Squeeze With Your Thighs

    Grip the bull with your inner thighs rather than pinching only with your knees. The pressure should feel firm but sustainable.

    I avoid using maximum force from the first second. That exhausts my legs quickly. Instead, I maintain steady pressure and tighten briefly during sharper movements.

    Stay centered over the saddle. Sliding toward the neck or rear reduces control and makes the next dip harder to manage.

    Keep Your Upper Body Relaxed

    Your shoulders should remain low rather than pulled toward your ears. Keep your chest open and your lower back flexible.

    Think of your legs as the anchor and your torso as a spring. A spring absorbs movement. A rigid board gets thrown.

    Relaxed does not mean limp. Keep enough core engagement to control your posture without bracing every muscle.

    Position Your Feet Correctly

    Let your legs sit slightly forward while keeping your feet clear of moving parts. Pointing the toes downward may help some riders maintain contact, but avoid forcing the ankles into an awkward position.

    Never wrap your legs around ropes, straps or mechanical components. Your legs must remain free when it is time to dismount.

    Move With the Mechanical Bull

    The bull wins when you react too late. Watch its movement and make small adjustments as soon as the direction changes.

    Counter Forward and Backward Dips

    When the bull’s head drops forward, shift your shoulders slightly backward. This counters the forward pull.

    When the front rises, bring your torso slightly forward. Do not throw your whole body in either direction. Move only far enough to keep your weight above the saddle.

    I imagine that my chest should remain above my hips. Once my chest travels far beyond them, recovery becomes much harder.

    Follow Turns Without Fighting Them

    Allow your hips to follow the rotation while your shoulders make a smaller counter-movement. Fighting every twist wastes energy and often causes overcorrection.

    A useful beginner drill is the “half-response rule.” When I feel tempted to make a large correction, I begin with half that movement. Small adjustments preserve balance and leave room for the bull’s next change.

    Focus on the Bull, Not the Crowd
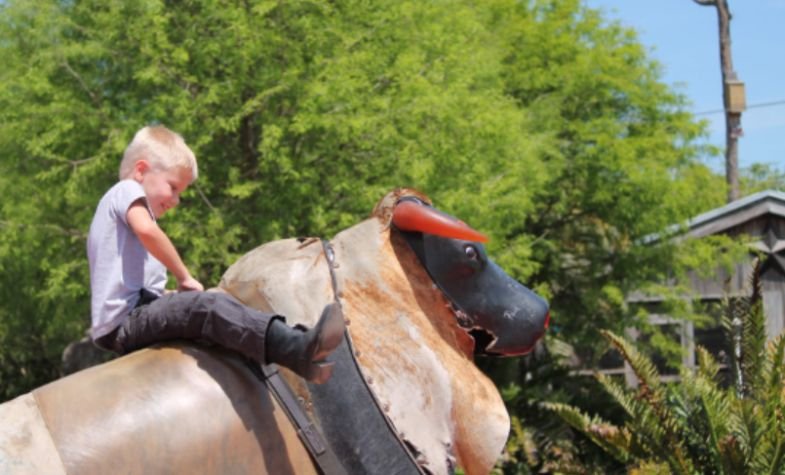
    Focus on the Bull, Not the Crowd

    Keep your eyes on the bull’s head, shoulders or another fixed point near its front. This helps you recognize dips and turns.

    Looking toward cheering friends rotates the head and shoulders. Your body often follows your eyes, pulling you away from the center.

    I also avoid staring at the inflatable mat. Looking down encourages the chest to collapse forward. Keep your gaze active and your chin in a neutral position.

    Wear the Right Clothes and Shoes

    Clothing should allow movement without catching on the bull. Fitted jeans, athletic pants or other flexible trousers usually work well.

    Avoid skirts, dresses, extremely short shorts and loose pants. Baggy clothing can shift, snag or interfere with your grip.

    Wear secure, closed-toe footwear. Sneakers or properly fitted boots are more suitable than sandals, flip-flops or high heels. Follow the rental company’s footwear rules because some operators may require riders to remove shoes.

    Empty your pockets before riding. A phone, wallet or set of keys can become uncomfortable during a fall.

    Know How to Fall Safely

    No technique guarantees that you will stay mounted. Falling is a normal part of the activity, so knowing when to release matters.

    When I feel completely separated from the saddle, I let go rather than hanging from one arm. I aim to slide onto the inflatable surface without reaching out with a locked elbow.

    Do not try to land standing. Let the padded surface receive your body, then move away from the bull when the operator tells you it is safe.

    Stop riding after a hard impact, especially if you hit your head or develop dizziness, confusion, nausea, balance trouble or a worsening headache. The CDC lists repeated vomiting, slurred speech, weakness, seizures and increasing drowsiness among signs that require emergency medical attention.

    Anyone recovering from a suspected concussion should not return to physical activity until medically cleared.

    A Simple Practice Method for First-Time Riders

    I divide my first ride into three short stages.

    During the opening seconds, I concentrate only on staying centered. I check my thigh pressure, riding hand and breathing.

    Next, I begin using my free arm. I make small counter-movements while watching the bull’s head.

    Finally, I practice responding to dips. I lean slightly opposite the bull’s movement without making dramatic corrections.

    This staged method prevents information overload. Instead of trying to perfect every technique at once, I add one skill after establishing another.

    Common Beginner Mistakes

    The most common mistake is leaning toward the bull’s head. Riders often do this because it feels safer, but a sudden forward dip can send them over the front.

    Other mistakes include holding with two hands, watching the crowd, locking the riding arm and squeezing until the legs become exhausted.

    Some riders also treat the free arm as decoration. It should actively support balance. Keep it lifted, loose and ready to counter the bull’s motion.

    Finally, never ignore the operator. Clear communication between operators and guests is a core part of amusement attraction safety.

    For a complete breakdown of mounting, posture, movement and dismounting, learn to ride a mechanical bull before your first attempt.

    Frequently Asked Questions

    1. How long does a beginner usually stay on a mechanical bull?

    A first ride may last only a few seconds, but controlled posture matters more than the time displayed.

    2. Should beginners lean forward or backward on a mechanical bull?

    Stay centered, lean slightly backward during a forward dip and shift slightly forward when the bull’s front rises.

    3. Can I ride a mechanical bull with both hands?

    Use one hand unless the operator gives different instructions, because your free hand helps you counterbalance turns and dips.

    4. What are the best mechanical bull riding tips for beginners at a party?

    Start slowly, follow the operator, grip with your thighs, keep your torso relaxed and release safely when you lose the saddle.

    Saddle Up Without Showing Off

    My biggest improvement came when I stopped trying to look fearless. A controlled beginner ride feels smoother than a tense attempt driven by pride.

    Remember the three-part method: anchor with your legs, absorb movement through your torso and adjust early. Ask for a gentle setting, focus on the bull and accept that falling is part of the experience.

    Your next step is simple. Practice the correct seated position before the machine starts. That five-second posture check may keep you riding longer than any last-minute burst of strength.


  • How Much Alcohol to Buy for a Wedding Before the Bar Runs Dry

    How Much Alcohol to Buy for a Wedding Before the Bar Runs Dry

    Picture the reception at its peak: the dance floor is full, the music is loud, and guests are lining up for another drink. Then the bartender reaches for a bottle that is no longer there. That is exactly why knowing how much alcohol to buy for a wedding matters long before the first toast.

    I used to think wedding alcohol planning meant buying a few extra cases and hoping for the best. In reality, the right amount depends on your number of drinking guests, reception length, bar setup, season, and the types of beverages your crowd actually enjoys. With a practical formula and a few smart adjustments, you can keep the bar running smoothly without wasting money on excessive leftovers.

    How Many Drinks Per Guest Should You Buy for a Wedding?

    A commonly used planning formula is to provide two drinks per guest during the first hour and one drink for every additional hour. Guests often drink more quickly during cocktail hour and then slow down once dinner begins.

    For a five-hour reception, the calculation looks like this:

    Two drinks during the first hour, plus four drinks during the remaining four hours, equals six drinks per drinking guest.

    A five-hour reception with 100 drinking guests would therefore require approximately 600 total drinks.

    A more conservative estimate is one drink per guest per hour, which would equal 500 drinks for the same event. The higher estimate is generally more suitable for an evening open bar, while the lower estimate may work for a brunch wedding, a mixed-age crowd, or a beer-and-wine reception. 

    Brides notes that wedding planners commonly use at least one drink per guest per hour, while some experts recommend two during the first hour.

    How Do I Calculate Wedding Alcohol for My Guest List?

    Start with the number of guests who will actually drink rather than the total number of people attending. Remove children, guests under 21, known nondrinkers, designated drivers, and vendors who will not use the bar.

    Next, multiply the number of drinking guests by the reception hours and your preferred consumption rate.

    For example, imagine you invited 125 people, but only 100 are likely to drink. For a five-hour evening reception, you could plan for 500 drinks using the conservative formula or 600 drinks using the more generous estimate.

    That range creates a much more reliable wedding alcohol shopping list than calculating from the entire guest count. It is also a practical approach when learning How to Reduce Wedding Costs Without Looking Cheap, because accurate quantities can help prevent unnecessary spending while still keeping guests comfortable.

    Wedding Alcohol Calculator for a Five-Hour Reception

    Wedding Alcohol Calculator for a Five-Hour Reception

    The following estimates use the generous formula of six drinks per drinking guest.

    Drinking guests Estimated total drinks
    50 300
    100 600
    150 900
    200 1,200

    These numbers should serve as planning estimates rather than guarantees. Your bartender, caterer, or venue coordinator may recommend adjustments based on the event schedule and guest profile.

    How Much Wine, Beer, and Liquor Do I Need for a Full Bar?

    A practical full-bar starting ratio is 50% wine, 30% beer, and 20% liquor. This mix generally suits a formal wedding with dinner, cocktail service, and a wide range of guest preferences.

    Guests Total drinks Wine bottles Individual beers Liquor bottles
    50 300 About 30 90 About 4
    100 600 About 60 180 About 8
    150 900 About 90 270 About 12
    200 1,200 About 120 360 About 16

    These calculations assume five glasses from a standard 750-milliliter wine bottle and approximately 15 standard 1.5-ounce servings from a 750-milliliter liquor bottle.

    The ratio should still reflect your guests. A casual outdoor reception may require more beer, while an elegant seated dinner may require more wine. A high-energy dance reception may also produce greater demand for cocktails.

    How Much Beer and Wine Do I Need Without Liquor?

    A beer-and-wine bar can lower costs while still giving guests enough variety. When skipping hard spirits, a useful starting ratio is 60% wine and 40% beer.

    Guests Total drinks Wine bottles Individual beers
    50 300 About 36 120
    100 600 About 72 240
    150 900 About 108 360
    200 1,200 About 144 480

    A limited bar can feel intentional rather than inexpensive when it includes quality red and white wines, a light domestic beer, a popular craft beer, and appealing nonalcoholic options. Another cost-conscious choice is beer, wine, and one or two signature cocktails. 

    The Knot reports that adding liquor to a beer-and-wine open bar can raise the price because cocktails require additional ingredients and bartender skill.

    How Do I Convert Wedding Drinks Into Bottles?

    How Do I Convert Wedding Drinks Into Bottles

    Understanding serving sizes prevents both overbuying and shortages. A standard 750-milliliter wine bottle provides about five glasses. You can divide the wine selection between red and white, adding rosé for a warm-weather wedding.

    One champagne bottle generally provides around eight smaller toast pours. If champagne will only be used for a formal toast, calculate one toast pour per participating guest. You can also let guests toast with the drink already in their hands and eliminate a separate champagne purchase.

    A standard 750-milliliter liquor bottle produces approximately 15 drinks when bartenders use controlled 1.5-ounce pours. Vodka, tequila, whiskey, rum, and gin are common full-bar choices, but signature cocktails can reduce the number of spirits you need.

    One beer bottle or can equals one serving. For variety, consider an easy-drinking light beer alongside a craft beer, lager, or IPA.

    What Can Change Your Wedding Alcohol Estimate?

    Does the Reception Style Affect Alcohol Consumption?

    Yes. Formal seated dinners typically generate stronger wine demand, especially during the meal. Cocktail-style receptions and dance-heavy celebrations often increase liquor and mixed-drink consumption.

    Brunch weddings tend to require less alcohol overall and may focus on mimosas, sparkling wine, Bloody Marys, and light beer. Evening receptions usually create greater demand, particularly when the bar stays open for five or six hours.

    Does the Season Change What Guests Drink?

    Warm spring and summer weddings often require more light beer, rosé, chilled white wine, tequila drinks, and refreshing signature cocktails. Outdoor celebrations also require more water and ice.

    Fall and winter receptions may shift toward red wine, bourbon, whiskey, and richer cocktails. Seasonality will not necessarily change the total number of drinks, but it can significantly change the beverage mix.

    Should I Include a Safety Buffer?

    A small buffer of approximately 5% to 10% may help if your guest list includes enthusiastic drinkers or the reception could run longer than expected. Avoid automatically adding a large surplus, especially when the retailer does not accept returns.

    How Much Ice, Water, and Mixer Supply Do I Need?

    Alcohol is only part of a complete wedding bar. You may also need club soda, tonic water, cola, lemon-lime soda, ginger ale, cranberry juice, orange juice, simple syrup, fresh citrus, cocktail garnishes, sparkling water, and bottled or filtered water.

    Better Homes & Gardens recommends considering approximately 1.5 to 2 pounds of ice per guest for a party, although the precise amount depends on weather, storage, and whether the ice will chill bottles as well as fill glasses.

    Provide visible water stations and appealing nonalcoholic drinks throughout the reception. These options support nondrinkers, younger guests, designated drivers, and anyone who wants to alternate alcoholic beverages with water.

    How Can I Save Money on Wedding Alcohol?

    Choose a venue that allows outside alcohol, but review every fee before purchasing. Some venues charge corkage fees for opening and serving bottles brought from outside. These charges may cover staffing, chilling, storage, glassware, and liability costs.

    Ask retailers about bulk discounts and returns before placing an order. Some stores may accept unopened, unchilled, resalable products, but alcohol return laws and individual store policies vary by state and retailer.

    Limiting the menu to beer, wine, and signature cocktails can also reduce expenses. Skipping a dedicated champagne toast, shortening bar hours, and avoiding too many premium spirit choices can further control the wedding bar budget.

    What Wedding Bar Mistakes Should I Avoid?

    What Wedding Bar Mistakes Should I Avoid

    Do not calculate quantities from the total headcount when many guests will not drink. Avoid buying alcohol before confirming whether the venue permits outside beverages, requires licensed bartenders, or charges corkage and service fees.

    Do not forget ice, mixers, garnishes, water, cups, napkins, bottle openers, wine keys, coolers, and storage. Finally, do not rely on self-service alcohol. Professional bartenders can control portions, monitor consumption, and keep service running safely.

    Frequently Asked Questions (FAQs)

    1. How much alcohol to buy for a wedding with 100 guests?

    For 100 guests who drink during a five-hour reception, plan for approximately 500 to 600 total drinks. Use the higher amount for a lively evening open bar and the lower amount for a brunch, daytime event, or moderate-drinking crowd.

    2. Is beer and wine enough for a wedding reception?

    Yes. A thoughtfully selected beer-and-wine menu can satisfy many guests while reducing alcohol, mixer, and staffing costs. Offer at least one red wine, one white wine, a familiar light beer, and a craft or regional option.

    3. How many bottles of wine do I need for 100 guests?

    For a five-hour beer-and-wine reception using a 60% wine ratio, you may need approximately 72 standard wine bottles. The final quantity should reflect how many guests drink wine and whether other beverages are available.

    4. Should I buy champagne for every guest?

    Only purchase champagne for everyone when you plan to serve a dedicated toast. Otherwise, allow guests to toast with their existing drinks. This reduces waste and simplifies service.

    Final Thoughts

    When I plan a wedding bar, I prefer creating a realistic range instead of trusting one rigid number. Start with the drinking-age guest count, calculate five to six drinks per person for a five-hour reception, and then adjust the mix for your venue, season, schedule, and crowd.

    Knowing how much alcohol to buy for a wedding is ultimately about understanding your guests and planning the experience you want to create. With sensible quantities, controlled pours, plenty of water, and a retailer with a flexible return policy, you can keep the bar stocked without letting the beverage budget get out of control.

  • How to Reduce Wedding Costs Without Looking Cheap: The Art of Spending Less Beautifully

    How to Reduce Wedding Costs Without Looking Cheap: The Art of Spending Less Beautifully

    A wedding can feel expensive long before the first invitation is sent. Venues charge more for Saturdays, florists turn simple arrangements into premium packages, and small upgrades quietly pile onto the final bill. But elegance does not come from filling every table with flowers or choosing the most expensive option on every vendor list. 

    When I learned how to reduce wedding costs without looking cheap, I stopped thinking about what to remove and started focusing on what guests would actually see, feel, taste, and remember. By investing in atmosphere, comfort, and a few high-impact details, you can create a celebration that looks polished, feels generous, and stays comfortably within budget.

    How Can You Set a Wedding Budget Without Sacrificing Style?

    Start by choosing the three parts of the wedding that matter most to you. These priorities might include photography, food, entertainment, attire, or the venue. Give those areas a larger share of your budget and simplify categories that carry less emotional or visual value.

    Create a detailed wedding budget before signing contracts, and include a contingency amount for unexpected expenses. Alterations, taxes, gratuities, insurance, delivery, setup, cleanup, overtime, vendor meals, corkage, and cake-cutting fees can quietly push your final total far above the original estimate.

    Track deposits and payment deadlines so you do not face several large bills at once. I would also avoid using credit cards to finance upgrades that are not essential. A polished wedding should not create years of avoidable debt.

    Which Wedding Dates and Venues Cost Less?

    Venue selection can reduce expenses before you make a single décor decision. Friday, Sunday, and weekday weddings often cost less than Saturday events. Off-season dates may also unlock lower venue minimums, better vendor availability, and more flexible packages.

    These choices can also make planning a Wedding Reception Timeline Without a Coordinator more manageable by giving couples greater flexibility when organizing the day’s schedule and coordinating vendors.

    An all-in-one venue can accommodate the ceremony, cocktail hour, and reception in one place. This removes the need for guest transportation, duplicate rental deliveries, multiple setup crews, and separate venue fees.

    You can also compare properties outside major downtown areas. A suburban estate, vineyard, garden, historic building, restaurant, or open-air lawn may offer more space and character than a central luxury hotel without the same premium pricing.

    Choose a setting with attractive architecture, landscaping, chandeliers, exposed brick, mature trees, or scenic views. A naturally beautiful venue does much of the decorating for you.

    How Much Can a Smaller Guest List Save?

    How Much Can a Smaller Guest List Save

    Reducing the guest count is one of the most effective ways to lower wedding expenses without lowering quality. Every additional person affects catering, alcohol, tables, chairs, linens, invitations, favors, transportation, and venue capacity.

    Instead of hosting 150 guests with limited resources, you might create a more generous experience for 80 or 100 people. A smaller celebration can support better food, comfortable seating, attentive service, and more meaningful conversations.

    Be consistent when deciding who to invite. Clear rules for plus-ones, children, coworkers, and distant relatives can prevent emotional, last-minute additions.

    How Can Affordable Wedding Food Feel Upscale?

    Guests care more about flavor, freshness, presentation, and service than the number of menu options. Instead of paying for several complicated international stations, consider serving high-quality regional dishes made with familiar local ingredients.

    Family-style meals can feel generous and intimate. Large platters shared at each table may also require less formal service than a traditional multicourse dinner. A thoughtfully arranged buffet, brunch reception, barbecue menu, taco station, or pasta bar can work equally well when the food is well presented and replenished promptly.

    Morning ceremonies followed by an upscale brunch can substantially reduce catering and beverage costs. Daytime guests also tend to consume less alcohol than guests attending a late-night reception.

    For the bar, offer beer, wine, attractive nonalcoholic choices, and one or two signature cocktails made with standard spirits. This feels curated rather than restricted and avoids the expense of stocking a full top-shelf bar.

    How Can Cheap Wedding Décor Look Expensive?

    Intentional minimalism usually looks more sophisticated than filling every empty space. Select a limited color palette and repeat the same materials, flowers, fonts, and textures throughout the event.

    Focus your décor budget on areas that guests see and photograph most, such as the ceremony backdrop, entrance, head table, cake display, and dance floor. You do not need elaborate decorations in hallways, service areas, or every corner of the venue.

    Ambient lighting can dramatically change an ordinary room. Warm uplighting, fairy lights, chandeliers, and clusters of candles create depth and romance while reducing the need for expensive floral installations. Dimming harsh overhead lights can make the entire design feel softer and more luxurious.

    How Can You Save Money on Wedding Flowers?

    How Can You Save Money on Wedding Flowers

    Ask your florist to design arrangements that can move from one part of the event to another. Ceremony aisle flowers can decorate the reception entrance, bridesmaid bouquets can become centerpieces, and an altar arrangement can frame the sweetheart table or dessert station.

    Seasonal blooms and locally available flowers generally offer better value than rare imported varieties. Greenery such as eucalyptus, ivy, ferns, or large tropical leaves can create volume and fill elevated spaces without relying on premium roses or orchids.

    Bud vases, candles, and smaller grouped arrangements often look more refined than oversized centerpieces that block conversation.

    Is Renting Wedding Attire Worth It?

    Renting can provide access to designer tuxedos, bridal gowns, traditional outfits, accessories, and jewelry for a fraction of the retail cost. This approach is especially useful when you need several outfits for different wedding events.

    Sample sales, secondhand dresses, and pre-owned accessories can also reduce wardrobe expenses. Regardless of what you spend, proper tailoring matters more than the label. A less expensive outfit that fits beautifully will usually look more polished than a costly garment with poor alterations.

    Should You Use Digital Wedding Invitations?

    Digital save-the-dates, animated invitations, online RSVPs, and a sleek wedding website can reduce printing and postage expenses while simplifying communication.

    You can still print a small number of formal invitations for older relatives or keepsakes. Skip excessive enclosure cards, custom napkins, elaborate ceremony programs, and signage that repeats information already available online.

    Should You Condense a Multi-Day Wedding?

    Combining a long celebration into one or two coordinated days can significantly lower venue, catering, transportation, entertainment, photography, décor, and wardrobe costs.

    A shorter timeline does not have to feel rushed. Create a clear schedule, place related traditions together, and allow enough time for meals, photographs, and guest transitions. The goal is to remove repetitive setups rather than meaningful moments.

    What Wedding Expenses Can You Skip Completely?

    What Wedding Expenses Can You Skip Completely

    Wedding favors are often left behind, especially when they are generic or difficult to carry. You may also skip custom drinkware, elaborate welcome bags, printed menus for every guest, premium chair upgrades, champagne for a formal toast, and decorations for spaces people barely notice.

    Be careful with DIY projects. Supplies, tools, shipping, storage, transport, installation, and cleanup may cost more than expected. DIY only the projects you genuinely enjoy and can complete well in advance.

    Where Should You Avoid Cutting Costs?

    Protect anything that directly affects guest comfort. Poor seating, insufficient food, weak sound, extreme temperatures, long waits, and an unclear timeline will be more noticeable than simple centerpieces.

    Spend enough on reliable catering, professional sound, organized event management, and comfortable facilities. Photography also deserves careful consideration because the images remain long after the decorations disappear.

    Frequently Asked Questions (FAQs)

    1. What is the fastest way to lower wedding costs?

    Reduce the guest list, choose a less popular date, and book one venue for the ceremony and reception. These changes can lower several expense categories at once.

    2. How can I make a low-budget wedding look elegant?

    Use a consistent color palette, warm lighting, uncluttered décor, seasonal flowers, greenery, attractive signage, and well-fitted attire.

    3. Is a buffet cheaper than a plated wedding dinner?

    A buffet can cost less because it may require fewer servers, although the final price depends on the menu, venue, staffing, and rental requirements.

    4. What wedding expenses do guests rarely notice?

    Guests rarely focus on expensive invitations, custom linens, elaborate favors, premium chair upgrades, or large floral arrangements in low-traffic areas.

    5. How do I learn how to reduce wedding costs without looking cheap?

    Prioritize guest comfort, choose high-impact visual details, eliminate hidden operational expenses, and spend only on the elements that support your wedding experience.

    A Stylish Wedding Is About Intention, Not Excess

    The most elegant weddings feel cohesive, welcoming, and personal. When I focus on guest experience and visual impact instead of buying every traditional extra, the budget becomes easier to control. 

    The real secret behind how to reduce wedding costs without looking cheap is to simplify the scale while maintaining quality where it matters. Thoughtful food, flattering lighting, coordinated décor, and smooth logistics will always create a stronger impression than unnecessary luxury.

  • Outdoor Festival Safety Tips for People With Asthma: Enjoy Every Festival Safely

    Outdoor Festival Safety Tips for People With Asthma: Enjoy Every Festival Safely

    The bass is pounding, the crowd is moving, and the air smells like food trucks, dry grass, and summer heat. For most festivalgoers, that mix feels exciting. For someone with asthma, it can also signal smoke, pollen, dust, humidity, and long hours of physical activity. 

    I never want breathing concerns to take over an experience I have been looking forward to, which is why I rely on outdoor festival safety tips for people with asthma before I step through the gates. With the right preparation, I can protect my lungs, reduce hearing risks, and still enjoy every stage, performance, and unforgettable moment.

    Why Can Outdoor Festivals Be Challenging for People With Asthma?

    Outdoor festivals expose visitors to several asthma triggers at once. Unlike indoor venues, these events often take place in parks, fairgrounds, or open fields where pollen, mold spores, and dust circulate freely. Add cigarette smoke, vaping, barbecue smoke, fireworks, and stage effects, and the air can quickly become irritating for sensitive lungs.

    Walking long distances between stages, dancing, carrying heavy bags, and standing for hours also increase breathing rates, making it easier for airborne irritants to reach the lungs. Hot weather and humidity may worsen symptoms even further, especially during summer festivals across the United States.

    Preparing before arriving helps me enjoy the event instead of reacting to symptoms after they begin.

    How Should I Prepare Before Attending an Outdoor Festival?

    How Should I Prepare Before Attending an Outdoor Festival

    Preparation starts several days before the event. I make sure my asthma is well controlled, continue taking my prescribed controller medication, and carry my rescue inhaler wherever I go. I also review my asthma action plan and save a digital copy on my phone in case I need quick access.

    Before leaving home, I check the local weather forecast, pollen count, and the Environmental Protection Agency’s Air Quality Index (AQI) through AirNow. If air quality reaches unhealthy levels for sensitive groups or wildfire smoke is expected, I carefully consider whether attending is the safest decision.

    I also tell the friends attending with me that I have asthma, where I keep my inhaler, and what they should do if I begin having difficulty breathing. Choosing a meeting point and locating the festival’s medical tent before the event begins makes emergencies much easier to manage.

    What Should I Bring to Protect My Health Throughout the Day?

    Packing the right supplies makes a noticeable difference.

    I never leave home without my rescue inhaler, water bottle, sunscreen, sunglasses, portable phone charger, emergency contact information, and any prescribed medications. If the festival lasts all day or includes camping, I also bring extra medication and keep it with me rather than leaving it inside a hot vehicle or tent.

    Because loud music can damage hearing surprisingly quickly, I also pack high-fidelity earplugs. Festival sound levels frequently exceed 100 decibels, and prolonged exposure can contribute to permanent hearing damage or tinnitus in less than 15 minutes without adequate hearing protection. 

    High-fidelity earplugs lower volume evenly while preserving music quality, making them an excellent choice for concerts. Foam earplugs provide greater noise reduction but slightly reduce sound clarity, while custom-molded earplugs are ideal for people who attend festivals regularly.

    If in-ear protection is uncomfortable, over-ear hearing protection offers another effective option. These are essential Festival Ear Protection Tips for Adults, helping festivalgoers enjoy live music while reducing the risk of excessive noise exposure.

    How Can I Avoid Common Asthma Triggers During the Festival?

    How Can I Avoid Common Asthma Triggers During the Festival

    The easiest way to prevent symptoms is to recognize triggers before they become a problem.

    Whenever possible, I avoid smoking areas, vaping sections, barbecue smoke, campfires, fireworks, and heavy traffic around food vendors. Dusty parking lots and dry walking paths can also irritate the airways, so I choose paved routes whenever available.

    Heat and humidity require equal attention. I drink water regularly instead of waiting until I feel thirsty, spend time in shaded areas throughout the day, and avoid pushing myself during the hottest afternoon hours.

    If pollen levels are especially high, I try not to sit directly on grassy areas and wash my hands and face whenever possible to remove pollen that collects on my skin.

    Why Should I Pay Attention to Air Quality and Noise Levels?

    Many festivalgoers check only the weather forecast, but air quality and sound exposure deserve just as much attention.

    Poor air quality caused by ozone, wildfire smoke, vehicle exhaust, or industrial pollution can trigger asthma symptoms even when the sky appears clear. Monitoring AQI before and during the event allows me to make informed decisions about limiting outdoor exposure if conditions worsen.

    Noise exposure is equally important. Standing directly in front of speaker towers dramatically increases sound intensity. Instead, I choose locations farther back from the stage whenever possible. I also insert my earplugs before entering active concert areas rather than waiting until my ears begin ringing.

    To further reduce my risk, I use a smartphone decibel meter app to monitor sound exposure throughout the day. Taking a ten-minute sound break every hour by stepping away from the stage allows my ears time to recover while giving my lungs a chance to rest in a less crowded environment. 

    Staying hydrated also supports healthy circulation, which helps protect the delicate hair cells inside the inner ear.

    What Should I Do If My Asthma Symptoms Begin?

    What Should I Do If My Asthma Symptoms Begin

    Even with careful planning, symptoms can occasionally develop.

    If I notice coughing, chest tightness, wheezing, or increasing shortness of breath, I immediately move away from the trigger whenever possible. Whether the problem is smoke, dust, pollen, or overcrowding, cleaner air often provides noticeable relief.

    I then follow my asthma action plan and use my prescribed rescue medication exactly as directed. If symptoms continue to worsen, speaking becomes difficult, breathing remains labored, or my medication does not provide relief, I seek immediate medical attention instead of trying to finish the event.

    Knowing when to leave the festival is just as important as knowing how to prepare for it.

    Can You Still Enjoy Outdoor Festivals If You Have Asthma?

    Absolutely. Having asthma should not automatically prevent anyone from attending outdoor concerts, food festivals, or seasonal celebrations. Careful preparation, awareness of personal triggers, proper medication management, hearing protection, and smart pacing allow me to enjoy the experience while minimizing unnecessary risks. 

    Following outdoor festival safety tips for people with asthma helps me focus on creating memories instead of worrying about breathing problems or preventable hearing damage.

    Frequently Asked Questions (FAQs)

    1. Can people with asthma safely attend outdoor festivals?

    Yes. Most people with controlled asthma can safely attend festivals by following outdoor festival safety tips for people with asthma, checking air quality, carrying prescribed medication, and avoiding personal triggers.

    2. Can loud music trigger asthma?

    Loud music itself usually does not trigger asthma, but physical exertion, stress, smoke, and poor air quality commonly found near stages may contribute to breathing symptoms.

    3. What type of earplugs are best for music festivals?

    High-fidelity earplugs are generally the best choice because they reduce sound volume evenly while maintaining music quality. Frequent festivalgoers may also benefit from custom-molded earplugs.

    4. Should I check air quality before attending a festival?

    Yes. Checking the Air Quality Index through AirNow before leaving home helps determine whether outdoor conditions are safe for people with asthma.

    5. When should I leave a festival because of asthma symptoms?

    Leave immediately if breathing becomes increasingly difficult, your rescue medication is not helping, or you experience severe chest tightness, persistent wheezing, or difficulty speaking.

    Wrapping Up

    Outdoor festivals should be exciting, not stressful. I have learned that planning ahead makes all the difference. By monitoring air quality, avoiding smoke and dust, carrying my inhaler, protecting my hearing with quality earplugs, staying hydrated, and recognizing symptoms early, I can enjoy every performance with greater confidence. 

    A little preparation before the gates open helps ensure the only memories I bring home are great music, unforgettable experiences, and peace of mind.

  • How Long Should a Mechanical Bull Ride Last?

    How Long Should a Mechanical Bull Ride Last?

    How long should a mechanical bull ride last at a party or public event? In my experience, most successful rides last between 30 seconds and one minute. That window gives riders a real challenge without exhausting them or creating an unnecessarily long line.

    A skilled rider may continue for up to two minutes. However, longer does not automatically mean better. The right duration depends on the rider, the machine settings, the operator and the type of event.

    The Best Mechanical Bull Ride Duration

    For most casual events, I recommend setting a target of 30 to 60 seconds per rider. Beginners can start below that range, while confident adults may ride longer when the operator considers it appropriate.

    The ride should feel exciting but controlled. It should not become an endurance test unless the event is running a structured competition.

    First-Time Riders

    A first-time rider usually needs a gentle 20-to-45-second experience. The operator can begin with slow turns and mild rocking before adding controlled bucking movements.

    I prefer giving beginners a short first attempt rather than pushing them through a long ride. A second attempt often feels more enjoyable because they understand the bull’s movement and know how to position their body.

    Confident and Experienced Riders

    A confident rider may stay on for 60 to 90 seconds. An experienced rider can sometimes continue for up to two minutes if the machine, event rules and operator allow it.

    The operator should still watch for fatigue. Even an experienced rider may lose posture, grip strength or body control after repeated spins and direction changes.

    My 30-60-90 Ride Model

    I use a simple planning model when estimating how long should a mechanical bull ride last:

    • 30 seconds for children, nervous beginners or busy events
    • 60 seconds for most adult party guests
    • 90 seconds for confident riders or timed challenges

    This model is not a manufacturer-mandated standard. It is a practical event-planning framework based on rider flow, fatigue and entertainment value.

    Consider an event with 40 guests who want to ride. At 60 seconds each, the riding itself requires 40 minutes. Allowing roughly 30 seconds for mounting, dismounting and resetting raises the total to about one hour. Extending every ride to two minutes could double the queue.

    That simple calculation shows why ride duration affects more than the person on the bull.

    What Determines Mechanical Bull Ride Time?

    What Determines Mechanical Bull Ride Time

    There is no universal ride time that suits every participant. Operators must adjust the experience in real time.

    ASTM F770 provides industry guidance for amusement-ride operation, maintenance, inspection and operator training. It does not establish one standard mechanical bull ride duration. Operators must instead follow the ride manufacturer’s instructions and applicable local regulations.

    Rider Experience and Comfort

    Rider Experience and Comfort

    Beginners need time to understand how the machine moves. Starting at full intensity may end the ride within seconds and leave the participant unwilling to try again.

    A trained operator can begin slowly, observe the rider’s balance and increase the challenge gradually. Professional rental operators commonly adjust speed and movement according to a rider’s size, age and experience.

    Before allowing anyone to ride, operators should also enforce the provider’s Mechanical bull age and weight requirements. Ride duration cannot compensate for a participant who falls outside the equipment’s approved limits.

    Speed and Bucking Intensity

    Twenty seconds at a high difficulty can demand more effort than one minute at a gentle setting. Ride duration and ride intensity should therefore be planned together.

    Slow turns help beginners settle into position. Faster spins, sudden direction changes and stronger bucking movements increase the physical challenge. Operators should raise one variable at a time instead of making every movement harder at once.

    Fatigue and Loss of Control

    Fatigue can affect grip, posture and reaction time. I end a ride when a participant stops making controlled adjustments and begins hanging from the bull with little body control.

    Mechanical bull riding should create a fun fall onto the inflatable landing area. It should not continue until a rider becomes too tired to respond safely.

    Event Size and Waiting Lines

    At a small backyard gathering, allowing a confident rider 60 to 90 seconds may work well. A festival, corporate event or college gathering needs faster turnover.

    For a busy event, I would normally use:

    • 30-to-45-second rides during peak demand
    • Up to 60 seconds when the line becomes shorter
    • One additional attempt later rather than one very long turn

    This approach gives more guests access to the attraction without making each ride feel rushed.

    Recommended Ride Times by Event Type

    Recommended Ride Times by Event Type


    When someone asks how long should a mechanical bull ride last, I first consider the event format.

    A children’s event may use rides of 15 to 30 seconds on the gentlest approved settings. The provider’s minimum age, height and weight rules must always take priority.

    At an adult birthday party, 30 to 60 seconds usually works well. Guests receive enough time to find their rhythm, and the line continues moving.

    Corporate events often benefit from a 45-to-60-second cap. A clear limit makes participation feel fair and prevents one confident rider from occupying the attraction.

    Competitions may use 60-to-90-second rounds. Every competitor should receive the same maximum time and comparable difficulty progression.

    Why Longer Is Not Always Better

    A mechanical bull ride has a natural entertainment curve. The rider mounts, finds balance, survives several movements and eventually falls. Stretching that sequence too long can reduce excitement.

    Long rides also create inconsistent experiences. One rider may receive two minutes while another receives 20 seconds because the event is running behind schedule.

    I would rather offer two controlled 40-second attempts than one exhausting two-minute attempt. The rider gets another chance to improve, and the operator can reset the difficulty.

    How Operators Should Manage Each Ride

    How Operators Should Manage Each Ride

    The operator matters more than the stopwatch. ASTM’s amusement-ride guidance emphasizes documented operating procedures, inspections, maintenance and training. IAAPA also notes that ASTM standards address ride design, operation, maintenance and inspection across the amusement industry.
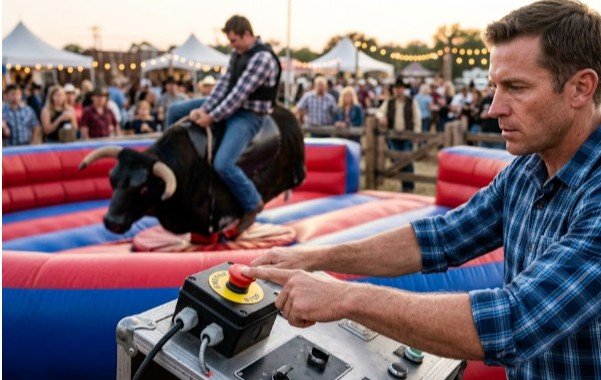
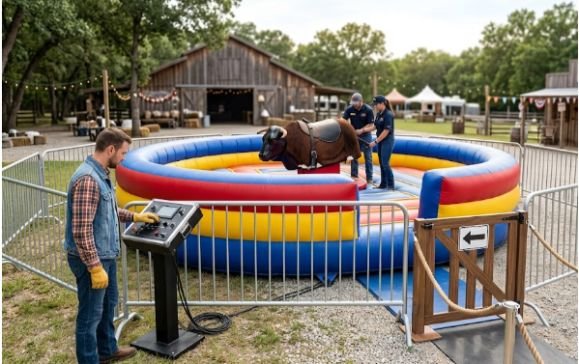
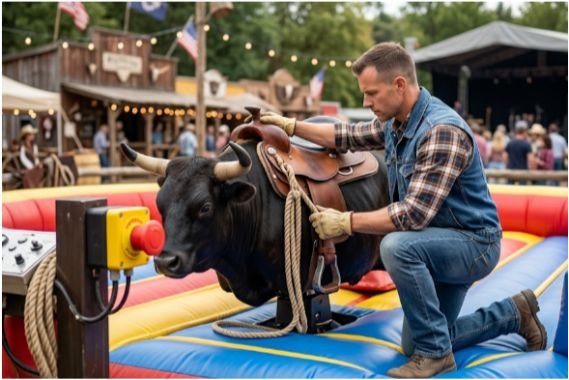
    Before starting a ride, the operator should explain how to hold on, how to signal discomfort and where to move after falling. The inflatable area should remain clear of spectators and waiting riders.

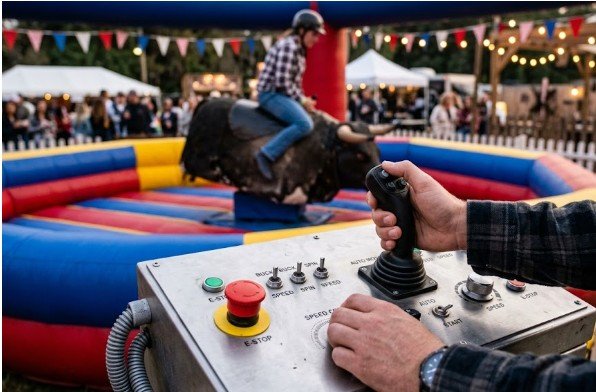
    During the ride, the operator should maintain an unobstructed view of the participant. Difficulty should increase gradually. The operator must also remain ready to use the emergency stop.

    The CPSC advises commercial inflatable operators to follow manufacturer instructions, supervise equipment and use appropriate anchoring and setup procedures. These precautions remain relevant when an inflatable landing area surrounds a mechanical bull.

    Planning Fair Mechanical Bull Competitions

    For a competition, decide the rules before the first rider mounts. Use the same time cap, starting intensity and progression method for every competitor.

    A fair format might begin with 15 seconds of gentle movement. The operator can then increase the difficulty at fixed intervals until the rider falls or reaches a 90-second limit.

    Record the time from the machine’s first movement, not from mounting. Stop the timer when the rider touches the inflatable mat or releases the approved grip.

    This structure provides a clearer answer to how long should a mechanical bull ride last during a contest. It also prevents the operator from unintentionally giving one competitor an easier sequence.

    When a Ride Should End Immediately

    A planned time limit should never prevent an operator from stopping early. The ride should end when the participant asks to stop, appears distressed or loses controlled posture.

    The operator should also stop if another person enters the landing area, the inflatable loses pressure, equipment shifts or any unusual sound occurs.

    Visible intoxication, unsafe behavior and ignored instructions are also reasons to refuse or end a ride. A participant’s comfort and the manufacturer’s operating rules must outweigh pressure from the crowd.

    FAQs

    1. How long should a beginner stay on a mechanical bull?

    Most beginners should ride for about 20 to 45 seconds, starting with gentle movements that increase only when they remain comfortable.

    2. How long should a mechanical bull ride last at a party?

    A party ride should usually last 30 to 60 seconds, giving each guest a satisfying attempt while keeping the line moving.

    3. Can a mechanical bull ride last two minutes?

    Yes, an experienced rider may continue for up to two minutes when the operator, equipment instructions and event rules permit it.

    4. How long should a mechanical bull competition round be?

    A competition round commonly works well with a 60-to-90-second cap and the same timed difficulty progression for every participant.

    Get Off While the Crowd Still Wants More

    So, how long should a mechanical bull ride last for the best experience? I recommend 30 to 60 seconds for most riders, shorter turns for beginners and a maximum of around 90 seconds for structured challenges.

    Do not chase a longer time simply for bragging rights. Set a clear limit, use a trained operator and adjust the intensity to the individual. The best ride ends with the participant smiling, the crowd cheering and the next rider ready to climb aboard.

  • The Growing Popularity of Immersive Carnival Experiences for Parties and Festivals

    The Growing Popularity of Immersive Carnival Experiences for Parties and Festivals

    I started noticing that people no longer talk about events the way they used to. Instead of remembering the food or decorations, they often describe the moments they participated in, the attractions they tried, and the photos they couldn’t wait to share. That shift made me realize that entertainment has become just as important as the celebration itself.

    I also found that the most memorable carnivals weren’t necessarily the biggest ones. They were the ones that invited guests to explore, interact, and become part of the experience. A few thoughtful additions often created more excitement than a long list of traditional attractions.

    What Makes Immersive Carnival Experiences Different?

    What Makes Immersive Carnival Experiences Different

    Traditional carnivals have always been built around games, rides, and food vendors. While those attractions still have their place, today’s guests often expect something that feels more engaging from the moment they arrive.

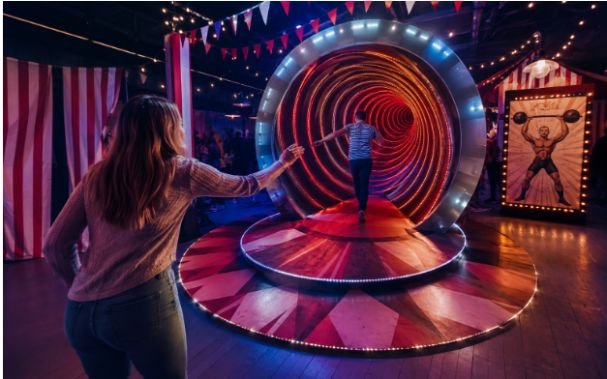
    Immersive carnival experiences encourage people to participate rather than simply observe. Instead of walking past attractions, guests become part of themed environments where every activity feels connected. Music, lighting, interactive games, performers, and creative décor work together to create an atmosphere that keeps people curious about what’s around the next corner.

    This approach appeals to guests of every age because it turns entertainment into an experience rather than a checklist of activities.

    Why Interactive Entertainment Is Becoming the Main Attraction

    People naturally remember experiences that involve movement, conversation, and discovery. That’s one reason interactive entertainment continues to grow across community festivals, corporate events, school fairs, and private celebrations.

    Social media has also changed expectations. Guests enjoy finding visually interesting spaces where they can take photos, record videos, and share moments with friends. An eye-catching backdrop, a creative game, or an unexpected performer often generates more excitement than expensive decorations alone.

    Interactive attractions also encourage guests to stay involved throughout the event instead of gathering in one area and remaining there. The more opportunities people have to participate, the more connected they feel to the overall celebration.

    Elements That Bring Immersive Carnival Experiences to Life

    Elements That Bring Immersive Carnival Experiences to Life

    Successful immersive events rarely depend on one attraction. Instead, they combine multiple elements that create a consistent atmosphere.

    Interactive environments are becoming increasingly popular because they transform ordinary venues into themed spaces. Separate activity zones with different visual styles, sound effects, and decorations encourage guests to keep exploring. Some event organizers even use projection mapping to change the mood of tents, stages, or walls throughout the day without rebuilding the venue.

    Living entertainment adds another layer of excitement. Roaming performers, costumed characters, and interactive actors invite conversations, hand out clues, or involve guests in short challenges. These unexpected moments often become the stories people remember long after the event ends.

    Technology is also expanding what’s possible. Augmented reality games, RFID wristbands for tracking scores, and virtual reality attractions bring modern experiences into familiar carnival settings. While not every event needs advanced technology, thoughtful digital features can increase participation when they support the overall theme instead of distracting from it.

    Balancing Technology With Human Interaction

    Technology can certainly enhance an event, but it should never replace genuine guest interaction.

    Projection mapping, virtual reality, and wearable technology create exciting moments, yet people often remember the conversations they had while solving challenges or participating in games together. That balance is what separates memorable events from attractions that simply look impressive.

    Simple activities can be just as engaging when they’re thoughtfully presented. Cooperative puzzle hunts, creative workshops, carnival competitions, or live demonstrations encourage guests to participate naturally without relying on expensive equipment.

    Many organizers also find success by combining classic carnival traditions with newer attractions. Mechanical bulls, midway games, photo booths, and live performers continue to draw crowds because they create shared experiences that appeal across generations. Blending those favorites with modern carnival entertainment gives guests something familiar while introducing fresh ways to interact.

    Common Mistakes That Reduce Guest Engagement

    Common Mistakes That Reduce Guest Engagement

    Even well-planned events can lose energy when guest participation isn’t considered from the beginning.

    Some common mistakes include:

    • Adding too many attractions without creating a clear flow between them.
    • Focusing on technology while overlooking personal interaction.
    • Designing activities for only one age group.
    • Ignoring seating, shade, or quiet areas where guests can recharge.
    • Choosing attractions that don’t match the event’s overall theme.

    A successful carnival isn’t measured by the number of attractions it includes. It’s measured by how often guests choose to participate.

    Why Experiences Leave a Lasting Impression

    People rarely remember every decoration or menu item months after an event. They remember the laughter during a team challenge, the unexpected conversation with a performer, or the excitement of discovering something new around the next corner.

    Immersive carnival experiences create those moments because they invite guests to become part of the story instead of watching from the sidelines. As expectations continue to evolve, events that encourage participation will remain far more memorable than those built around passive entertainment alone.

    FAQs: The Growing Popularity of Immersive Carnival Experiences for Parties and Festivals

    What are immersive carnival experiences?

    They combine interactive attractions, themed environments, live entertainment, and guest participation to create engaging events instead of passive entertainment.

    Are immersive carnival experiences suitable for corporate events?

    Yes. Many companies use interactive games, team challenges, and themed attractions to encourage networking, collaboration, and stronger attendee engagement.

    Do immersive carnival experiences require expensive technology?

    No. While technology can enhance an event, creative performers, themed décor, cooperative games, and interactive activities often create equally memorable experiences.

    How do immersive carnival experiences improve guest satisfaction?

    Guests stay engaged longer, interact with others more naturally, and leave with memorable moments that encourage positive word-of-mouth and social media sharing.

    Why the Best Events Stay With People Long After They End

    The strongest events aren’t remembered because they had the biggest budget or the newest attraction. They’re remembered because they made people feel involved. When guests laugh together, solve challenges, explore themed spaces, and create memories through shared experiences, the event becomes something they’ll happily talk about long after the lights come down.

    Creating that kind of experience doesn’t always require doing more. It simply requires designing every attraction with participation, connection, and lasting memories in mind.

  • Festival Ear Protection Tips for Adults: Don’t Let One Weekend Cost You Your Hearing

    Festival Ear Protection Tips for Adults: Don’t Let One Weekend Cost You Your Hearing

    There’s nothing quite like the excitement of a live music festival. I love the energy of the crowd, the powerful performances, and the unforgettable atmosphere. But after attending several festivals, I realized that one amazing weekend can leave a lasting impact on something we often take for granted—our hearing. 

    Many festival stages produce sound levels well above 100 decibels, which can damage hearing much faster than most people realize. That’s why I never head to a festival without preparing to protect my ears. A few simple habits can make the difference between enjoying live music for decades and dealing with ringing ears long after the final encore.

    Why Can Music Festivals Permanently Damage Your Hearing?

    Concert speakers are designed to fill massive outdoor spaces with powerful sound. Whether you’re standing near the main stage or inside a packed festival tent, your ears are exposed to loud music for hours at a time.

    Repeated exposure to noise above safe listening levels can damage the tiny sensory hair cells inside your inner ear. Once these cells are damaged, they do not regenerate, increasing the risk of permanent hearing loss and tinnitus. While many people dismiss ringing ears after a concert as normal, it is actually a warning sign that your ears have been overstressed.

    Protecting your hearing doesn’t mean sacrificing the live music experience. Modern hearing protection allows you to hear music clearly while reducing harmful noise exposure.

    What Are the Best Earplugs for Music Festivals?

    Choosing the right hearing protection is the most important decision you’ll make before attending a festival.

    Should You Choose High-Fidelity Earplugs?

    Should You Choose High-Fidelity Earplugs

    High-fidelity earplugs are my first recommendation because they reduce volume evenly across all frequencies instead of blocking sound unevenly. The music remains balanced, vocals stay crisp, and conversations become much easier compared to traditional foam earplugs.

    They’re ideal for concerts, festivals, sporting events, and anyone who regularly attends loud entertainment venues.

    Are Foam Earplugs Still Effective?

    Foam earplugs remain one of the most affordable ways to protect your hearing. They offer excellent noise reduction and work well as emergency backups.

    The trade-off is that they often reduce music clarity, making instruments and vocals sound more muffled than filtered earplugs.

    Who Should Consider Custom Earplugs?

    If you attend multiple festivals every year, custom-molded musician’s earplugs are worth considering. Because they’re professionally fitted to your ears, they provide outstanding comfort, consistent protection, and excellent sound quality during long festival days.

    Can Over-Ear Hearing Protection Work?

    Over-ear hearing protectors are another excellent option for adults who cannot comfortably wear in-ear earplugs. They also work well for individuals with sensitive ears or certain medical conditions.

    While they are less common at music festivals, they can still provide reliable hearing protection when properly fitted. Along with protecting your hearing, knowing How to Stay Hydrated at a Music Festival is essential, particularly when spending hours outdoors, dancing, or standing in warm weather.

    When Should You Insert Your Earplugs?

    When Should You Insert Your Earplugs

    One mistake I see repeatedly is people waiting until the music already feels painfully loud before putting in earplugs.

    Instead, insert your hearing protection before entering active stage areas. Your ears begin receiving loud sound the moment you approach the performance, so protecting them from the very beginning greatly reduces total noise exposure.

    A proper fit also matters. Follow the manufacturer’s instructions and make sure your earplugs create a complete seal. Even expensive hearing protection becomes far less effective when worn incorrectly.

    How Can You Reduce Noise Exposure Throughout the Day?

    Good hearing protection involves more than simply wearing earplugs.

    I always avoid standing directly in front of large speaker arrays for extended periods. Even moving farther back can noticeably reduce sound exposure without significantly affecting the concert experience.

    Another habit I’ve adopted is taking regular sound breaks. Stepping into quieter food areas, shaded seating sections, or designated rest zones for around 10 minutes every hour gives my ears valuable recovery time while also allowing me to hydrate and recharge before the next performance.

    Staying hydrated is another smart festival habit. While drinking water doesn’t prevent noise-induced hearing loss, proper hydration supports your overall health and helps you stay comfortable during long hours outdoors.

    Can Smartphone Apps Help Protect Your Hearing?

    Many free decibel meter apps allow you to estimate surrounding sound levels during concerts.

    Although smartphones are not professional sound meters, these apps provide useful awareness. If readings consistently show extremely loud conditions, it’s a good reminder to verify that your earplugs are properly inserted, move farther from the speakers, or spend a few minutes in a quieter area.

    Why Should You Keep Earplugs In During Performances?

    Many people remove one earplug to speak with friends.

    I avoid doing this because even short periods of unprotected exposure add up over an entire festival. Instead, I simply move to a quieter location before having conversations.

    High-fidelity earplugs actually make speech easier to understand than many people expect, especially compared to disposable foam earplugs.

    What Else Should You Bring for Better Hearing Protection?

    Besides wearing quality earplugs, I always carry a protective storage case and a backup pair. Losing an earplug halfway through a festival shouldn’t mean spending the rest of the day without protection.

    If I’m attending a multi-day event, I clean reusable earplugs according to the manufacturer’s recommendations, allow them to dry completely, and store them in a clean case. Proper maintenance helps preserve both comfort and performance.

    What Warning Signs Should You Never Ignore?

    What Warning Signs Should You Never Ignore

    Your ears often tell you when they’ve been exposed to too much noise.

    Persistent ringing, muffled hearing, ear fullness, difficulty understanding conversations, or increased sensitivity to sound should never be ignored. If these symptoms continue beyond a day or suddenly worsen, schedule an appointment with an audiologist or healthcare provider.

    Early evaluation can identify hearing problems before they become more serious.

    Frequently Asked Questions (FAQs)

    1. What are the best festival ear protection tips for adults?

    The best festival ear protection tips for adults include wearing high-fidelity earplugs before entering loud areas, taking regular sound breaks, avoiding speaker stacks, using a properly fitted hearing protector, and keeping your ear protection in throughout performances.

    2. Do high-fidelity earplugs make music sound muffled?

    No. High-fidelity earplugs are designed to reduce overall volume while preserving the clarity of vocals and instruments, making them ideal for concerts and festivals.

    3. Should I wear ear protection at outdoor music festivals?

    Yes. Outdoor festivals frequently reach sound levels that can damage hearing, particularly near the main stage and speaker arrays.

    4. Are smartphone decibel meter apps accurate?

    They provide useful estimates of surrounding noise levels but should be viewed as awareness tools rather than professional sound-measuring devices.

    5. Can tinnitus develop after one loud festival?

    Yes. Temporary tinnitus may occur after significant noise exposure, but persistent ringing or hearing changes should be evaluated by an audiologist.

    How Can You Enjoy Festivals Without Sacrificing Your Hearing?

    The best concerts are the ones you’ll still be able to hear years from now. By following festival ear protection tips for adults, choosing hearing protection that fits correctly, taking regular sound breaks, avoiding prolonged exposure near speakers, monitoring noise levels, and caring for reusable earplugs, you can enjoy every performance without putting your hearing at unnecessary risk. 

    I never consider hearing protection an optional accessory anymore—it’s just as essential as sunscreen, comfortable shoes, and staying hydrated. A little preparation today helps ensure that live music remains part of my life for many years to come.

  • Mechanical Bull Age and Weight Requirements Explained

    Mechanical Bull Age and Weight Requirements Explained

    A five-year-old may meet one rental company’s age rule yet still be too short for its machine. A 275-pound adult may qualify on one bull but exceed another unit’s capacity. That is why mechanical bull age and weight requirements should never be reduced to one universal number.

    After comparing manufacturer guidance, rental policies, insurance documents, and injury research, I found three limits matter most: age, height, and weight. The final decision should always rest with the trained operator following the specific ride manual.

    The Typical Age, Height, and Weight Limits

    The Typical Age, Height, and Weight Limits

    Many commercial rentals accept children from about five to eight years old. However, that range is only a common business policy. It is not a nationwide safety standard.

    Full-size units often allow riders weighing up to 250 or 300 pounds. Smaller carnival or children’s units may have lower limits, sometimes between 150 and 200 pounds.

    A widely used commercial mechanical bull manual recommends a minimum rider height of 48 inches and a maximum weight of 300 pounds. The same manual instructs riders to sit centrally, keep their legs back, and hold the rope with one hand.

    Minimum Age Requirements

    Some operators accept riders aged five or six. Others set the minimum at eight, ten, or even fifteen years. The difference may reflect the equipment, event type, insurer, or operator’s risk policy.

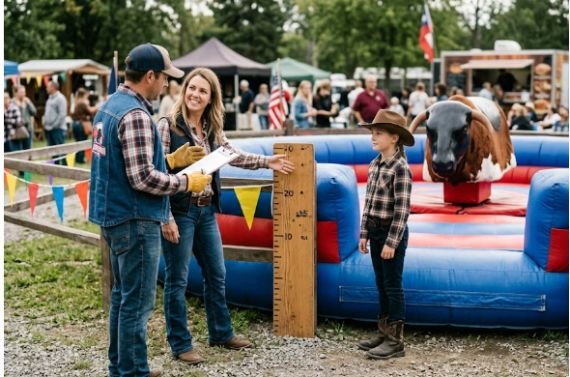
    For example, one commercial event provider requires riders to be at least eight years old, four feet tall, and under 300 pounds. It also requires a rider or guardian waiver.

    I would not advertise “ages five and up” without checking the actual booking agreement. A child’s age does not prove that they have enough height, coordination, grip, or confidence.

    Maximum Rider Weight

    A 300-pound limit appears in several commercial machine manuals, but it is not suitable for every bull. The listed number describes the capacity of that specific model.

    Exceeding the approved weight can affect the motor, saddle, mounting system, inflatable base, and operator control. It can also breach the rental company’s insurance terms.

    Hosts should never estimate a guest’s weight or pressure someone to disclose it publicly. The better approach is to display the limit clearly and let riders speak privately with the operator.

    Why Height Can Matter More Than Age

    Height determines whether a rider can straddle the body securely and position their legs correctly. A child may meet a minimum age but remain unable to grip the bull safely.

    The 48-inch guideline appears in both manufacturer instructions and commercial rental policies. Still, hosts must treat it as model-specific guidance rather than a rule covering every machine.

    This is why complete mechanical bull age and weight requirements should include height. Publishing only an age limit leaves an important suitability question unanswered.

    Why Mechanical Bull Restrictions Vary

    Why Mechanical Bull Restrictions Vary

    Mechanical bulls come in different sizes, designs, speeds, control systems, and landing-area configurations. A compact children’s unit cannot automatically follow the limits of a commercial adult model.

    Manufacturer Specifications

    The manufacturer’s operating manual should be the first authority. It identifies the tested rider capacity, correct position, operating method, electrical needs, inspection duties, and emergency procedures.

    A rental provider should be able to identify the bull model and explain its documented restrictions. Vague answers such as “it holds almost anyone” should raise concern.

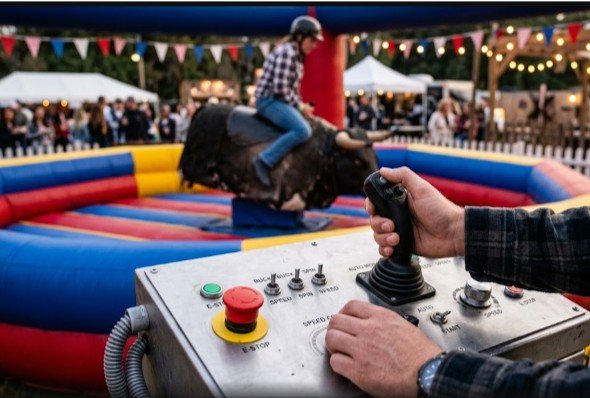
    The operator must also understand the Mechanical bull controls because speed, spin, bucking motion, and emergency stopping affect rider suitability. Even an eligible rider should start at a low, controlled setting.

    Rental Company and Insurance Rules

    Rental companies may impose stricter rules than the manufacturer. Their insurer may require a higher minimum age, signed waivers, adult consent, sobriety rules, or reduced speeds for younger riders.

    An insurance application published for mechanical bull operators asks what speed is used for minors and states that children under ten should not exceed a specified setting. This illustrates how operating speed can form part of an insurer’s risk controls.

    Therefore, meeting the machine’s capacity does not guarantee permission to ride. The operator’s approved policy still applies.

    State and Local Regulations

    Amusement-device oversight differs across the United States. Permits, inspections, operator qualifications, and adopted technical standards can vary by state or municipality.

    Oklahoma’s administrative guidance, for example, states that mechanical bulls and similar devices must meet applicable ASTM requirements. Event organizers should ask the rental provider who handles permits and inspections instead of assuming none are needed.

    How I Check Whether Someone Can Ride

    I use a three-gate test when reviewing mechanical bull age and weight requirements. A rider should pass all three gates, not just one.

    The Three-Gate Rider Test

    Gate one is equipment eligibility. The rider must meet the manufacturer’s documented height and weight limits.

    Gate two is operator eligibility. The rider must satisfy the rental company, insurer, waiver, and event rules.

    Gate three is personal suitability. The rider must be able to mount, sit securely, follow directions, and understand when to stop.

    Failure at any gate means the person should not ride. This method is more reliable than using age as the only screening tool.

    A Worked Rider Example

    Consider a nine-year-old who weighs 75 pounds but stands 45 inches tall. The child passes a hypothetical age rule and remains far below the weight limit. However, the child fails a 48-inch manufacturer requirement.

    Now consider a healthy adult who stands six feet tall and weighs 285 pounds. That rider may qualify on a 300-pound commercial model but not on a smaller unit capped at 250 pounds.

    These examples show why one number cannot answer the whole question.

    Safety Rules Beyond Age and Weight

    Safety Rules Beyond Age and Weight

    Eligibility does not remove the possibility of injury. Published medical literature has reported serious pediatric injuries connected with mechanical bull riding and has called for stronger precautions.

    Health Restrictions

    Pregnant guests should not ride. People with neck, back, joint, bone, balance, heart, or recent surgical concerns should also stay off unless medically cleared.

    Anyone who feels dizzy, unwell, intoxicated, or unable to follow instructions should not participate. The operator should have authority to refuse a ride without debate.

    Clothing, Shoes, and Loose Items

    Operators commonly require riders to remove shoes, glasses, phones, keys, and loose jewelry. Scarves, unsecured belts, and dangling accessories may catch or become projectiles.

    Riders should wear fitted clothing that permits movement. One rider should use the bull at a time. Tandem riding should never be allowed.

    Waivers and Adult Supervision

    Adults commonly sign their own waivers. A parent or legal guardian usually signs for a minor. A waiver explains risk but does not replace proper maintenance, supervision, or operation.

    Children should remain with a responsible adult while waiting. Spectators must stay outside the inflatable landing area and away from the controls.

    Questions to Ask Before Booking

    Before paying a deposit, I would ask for the exact minimum age, minimum height, and maximum weight. I would also request the bull’s model-specific operating limits.

    Confirm that a trained operator remains present throughout the event. Ask about insurance, inspections, waivers, weather restrictions, emergency stopping, and rules for children.

    Get the answers in writing. The written contract should match the rules communicated to guests. If the provider cannot explain its mechanical bull age and weight requirements, choose another company.

    FAQs

    1. What is the minimum age for riding a mechanical bull?

    Many operators set the minimum between five and ten years, but the manufacturer, insurer, venue, and rental company determine the actual limit.

    2. What is the usual mechanical bull weight limit?

    Full-size commercial machines commonly allow 250 to 300 pounds, while compact or children’s units may have a much lower capacity.

    3. How tall must a child be to ride a mechanical bull?

    Some commercial models require a minimum height of 48 inches, although the operator must confirm the rule for the exact machine.

    4. Can adults over 300 pounds ride a mechanical bull?

    Not on a machine capped at 300 pounds. The rider must use a model specifically rated and insured for their weight.

    Saddle Up Smart, Not Sorry

    Safe participation starts with the machine manual, not a general number found online. Check the operator’s written policy, confirm the rider’s height and weight eligibility, and consider their health and ability to follow instructions.

    My clearest takeaway is simple: mechanical bull age and weight requirements work as a combined screening system. Confirm every limit before the event, post the rules clearly, and let the trained operator make the final call.

  • Wedding Reception Timeline Without a Coordinator: A Smooth Five-Hour Plan

    Wedding Reception Timeline Without a Coordinator: A Smooth Five-Hour Plan

    The music is ready, the tables are set, and your guests are waiting for the evening to begin. Then the questions start arriving. Who cues the entrance? When should dinner begin? Who tells the photographer that speeches are next? 

    A carefully planned wedding reception timeline without a coordinator answers those questions before they ever reach you. With the right buffers, clear vendor roles, and one trusted point person, your reception can feel polished, relaxed, and completely under control without turning you into the event manager.

    Can You Run a Wedding Reception Without a Coordinator?

    Yes, you can manage a reception without a professional coordinator, but you cannot leave the event to chance. Someone must still handle the duties a coordinator would normally perform, including vendor communication, announcements, schedule adjustments, gift security, and cleanup decisions.

    I recommend dividing those responsibilities among several dependable people rather than placing everything on one volunteer. Your DJ or master of ceremonies should control public transitions, your photographer should direct photo sessions, and a trusted spokesperson should handle behind-the-scenes questions.

    Choose a spokesperson who is not a guest you expect to participate heavily in speeches, photographs, or wedding-party activities. This person should remain calm under pressure, understand the entire day-of wedding schedule, and feel comfortable making small decisions on your behalf.

    What Should a DIY Wedding Run of Show Include?

    What Should a DIY Wedding Run of Show Include

    Your master timeline should show the start time, duration, activity, responsible person, vendor involved, and backup plan for every major moment. Build ten- to fifteen-minute buffers around transitions so one delay does not disrupt the entire evening.

    Send the final document to all vendors and key helpers at least two weeks before the wedding. Ask your DJ, caterer, photographer, venue manager, bartender, transportation provider, and rental company to confirm that the timing works with their contracts and staffing plans.

    Store the timeline, floor plan, family photo list, vendor phone numbers, delivery instructions, and emergency contacts in one shared Google Drive folder. Text or email the link to everyone involved, but also print several copies in case phone service or Wi-Fi becomes unreliable.

    What Is a Realistic Five-Hour Wedding Reception Timeline?

    The following schedule works well for a reception running from 5:00 PM to 10:00 PM. Adjust it according to your guest count, venue rules, meal style, and vendor contracts.

    5:00 PM–6:00 PM: Cocktail Hour and Final Photos

    Guests arrive while the bar and appetizer stations open. The DJ plays background music, the catering team prepares dinner, and the photographer completes extended-family portraits. For anyone attending a long outdoor event, planning ahead is also important when considering How to Stay Hydrated at a Music Festival, including drinking water regularly between activities and taking breaks when needed.

    Give your photographer a written must-have photo list before the wedding. Include names and family groupings so the photographer can gather relatives efficiently without asking you to identify people during cocktail hour.

    6:00 PM–6:15 PM: Grand Entrance and First Dance

    The DJ invites guests to take their seats, lines up the wedding party, and confirms that the photographer is ready. After introducing the wedding party and newlyweds, the DJ transitions directly into the first dance.

    Combining these moments maintains energy and prevents guests from waiting through unnecessary pauses.

    6:15 PM–6:25 PM: Welcome Toast or Blessing

    A parent, host, or the couple welcomes guests and offers a blessing if desired. Keep this portion brief so the caterer can begin serving food while it is fresh.

    Your DJ should already know who is speaking, how their name is pronounced, and where they will stand.

    6:25 PM–7:30 PM: Dinner Service and Table Visits

    The catering team begins plated service or releases tables to the buffet. I recommend that the couple eat first so they have time to visit guest tables while everyone else finishes dinner.

    Buffets often take longer than expected. Allow approximately 15 to 20 minutes for every 50 guests to move through the line. Larger weddings may require multiple buffet stations or a longer dinner window.

    7:30 PM–7:50 PM: Speeches and Toasts

    730 PM–750 PM Speeches and Toasts

    The DJ introduces each speaker and manages the wireless microphone while the photographer prepares to capture reactions.

    Ask each speaker to limit remarks to approximately three minutes. The DJ can provide a subtle visual signal when someone approaches the limit. Short speeches usually feel more meaningful and prevent dinner from extending into dancing time.

    7:50 PM–8:05 PM: Parent Dances and Cake Cutting

    Move directly from speeches into the father-daughter dance, mother-son dance, or other family dances. Follow them immediately with the cake cutting.

    Grouping these formalities creates a smooth transition and allows the catering team to begin preparing dessert while guests move toward the dance floor.

    8:05 PM–9:45 PM: Open Dancing, Dessert, and Coffee

    The DJ opens the dance floor with energetic music while the caterer serves cake, coffee, and any planned late-night snacks.

    Avoid interrupting dancing with too many additional activities. Bouquet tosses, anniversary dances, or group photographs can still happen, but schedule only the traditions that genuinely matter to you.

    9:45 PM–10:00 PM: Last Call, Final Dance, and Grand Exit

    The DJ announces last call at the bar and invites guests to join the final dance. Your designated helpers then organize guests for the grand exit while the photographer gets into position.

    Whether you use bubbles, glow sticks, ribbon wands, or a simple farewell line, confirm that your exit materials comply with venue rules.

    Who Should Handle Each Reception Responsibility?

    Your DJ or MC should act as the master of time. Give them authority to announce dinner, introduce speakers, cue formal dances, open the dance floor, announce last call, and organize the final song.

    Your photographer should act as the photo director. They need the family photo list, schedule, venue layout, and names of relatives who can help gather people.

    Your non-guest spokesperson should become the main vendor contact. If a rental truck arrives early, the caterer needs an outlet, or the venue has a question, vendors should contact this person instead of interrupting you.

    Assign two gift guardians to move cards and gifts to a locked bridal suite, hotel room, or secured vehicle as dinner begins. Two people provide accountability and make it easier to move everything quickly.

    Finally, appoint a cleanup lead who knows which décor items belong to you, what the venue will discard, where leftovers should go, and who will return rentals.

    How Do You Keep the Reception on Time Without Feeling Rushed?

    Buffers are essential. Add extra time to dinner, transportation, family photos, and transitions between formal events. A rigid minute-by-minute schedule can collapse after one small delay, while a flexible schedule gives vendors room to recover.

    Decide in advance which events are fixed, flexible, or optional. Venue closing time, transportation pickup, and vendor departure times are usually fixed. Cake cutting and parent dances can move slightly. Games, bouquet tosses, and staged photographs may be shortened or removed.

    Ask the DJ and photographer to communicate directly throughout the evening. They should never announce a speech, dance, or cake cutting until both are ready.

    What Are the Biggest Mistakes Couples Make?

    What Are the Biggest Mistakes Couples Make

    The first mistake is making the couple the main point of contact. Once your reception begins, you should not be solving delivery problems or answering vendor questions.

    The second is underestimating dinner. Buffet lines, dietary requests, slow service, and guest conversations can easily extend the meal.

    The third is failing to assign cleanup and gift responsibilities. Without clear instructions, personal items may be misplaced, décor may be discarded, and relatives may spend the final hour asking what they should do.

    The fourth is sending different versions of the schedule to different vendors. Maintain one master document and update everyone whenever a change occurs.

    Frequently Asked Questions (FAQs)

    1. Who runs a wedding reception when there is no coordinator?

    A trusted spokesperson handles vendor questions, while the DJ or MC manages announcements and event cues. The photographer oversees portraits, and assigned helpers manage gifts, personal belongings, and cleanup.

    2. Can the DJ manage the entire reception timeline?

    The DJ can control public-facing transitions, but they should not be expected to receive deliveries, resolve catering issues, secure gifts, or supervise cleanup. Assign a separate spokesperson for logistical responsibilities.

    3. How much buffer time should I add to the schedule?

    Include at least ten to fifteen minutes of flexibility around major transitions. Larger receptions, buffet dinners, separate ceremony locations, and extensive family photographs may require additional time.

    4. When should vendors receive the final timeline?

    Send the schedule at least two weeks before the wedding and reconfirm it during the final week. This gives vendors time to resolve conflicts involving arrival times, meals, equipment, overtime, or staffing.

    5. What belongs in a wedding reception timeline without a coordinator?

    It should include vendor arrivals, cocktail hour, the grand entrance, dances, dinner, speeches, cake cutting, open dancing, last call, the final exit, gift security, cleanup assignments, emergency contacts, and built-in buffers.

    A Well-Planned Reception Still Feels Natural

    I would rather spend my reception talking, dancing, and celebrating than checking the clock or answering vendor calls. That becomes possible when every responsibility has an owner and every vendor follows the same plan.

    A thoughtful wedding reception timeline without a coordinator gives your team enough structure to work independently while leaving enough flexibility for spontaneous moments. Prepare early, delegate clearly, and let your trusted helpers manage the logistics while you enjoy the celebration you worked so hard to create.

  • Mechanical Bull Controls Explained for Beginners

    Mechanical Bull Controls Explained for Beginners

    The control panel can look intimidating when you first stand beside a mechanical bull. There are buttons, speed settings, timers, switches, and a joystick that appears capable of launching a rider into the next county.

    In practice, mechanical bull controls explained for beginners becomes much simpler once you separate the ride into two systems. The operator controls the machine. The rider controls balance, grip, posture, and reactions.

    That distinction changed how I understood the ride. I stopped viewing it as one complicated system and began seeing it as a conversation between the console and the rider.

    The Two Types of Mechanical Bull Control

    A rider does not steer a mechanical bull in the traditional sense. The machine follows commands from an operator standing at a separate control console.

    The operator controls movements such as spinning, bucking, rolling, speed changes, and stopping. The rider responds by shifting body weight and maintaining a stable center of gravity.

    Think of the operator as the driver and the rider as the suspension system. One creates movement. The other absorbs and counters it.

    Understanding How does a mechanical bull work can also clarify how the motorized base converts console commands into physical movement.

    How the Operator’s Control Console Works

    How the Operator’s Control Console Works

    Commercial mechanical bulls vary by manufacturer and model. However, most operator consoles contain similar core features.

    A current Galaxy Multi Rides console, for example, can include preset programs, a manual joystick, adjustable spin and buck settings, timers, stop buttons, and a spin-disable switch.

    Manual Joystick Controls

    The joystick gives the operator direct control over the bull’s movement.

    Moving the joystick forward or backward commonly controls pitching or bucking. This motion raises and lowers the front of the bull. Moving the joystick sideways controls spinning or rolling, depending on the machine’s design.

    The operator can combine these directions to create more complex movement. A slow backward pitch followed by a gentle turn feels manageable. A fast pitch combined with a sudden spin feels far more demanding.

    A responsible operator makes gradual changes. Sharp, unpredictable inputs can challenge an experienced rider, but they are unsuitable for someone learning the basics.

    Buck and Spin Speed Settings

    Many systems allow the operator to control bucking and spinning separately. This separation matters because each movement challenges the rider differently.

    Bucking shifts the rider forward and backward. Spinning creates sideways force and can pull the rider away from the center. Combining both movements greatly increases the difficulty.

    On some commercial systems, the manual joystick offers ten speed levels. Manufacturers also provide adjustable controls for spin and buck intensity.

    For a beginner, I prefer a low bucking speed with either no spin or a very slow rotation. This lets the rider learn one movement before handling several forces at once.

    Automatic Ride Programs

    Modern consoles may offer preset programs that automatically create a sequence of movements.

    Galaxy Multi Rides lists programs such as Soft, Medium, Hard, Greenhorn, Cowboy, and Redneck Games on some models. The Greenhorn setting is intended as a beginner competition level, while Cowboy is designed for more experienced riders.

    Automatic programs help operators deliver consistent rides. They also reduce the need to create every spin and buck manually.

    However, a preset name does not replace operator judgment. The operator must still consider the rider’s age, size, comfort, physical ability, and experience.

    Timers and Competition Displays

    LED timers measure how long the rider remains on the bull. Some consoles show the current ride time and the best time achieved during an event.

    The timer usually starts when the ride begins and stops when the rider falls or releases the riding strap. Certain systems connect their automatic programs directly to digital clocks.

    The timer adds excitement, but it should never pressure an operator to increase the difficulty too quickly. A controlled ten-second ride teaches more than an uncontrolled three-second launch.

    Mechanical Bull Safety Controls

    Mechanical Bull Safety Controls

    Safety controls are not optional decorations. They allow the operator to stop movement before a minor loss of balance becomes a harder fall.

    Emergency Stop Button

    The emergency stop is usually a large, highly visible button. Pressing it cuts or interrupts power to the movement system.

    Some consoles use a keyed emergency stop. The key helps prevent unauthorized guests or children from activating the bull without a trained operator present.

    Before running a ride, the operator should know exactly where every stop control is located. That is not something to learn after the rider begins slipping.

    Automatic Stop Sensor

    Some machines include a sensor that stops the bull when the rider falls or releases the strap.

    Galaxy describes its Automatic Stop Sensor as a system that stops the ride when the rider comes off.

    This feature provides an additional layer of protection, but it does not replace an alert operator. Sensors can support safe operation. They cannot evaluate rider posture, fear, fatigue, or unsafe behavior.

    Spin and No-Spin Switch

    A spin-disable switch lets the operator remove the rotating motion while retaining controlled bucking.

    This setting is useful for first-time riders because rotation often causes immediate disorientation. Galaxy states that its spin/no-spin control can disengage spinning, including when accommodating younger riders.

    Removing spin also helps riders practice forward and backward weight shifts without managing sideways force.

    How Riders Control Their Bodies

    How Riders Control Their Bodies

    The rider cannot override the console. However, body position strongly affects how long the rider remains centered.

    Thigh Grip and Lower-Body Stability

    I use my inner thighs and knees to maintain contact with the bull’s body. The goal is a firm clamp, not a panicked squeeze.

    Over-gripping creates fatigue and stiffness. A steady thigh grip keeps the lower body secure while allowing the hips to move.

    The rider should sit close to the center instead of sliding toward the rear. A centered seat provides more room to respond in every direction.

    Riding-Hand Position

    The dominant hand normally holds the rope or leather strap.

    An overhand or underhand grip may be used, depending on the handle and rider preference. I keep my elbow slightly bent rather than locking the arm straight.

    That bend acts like a shock absorber. A rigid arm transfers every movement directly into the shoulder and upper body.

    The grip should feel secure but releasable. Riders should never wrap the rope around the wrist or hand.

    Free-Hand Counterbalance

    The non-gripping hand stays free and raised.

    This hand works as a counterweight. When the bull turns left, moving the free arm right can help keep the upper body centered. The movement should remain responsive rather than theatrical.

    I once assumed the raised hand was mainly part of the rodeo style. After riding, I realized it functions like the balancing pole used by a tightrope walker.

    Hip and Upper-Body Movement

    The hips should follow the bull while the upper body counters its direction.

    When the bull’s head drops, I shift my hips forward and allow my shoulders to move slightly back. When the front rises, I move forward enough to avoid falling behind the motion.

    Staying loose matters. A stiff rider becomes one solid lever that the machine can easily tip. A relaxed rider can absorb several smaller movements through the hips, knees, elbow, and shoulders.

    What a Beginner Ride Should Look Like

    What a Beginner Ride Should Look Like

    My preferred beginner sequence lasts about 20 seconds and adds one challenge at a time.

    During the first five seconds, the bull moves slowly without spinning. The rider checks the grip, seat position, and free hand.

    During the next five seconds, the operator adds a gentle forward and backward pitch. The rider practices moving the hips without pulling hard on the strap.

    The third stage introduces a slow turn. The operator watches whether the rider remains centered or begins leaning outside the rotation.

    Only during the final stage should the operator slightly increase one setting. Increasing bucking and spinning together makes it difficult to identify which movement caused the rider to lose balance.

    This staged approach is my original control test: change one variable, watch the response, and adjust only after the rider regains a centered position.

    Common Mechanical Bull Control Mistakes

    The most common operator mistake is increasing the intensity before the rider understands the current movement. Speed should follow control, not replace it.

    Another mistake is treating every rider equally. A tall adult, a smaller teenager, and an experienced rodeo rider respond differently to the same setting.

    Riders often make the opposite mistake. They try to overpower the machine by pulling the strap and squeezing with maximum force.

    That approach usually makes the body rigid. Better control comes from a stable lower body, a flexible hip hinge, a bent riding arm, and an active free hand.

    Operators should also avoid becoming distracted by the timer or crowd. Their attention belongs on the rider’s position, grip, comfort, and fall direction.

    Frequently Asked Questions

    1. What does the joystick control on a mechanical bull?

    The joystick typically controls pitching, bucking, spinning, or rolling, although the exact directional layout varies between manufacturers and models.

    2. What setting should a beginner use on a mechanical bull?

    A beginner should start with low-speed bucking and little or no spin while learning grip, posture, and weight-shifting techniques.

    3. Does a mechanical bull stop automatically when someone falls?

    Some commercial systems use automatic fall or strap-release sensors, but the operator must still watch the rider and use the stop control when needed.

    4. Are mechanical bull controls difficult to operate?

    The basic controls are straightforward, but safe operation requires manufacturer training, careful rider assessment, constant attention, and familiarity with emergency procedures.

    Easy Does It, Cowboy

    The biggest lesson from mechanical bull controls explained for beginners is that more speed does not create a better first ride. Better control does.

    The operator should introduce one motion at a time. The rider should focus on staying centered rather than fighting every movement.

    Start without spin, keep the bucking gentle, and practice for several short rounds. Once the rider can stay loose and balanced, the operator can add difficulty gradually. The goal is not to survive a surprise. It is to understand the movement before the bull turns up the attitude.