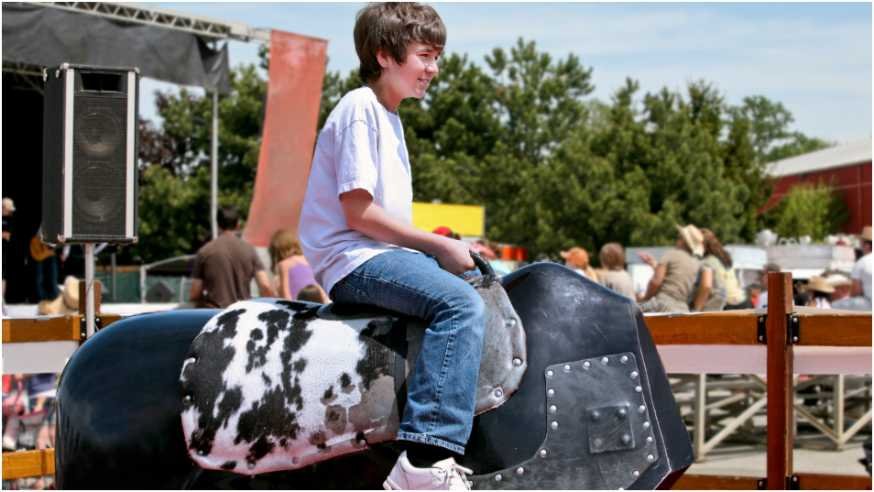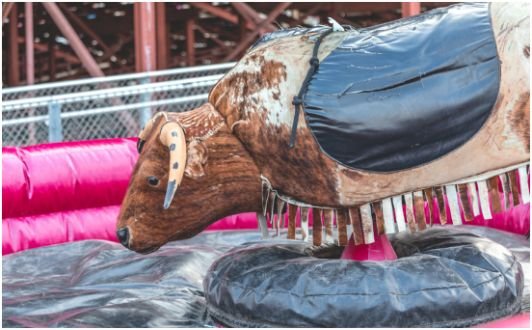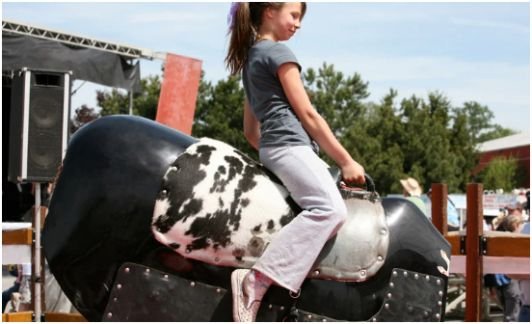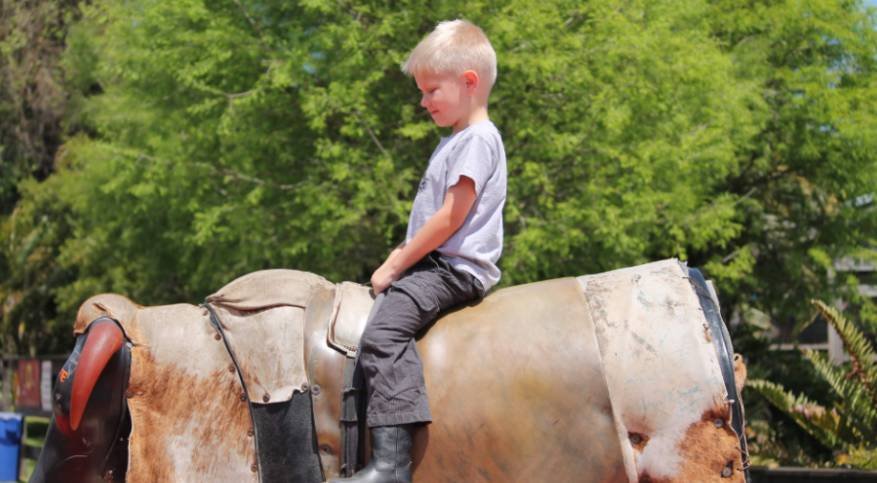
Category: Mechanical Bull Guides

  • Mechanical Bull Riding Tips for Beginners That Work

    Mechanical Bull Riding Tips for Beginners That Work

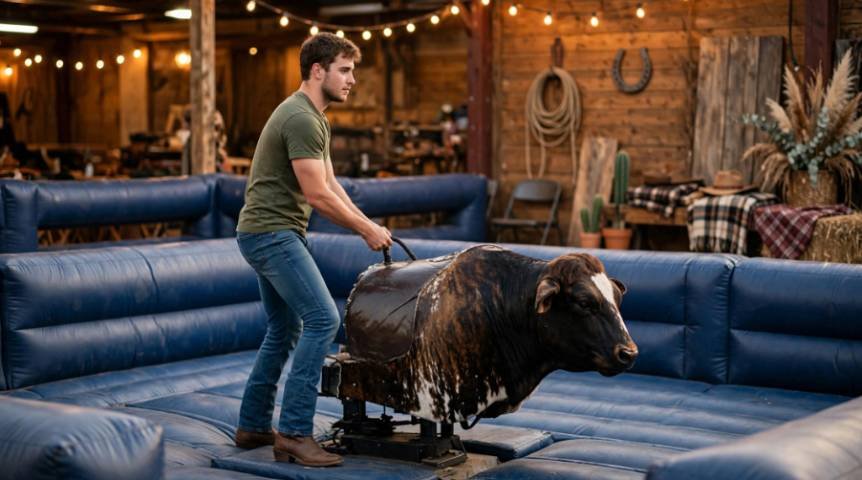
    The first time I climbed onto a mechanical bull, I assumed strength would keep me in the saddle. I squeezed every muscle, held my breath and fell almost immediately. The most useful mechanical bull riding tips for beginners are not about overpowering the machine. They are about controlling tension, reacting early and staying centered.

    My most effective technique is simple: anchor with the legs, absorb movement through the torso and adjust before the next turn. Once I stopped treating the ride like a wrestling match, I stayed mounted longer and felt more in control.

    Why Beginners Fall So Quickly

    Most first-time riders become rigid as soon as the bull moves. They tighten their shoulders, lock their elbows and lean too far in one direction.

    A rigid body cannot adapt quickly. When the bull changes direction, the rider’s entire body moves as one stiff unit. That makes a small shift feel much larger.

    I use a different approach. My thighs stay active, but my waist, shoulders and free arm remain responsive. My lower body creates stability while my upper body manages balance.

    This “anchor, absorb, adjust” method is the original framework I use to remember the correct technique:

    • Anchor with the thighs and riding hand.
    • Absorb motion through a relaxed torso.
    • Adjust your weight before the movement becomes extreme.

    Prepare Before Getting on the Bull
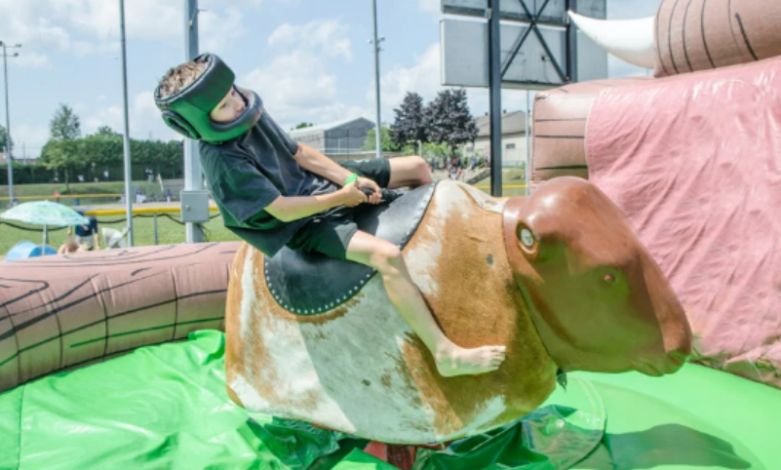
    Prepare Before Getting on the Bull

    Good riding starts before the operator presses the controls. A quick safety check can reduce avoidable risks and help you focus on technique.

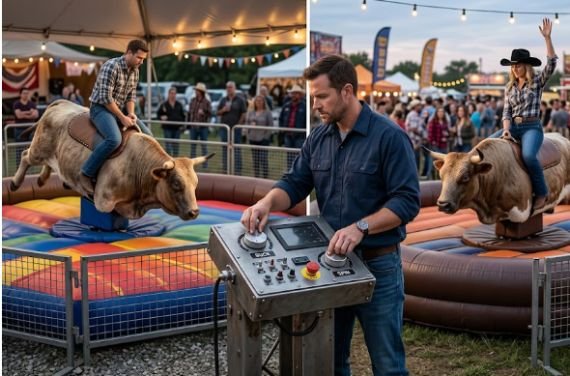
    Mechanical bulls are also popular unforgettable attractions for corporate events because they combine spectator entertainment with an activity guests can try at their own comfort level. When one is part of a larger event, proper setup and operator supervision become even more important.

    Ask for a Beginner-Friendly Ride

    Tell the operator that this is your first attempt. Ask for a low speed and gentle movement pattern.

    A responsible operator should explain the rules, show you how to hold the strap and confirm that you understand how to dismount. Amusement ride safety standards cover areas such as operation, maintenance, inspection and operator procedures.

    Do not allow friends to pressure the operator into increasing the difficulty. Your first goal is learning how the machine moves, not setting a party record.

    Check the Landing Area

    The inflatable landing surface should appear fully inflated, unobstructed and large enough to surround the bull. Avoid riding when people, shoes, drinks or equipment remain inside the inflatable area.

    The U.S. Consumer Product Safety Commission advises following manufacturer instructions and using inflatable devices on suitable, properly prepared surfaces.

    Remove Loose Accessories

    I remove my hat, watch, long earrings, necklace and anything stored in loose pockets. These items can fall, distract me or catch against clothing.

    Long hair should be secured in a ponytail, braid or bun. Clear vision matters when the bull begins changing direction.

    Use the Correct Mechanical Bull Grip
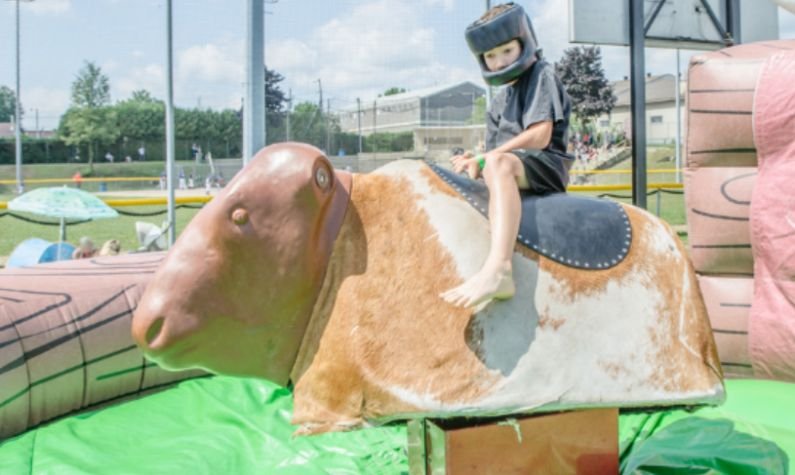
    Use the Correct Mechanical Bull Grip

    A secure grip provides stability without freezing the shoulders. These mechanical bull riding tips for beginners work best when the riding hand and free hand perform different jobs.

    Hold the Strap With One Hand

    Use your dominant hand to hold the rope, handle or leather strap. Wrap your fingers securely without twisting your wrist into an uncomfortable position.

    Many riders prefer placing the palm upward because it can create a firm connection with the strap. However, follow the operator’s instructions and the specific equipment design.

    Avoid holding on with both hands unless the operator specifically directs you to do so. A two-handed grip can square the shoulders and limit your ability to counterbalance.

    Use Your Free Hand for Balance

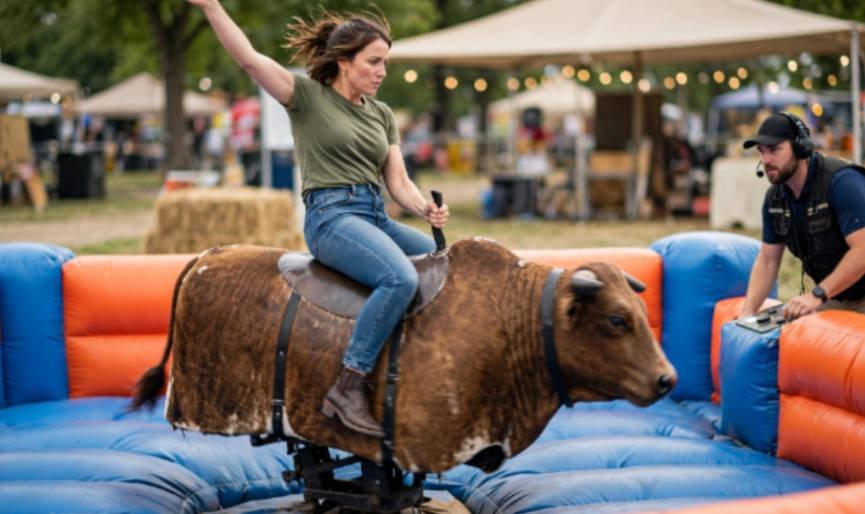
    Raise your non-riding hand around shoulder or head height. Keep the elbow bent and responsive.

    I treat my free arm like the balancing pole used by a tightrope walker. When the bull turns left, the arm can move right. When the bull drops forward, the arm can shift behind me.

    Do not wave wildly. Small corrections usually work better than dramatic movements.

    Master the Best Mechanical Bull Riding Position

    Correct posture gives you space to react. Poor posture forces you to recover after your balance has already disappeared.

    Squeeze With Your Thighs

    Grip the bull with your inner thighs rather than pinching only with your knees. The pressure should feel firm but sustainable.

    I avoid using maximum force from the first second. That exhausts my legs quickly. Instead, I maintain steady pressure and tighten briefly during sharper movements.

    Stay centered over the saddle. Sliding toward the neck or rear reduces control and makes the next dip harder to manage.

    Keep Your Upper Body Relaxed

    Your shoulders should remain low rather than pulled toward your ears. Keep your chest open and your lower back flexible.

    Think of your legs as the anchor and your torso as a spring. A spring absorbs movement. A rigid board gets thrown.

    Relaxed does not mean limp. Keep enough core engagement to control your posture without bracing every muscle.

    Position Your Feet Correctly

    Let your legs sit slightly forward while keeping your feet clear of moving parts. Pointing the toes downward may help some riders maintain contact, but avoid forcing the ankles into an awkward position.

    Never wrap your legs around ropes, straps or mechanical components. Your legs must remain free when it is time to dismount.

    Move With the Mechanical Bull

    The bull wins when you react too late. Watch its movement and make small adjustments as soon as the direction changes.

    Counter Forward and Backward Dips

    When the bull’s head drops forward, shift your shoulders slightly backward. This counters the forward pull.

    When the front rises, bring your torso slightly forward. Do not throw your whole body in either direction. Move only far enough to keep your weight above the saddle.

    I imagine that my chest should remain above my hips. Once my chest travels far beyond them, recovery becomes much harder.

    Follow Turns Without Fighting Them

    Allow your hips to follow the rotation while your shoulders make a smaller counter-movement. Fighting every twist wastes energy and often causes overcorrection.

    A useful beginner drill is the “half-response rule.” When I feel tempted to make a large correction, I begin with half that movement. Small adjustments preserve balance and leave room for the bull’s next change.

    Focus on the Bull, Not the Crowd
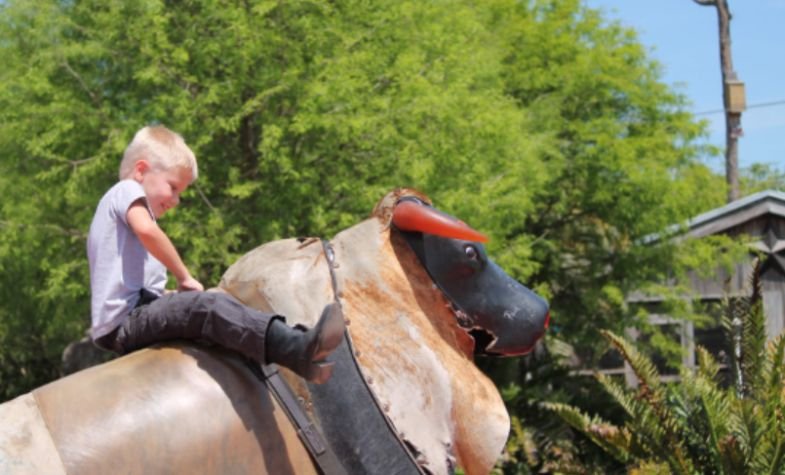
    Focus on the Bull, Not the Crowd

    Keep your eyes on the bull’s head, shoulders or another fixed point near its front. This helps you recognize dips and turns.

    Looking toward cheering friends rotates the head and shoulders. Your body often follows your eyes, pulling you away from the center.

    I also avoid staring at the inflatable mat. Looking down encourages the chest to collapse forward. Keep your gaze active and your chin in a neutral position.

    Wear the Right Clothes and Shoes

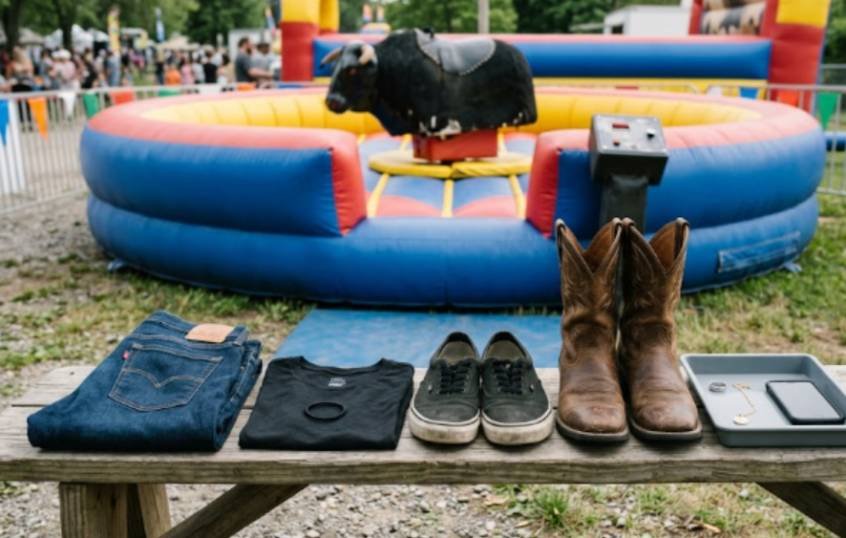
    Clothing should allow movement without catching on the bull. Fitted jeans, athletic pants or other flexible trousers usually work well.

    Avoid skirts, dresses, extremely short shorts and loose pants. Baggy clothing can shift, snag or interfere with your grip.

    Wear secure, closed-toe footwear. Sneakers or properly fitted boots are more suitable than sandals, flip-flops or high heels. Follow the rental company’s footwear rules because some operators may require riders to remove shoes.

    Empty your pockets before riding. A phone, wallet or set of keys can become uncomfortable during a fall.

    Know How to Fall Safely

    No technique guarantees that you will stay mounted. Falling is a normal part of the activity, so knowing when to release matters.

    When I feel completely separated from the saddle, I let go rather than hanging from one arm. I aim to slide onto the inflatable surface without reaching out with a locked elbow.

    Do not try to land standing. Let the padded surface receive your body, then move away from the bull when the operator tells you it is safe.

    Stop riding after a hard impact, especially if you hit your head or develop dizziness, confusion, nausea, balance trouble or a worsening headache. The CDC lists repeated vomiting, slurred speech, weakness, seizures and increasing drowsiness among signs that require emergency medical attention.

    Anyone recovering from a suspected concussion should not return to physical activity until medically cleared.

    A Simple Practice Method for First-Time Riders

    I divide my first ride into three short stages.

    During the opening seconds, I concentrate only on staying centered. I check my thigh pressure, riding hand and breathing.

    Next, I begin using my free arm. I make small counter-movements while watching the bull’s head.

    Finally, I practice responding to dips. I lean slightly opposite the bull’s movement without making dramatic corrections.

    This staged method prevents information overload. Instead of trying to perfect every technique at once, I add one skill after establishing another.

    Common Beginner Mistakes

    The most common mistake is leaning toward the bull’s head. Riders often do this because it feels safer, but a sudden forward dip can send them over the front.

    Other mistakes include holding with two hands, watching the crowd, locking the riding arm and squeezing until the legs become exhausted.

    Some riders also treat the free arm as decoration. It should actively support balance. Keep it lifted, loose and ready to counter the bull’s motion.

    Finally, never ignore the operator. Clear communication between operators and guests is a core part of amusement attraction safety.

    For a complete breakdown of mounting, posture, movement and dismounting, learn to ride a mechanical bull before your first attempt.

    Frequently Asked Questions

    1. How long does a beginner usually stay on a mechanical bull?

    A first ride may last only a few seconds, but controlled posture matters more than the time displayed.

    2. Should beginners lean forward or backward on a mechanical bull?

    Stay centered, lean slightly backward during a forward dip and shift slightly forward when the bull’s front rises.

    3. Can I ride a mechanical bull with both hands?

    Use one hand unless the operator gives different instructions, because your free hand helps you counterbalance turns and dips.

    4. What are the best mechanical bull riding tips for beginners at a party?

    Start slowly, follow the operator, grip with your thighs, keep your torso relaxed and release safely when you lose the saddle.

    Saddle Up Without Showing Off

    My biggest improvement came when I stopped trying to look fearless. A controlled beginner ride feels smoother than a tense attempt driven by pride.

    Remember the three-part method: anchor with your legs, absorb movement through your torso and adjust early. Ask for a gentle setting, focus on the bull and accept that falling is part of the experience.

    Your next step is simple. Practice the correct seated position before the machine starts. That five-second posture check may keep you riding longer than any last-minute burst of strength.
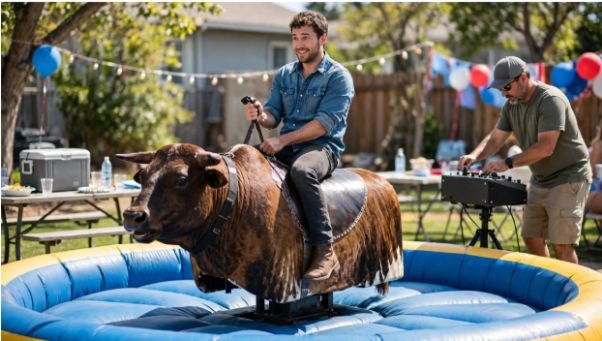
  • How Long Should a Mechanical Bull Ride Last?

    How Long Should a Mechanical Bull Ride Last?

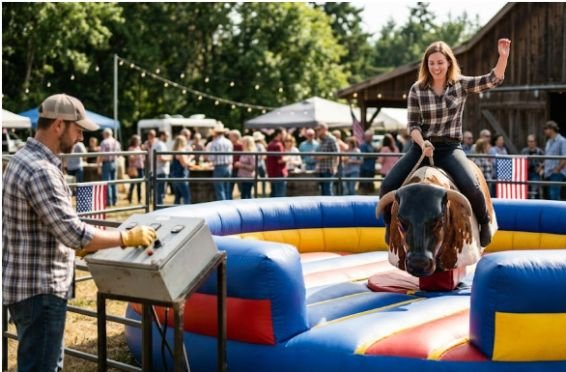
    How long should a mechanical bull ride last at a party or public event? In my experience, most successful rides last between 30 seconds and one minute. That window gives riders a real challenge without exhausting them or creating an unnecessarily long line.

    A skilled rider may continue for up to two minutes. However, longer does not automatically mean better. The right duration depends on the rider, the machine settings, the operator and the type of event.

    The Best Mechanical Bull Ride Duration

    For most casual events, I recommend setting a target of 30 to 60 seconds per rider. Beginners can start below that range, while confident adults may ride longer when the operator considers it appropriate.

    The ride should feel exciting but controlled. It should not become an endurance test unless the event is running a structured competition.

    First-Time Riders

    A first-time rider usually needs a gentle 20-to-45-second experience. The operator can begin with slow turns and mild rocking before adding controlled bucking movements.

    I prefer giving beginners a short first attempt rather than pushing them through a long ride. A second attempt often feels more enjoyable because they understand the bull’s movement and know how to position their body.

    Confident and Experienced Riders

    A confident rider may stay on for 60 to 90 seconds. An experienced rider can sometimes continue for up to two minutes if the machine, event rules and operator allow it.

    The operator should still watch for fatigue. Even an experienced rider may lose posture, grip strength or body control after repeated spins and direction changes.

    My 30-60-90 Ride Model

    I use a simple planning model when estimating how long should a mechanical bull ride last:

    • 30 seconds for children, nervous beginners or busy events
    • 60 seconds for most adult party guests
    • 90 seconds for confident riders or timed challenges

    This model is not a manufacturer-mandated standard. It is a practical event-planning framework based on rider flow, fatigue and entertainment value.

    Consider an event with 40 guests who want to ride. At 60 seconds each, the riding itself requires 40 minutes. Allowing roughly 30 seconds for mounting, dismounting and resetting raises the total to about one hour. Extending every ride to two minutes could double the queue.

    That simple calculation shows why ride duration affects more than the person on the bull.

    What Determines Mechanical Bull Ride Time?

    What Determines Mechanical Bull Ride Time

    There is no universal ride time that suits every participant. Operators must adjust the experience in real time.

    ASTM F770 provides industry guidance for amusement-ride operation, maintenance, inspection and operator training. It does not establish one standard mechanical bull ride duration. Operators must instead follow the ride manufacturer’s instructions and applicable local regulations.

    Rider Experience and Comfort

    Rider Experience and Comfort

    Beginners need time to understand how the machine moves. Starting at full intensity may end the ride within seconds and leave the participant unwilling to try again.

    A trained operator can begin slowly, observe the rider’s balance and increase the challenge gradually. Professional rental operators commonly adjust speed and movement according to a rider’s size, age and experience.

    Before allowing anyone to ride, operators should also enforce the provider’s Mechanical bull age and weight requirements. Ride duration cannot compensate for a participant who falls outside the equipment’s approved limits.

    Speed and Bucking Intensity

    Twenty seconds at a high difficulty can demand more effort than one minute at a gentle setting. Ride duration and ride intensity should therefore be planned together.

    Slow turns help beginners settle into position. Faster spins, sudden direction changes and stronger bucking movements increase the physical challenge. Operators should raise one variable at a time instead of making every movement harder at once.

    Fatigue and Loss of Control

    Fatigue can affect grip, posture and reaction time. I end a ride when a participant stops making controlled adjustments and begins hanging from the bull with little body control.

    Mechanical bull riding should create a fun fall onto the inflatable landing area. It should not continue until a rider becomes too tired to respond safely.

    Event Size and Waiting Lines

    At a small backyard gathering, allowing a confident rider 60 to 90 seconds may work well. A festival, corporate event or college gathering needs faster turnover.

    For a busy event, I would normally use:

    • 30-to-45-second rides during peak demand
    • Up to 60 seconds when the line becomes shorter
    • One additional attempt later rather than one very long turn

    This approach gives more guests access to the attraction without making each ride feel rushed.

    Recommended Ride Times by Event Type

    Recommended Ride Times by Event Type


    When someone asks how long should a mechanical bull ride last, I first consider the event format.

    A children’s event may use rides of 15 to 30 seconds on the gentlest approved settings. The provider’s minimum age, height and weight rules must always take priority.

    At an adult birthday party, 30 to 60 seconds usually works well. Guests receive enough time to find their rhythm, and the line continues moving.

    Corporate events often benefit from a 45-to-60-second cap. A clear limit makes participation feel fair and prevents one confident rider from occupying the attraction.

    Competitions may use 60-to-90-second rounds. Every competitor should receive the same maximum time and comparable difficulty progression.

    Why Longer Is Not Always Better

    A mechanical bull ride has a natural entertainment curve. The rider mounts, finds balance, survives several movements and eventually falls. Stretching that sequence too long can reduce excitement.

    Long rides also create inconsistent experiences. One rider may receive two minutes while another receives 20 seconds because the event is running behind schedule.

    I would rather offer two controlled 40-second attempts than one exhausting two-minute attempt. The rider gets another chance to improve, and the operator can reset the difficulty.

    How Operators Should Manage Each Ride

    How Operators Should Manage Each Ride

    The operator matters more than the stopwatch. ASTM’s amusement-ride guidance emphasizes documented operating procedures, inspections, maintenance and training. IAAPA also notes that ASTM standards address ride design, operation, maintenance and inspection across the amusement industry.

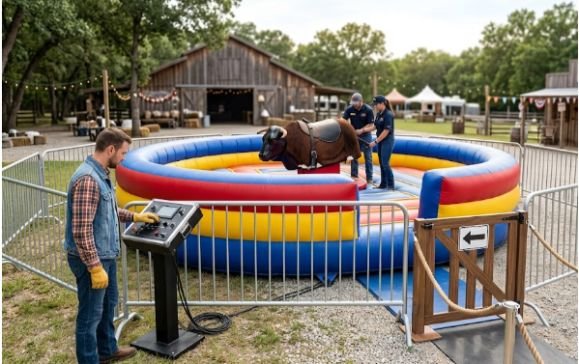
    Before starting a ride, the operator should explain how to hold on, how to signal discomfort and where to move after falling. The inflatable area should remain clear of spectators and waiting riders.

    During the ride, the operator should maintain an unobstructed view of the participant. Difficulty should increase gradually. The operator must also remain ready to use the emergency stop.

    The CPSC advises commercial inflatable operators to follow manufacturer instructions, supervise equipment and use appropriate anchoring and setup procedures. These precautions remain relevant when an inflatable landing area surrounds a mechanical bull.

    Planning Fair Mechanical Bull Competitions

    For a competition, decide the rules before the first rider mounts. Use the same time cap, starting intensity and progression method for every competitor.

    A fair format might begin with 15 seconds of gentle movement. The operator can then increase the difficulty at fixed intervals until the rider falls or reaches a 90-second limit.

    Record the time from the machine’s first movement, not from mounting. Stop the timer when the rider touches the inflatable mat or releases the approved grip.

    This structure provides a clearer answer to how long should a mechanical bull ride last during a contest. It also prevents the operator from unintentionally giving one competitor an easier sequence.

    When a Ride Should End Immediately

    A planned time limit should never prevent an operator from stopping early. The ride should end when the participant asks to stop, appears distressed or loses controlled posture.

    The operator should also stop if another person enters the landing area, the inflatable loses pressure, equipment shifts or any unusual sound occurs.

    Visible intoxication, unsafe behavior and ignored instructions are also reasons to refuse or end a ride. A participant’s comfort and the manufacturer’s operating rules must outweigh pressure from the crowd.

    FAQs

    1. How long should a beginner stay on a mechanical bull?

    Most beginners should ride for about 20 to 45 seconds, starting with gentle movements that increase only when they remain comfortable.

    2. How long should a mechanical bull ride last at a party?

    A party ride should usually last 30 to 60 seconds, giving each guest a satisfying attempt while keeping the line moving.

    3. Can a mechanical bull ride last two minutes?

    Yes, an experienced rider may continue for up to two minutes when the operator, equipment instructions and event rules permit it.

    4. How long should a mechanical bull competition round be?

    A competition round commonly works well with a 60-to-90-second cap and the same timed difficulty progression for every participant.

    Get Off While the Crowd Still Wants More

    So, how long should a mechanical bull ride last for the best experience? I recommend 30 to 60 seconds for most riders, shorter turns for beginners and a maximum of around 90 seconds for structured challenges.

    Do not chase a longer time simply for bragging rights. Set a clear limit, use a trained operator and adjust the intensity to the individual. The best ride ends with the participant smiling, the crowd cheering and the next rider ready to climb aboard.

  • Mechanical Bull Age and Weight Requirements Explained

    Mechanical Bull Age and Weight Requirements Explained

    A five-year-old may meet one rental company’s age rule yet still be too short for its machine. A 275-pound adult may qualify on one bull but exceed another unit’s capacity. That is why mechanical bull age and weight requirements should never be reduced to one universal number.

    After comparing manufacturer guidance, rental policies, insurance documents, and injury research, I found three limits matter most: age, height, and weight. The final decision should always rest with the trained operator following the specific ride manual.

    The Typical Age, Height, and Weight Limits

    The Typical Age, Height, and Weight Limits

    Many commercial rentals accept children from about five to eight years old. However, that range is only a common business policy. It is not a nationwide safety standard.

    Full-size units often allow riders weighing up to 250 or 300 pounds. Smaller carnival or children’s units may have lower limits, sometimes between 150 and 200 pounds.

    A widely used commercial mechanical bull manual recommends a minimum rider height of 48 inches and a maximum weight of 300 pounds. The same manual instructs riders to sit centrally, keep their legs back, and hold the rope with one hand.

    Minimum Age Requirements

    Some operators accept riders aged five or six. Others set the minimum at eight, ten, or even fifteen years. The difference may reflect the equipment, event type, insurer, or operator’s risk policy.

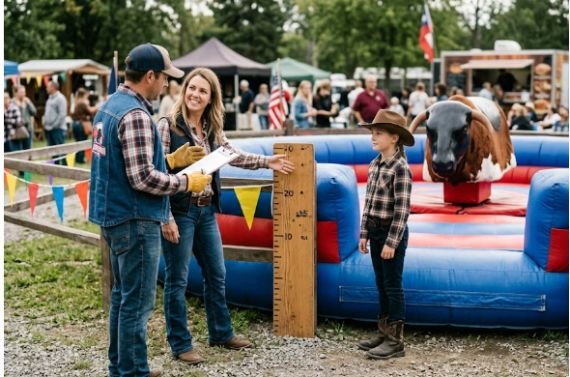
    For example, one commercial event provider requires riders to be at least eight years old, four feet tall, and under 300 pounds. It also requires a rider or guardian waiver.

    I would not advertise “ages five and up” without checking the actual booking agreement. A child’s age does not prove that they have enough height, coordination, grip, or confidence.

    Maximum Rider Weight

    A 300-pound limit appears in several commercial machine manuals, but it is not suitable for every bull. The listed number describes the capacity of that specific model.

    Exceeding the approved weight can affect the motor, saddle, mounting system, inflatable base, and operator control. It can also breach the rental company’s insurance terms.

    Hosts should never estimate a guest’s weight or pressure someone to disclose it publicly. The better approach is to display the limit clearly and let riders speak privately with the operator.

    Why Height Can Matter More Than Age

    Height determines whether a rider can straddle the body securely and position their legs correctly. A child may meet a minimum age but remain unable to grip the bull safely.

    The 48-inch guideline appears in both manufacturer instructions and commercial rental policies. Still, hosts must treat it as model-specific guidance rather than a rule covering every machine.

    This is why complete mechanical bull age and weight requirements should include height. Publishing only an age limit leaves an important suitability question unanswered.

    Why Mechanical Bull Restrictions Vary

    Why Mechanical Bull Restrictions Vary

    Mechanical bulls come in different sizes, designs, speeds, control systems, and landing-area configurations. A compact children’s unit cannot automatically follow the limits of a commercial adult model.

    Manufacturer Specifications

    The manufacturer’s operating manual should be the first authority. It identifies the tested rider capacity, correct position, operating method, electrical needs, inspection duties, and emergency procedures.

    A rental provider should be able to identify the bull model and explain its documented restrictions. Vague answers such as “it holds almost anyone” should raise concern.

    The operator must also understand the Mechanical bull controls because speed, spin, bucking motion, and emergency stopping affect rider suitability. Even an eligible rider should start at a low, controlled setting.

    Rental Company and Insurance Rules

    Rental companies may impose stricter rules than the manufacturer. Their insurer may require a higher minimum age, signed waivers, adult consent, sobriety rules, or reduced speeds for younger riders.

    An insurance application published for mechanical bull operators asks what speed is used for minors and states that children under ten should not exceed a specified setting. This illustrates how operating speed can form part of an insurer’s risk controls.

    Therefore, meeting the machine’s capacity does not guarantee permission to ride. The operator’s approved policy still applies.

    State and Local Regulations

    Amusement-device oversight differs across the United States. Permits, inspections, operator qualifications, and adopted technical standards can vary by state or municipality.

    Oklahoma’s administrative guidance, for example, states that mechanical bulls and similar devices must meet applicable ASTM requirements. Event organizers should ask the rental provider who handles permits and inspections instead of assuming none are needed.

    How I Check Whether Someone Can Ride

    I use a three-gate test when reviewing mechanical bull age and weight requirements. A rider should pass all three gates, not just one.

    The Three-Gate Rider Test

    Gate one is equipment eligibility. The rider must meet the manufacturer’s documented height and weight limits.

    Gate two is operator eligibility. The rider must satisfy the rental company, insurer, waiver, and event rules.

    Gate three is personal suitability. The rider must be able to mount, sit securely, follow directions, and understand when to stop.

    Failure at any gate means the person should not ride. This method is more reliable than using age as the only screening tool.

    A Worked Rider Example

    Consider a nine-year-old who weighs 75 pounds but stands 45 inches tall. The child passes a hypothetical age rule and remains far below the weight limit. However, the child fails a 48-inch manufacturer requirement.

    Now consider a healthy adult who stands six feet tall and weighs 285 pounds. That rider may qualify on a 300-pound commercial model but not on a smaller unit capped at 250 pounds.

    These examples show why one number cannot answer the whole question.

    Safety Rules Beyond Age and Weight

    Safety Rules Beyond Age and Weight

    Eligibility does not remove the possibility of injury. Published medical literature has reported serious pediatric injuries connected with mechanical bull riding and has called for stronger precautions.

    Health Restrictions

    Pregnant guests should not ride. People with neck, back, joint, bone, balance, heart, or recent surgical concerns should also stay off unless medically cleared.

    Anyone who feels dizzy, unwell, intoxicated, or unable to follow instructions should not participate. The operator should have authority to refuse a ride without debate.

    Clothing, Shoes, and Loose Items

    Operators commonly require riders to remove shoes, glasses, phones, keys, and loose jewelry. Scarves, unsecured belts, and dangling accessories may catch or become projectiles.

    Riders should wear fitted clothing that permits movement. One rider should use the bull at a time. Tandem riding should never be allowed.

    Waivers and Adult Supervision

    Adults commonly sign their own waivers. A parent or legal guardian usually signs for a minor. A waiver explains risk but does not replace proper maintenance, supervision, or operation.

    Children should remain with a responsible adult while waiting. Spectators must stay outside the inflatable landing area and away from the controls.

    Questions to Ask Before Booking

    Before paying a deposit, I would ask for the exact minimum age, minimum height, and maximum weight. I would also request the bull’s model-specific operating limits.

    Confirm that a trained operator remains present throughout the event. Ask about insurance, inspections, waivers, weather restrictions, emergency stopping, and rules for children.

    Get the answers in writing. The written contract should match the rules communicated to guests. If the provider cannot explain its mechanical bull age and weight requirements, choose another company.

    FAQs

    1. What is the minimum age for riding a mechanical bull?

    Many operators set the minimum between five and ten years, but the manufacturer, insurer, venue, and rental company determine the actual limit.

    2. What is the usual mechanical bull weight limit?

    Full-size commercial machines commonly allow 250 to 300 pounds, while compact or children’s units may have a much lower capacity.

    3. How tall must a child be to ride a mechanical bull?

    Some commercial models require a minimum height of 48 inches, although the operator must confirm the rule for the exact machine.

    4. Can adults over 300 pounds ride a mechanical bull?

    Not on a machine capped at 300 pounds. The rider must use a model specifically rated and insured for their weight.

    Saddle Up Smart, Not Sorry

    Safe participation starts with the machine manual, not a general number found online. Check the operator’s written policy, confirm the rider’s height and weight eligibility, and consider their health and ability to follow instructions.

    My clearest takeaway is simple: mechanical bull age and weight requirements work as a combined screening system. Confirm every limit before the event, post the rules clearly, and let the trained operator make the final call.

  • Mechanical Bull Controls Explained for Beginners

    Mechanical Bull Controls Explained for Beginners

    The control panel can look intimidating when you first stand beside a mechanical bull. There are buttons, speed settings, timers, switches, and a joystick that appears capable of launching a rider into the next county.

    In practice, mechanical bull controls explained for beginners becomes much simpler once you separate the ride into two systems. The operator controls the machine. The rider controls balance, grip, posture, and reactions.

    That distinction changed how I understood the ride. I stopped viewing it as one complicated system and began seeing it as a conversation between the console and the rider.

    The Two Types of Mechanical Bull Control

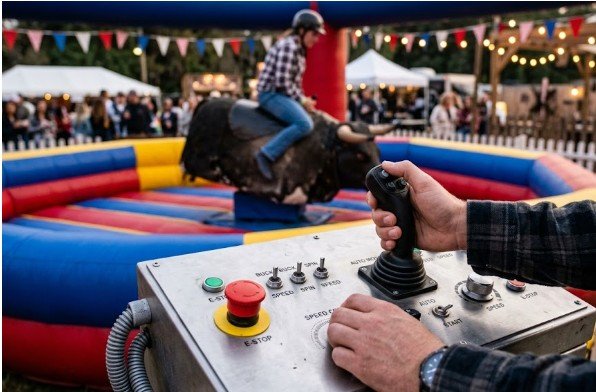
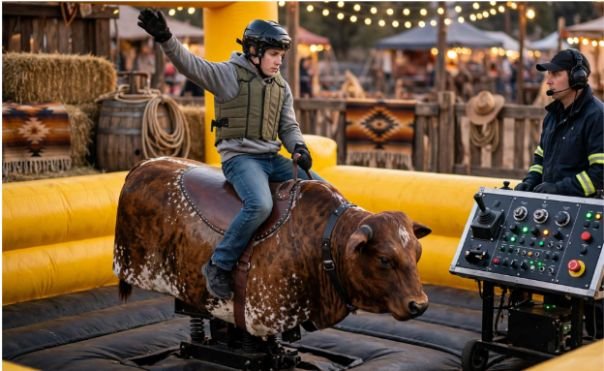
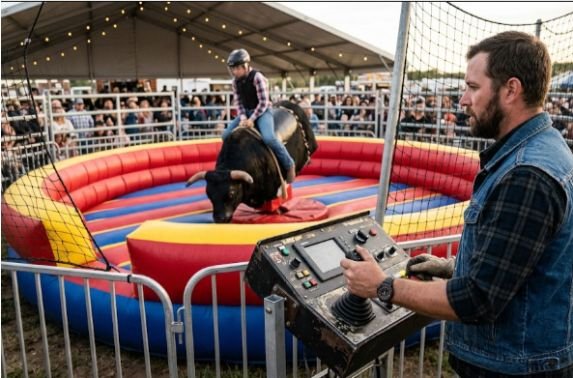
    A rider does not steer a mechanical bull in the traditional sense. The machine follows commands from an operator standing at a separate control console.

    The operator controls movements such as spinning, bucking, rolling, speed changes, and stopping. The rider responds by shifting body weight and maintaining a stable center of gravity.

    Think of the operator as the driver and the rider as the suspension system. One creates movement. The other absorbs and counters it.

    Understanding How does a mechanical bull work can also clarify how the motorized base converts console commands into physical movement.

    How the Operator’s Control Console Works

    How the Operator’s Control Console Works

    Commercial mechanical bulls vary by manufacturer and model. However, most operator consoles contain similar core features.

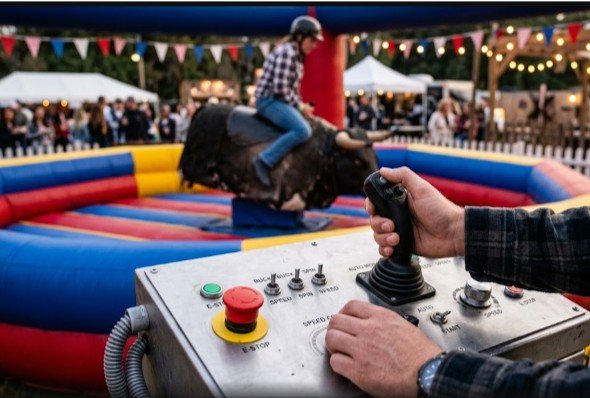
    A current Galaxy Multi Rides console, for example, can include preset programs, a manual joystick, adjustable spin and buck settings, timers, stop buttons, and a spin-disable switch.

    Manual Joystick Controls

    The joystick gives the operator direct control over the bull’s movement.

    Moving the joystick forward or backward commonly controls pitching or bucking. This motion raises and lowers the front of the bull. Moving the joystick sideways controls spinning or rolling, depending on the machine’s design.

    The operator can combine these directions to create more complex movement. A slow backward pitch followed by a gentle turn feels manageable. A fast pitch combined with a sudden spin feels far more demanding.

    A responsible operator makes gradual changes. Sharp, unpredictable inputs can challenge an experienced rider, but they are unsuitable for someone learning the basics.

    Buck and Spin Speed Settings

    Many systems allow the operator to control bucking and spinning separately. This separation matters because each movement challenges the rider differently.

    Bucking shifts the rider forward and backward. Spinning creates sideways force and can pull the rider away from the center. Combining both movements greatly increases the difficulty.

    On some commercial systems, the manual joystick offers ten speed levels. Manufacturers also provide adjustable controls for spin and buck intensity.

    For a beginner, I prefer a low bucking speed with either no spin or a very slow rotation. This lets the rider learn one movement before handling several forces at once.

    Automatic Ride Programs

    Modern consoles may offer preset programs that automatically create a sequence of movements.

    Galaxy Multi Rides lists programs such as Soft, Medium, Hard, Greenhorn, Cowboy, and Redneck Games on some models. The Greenhorn setting is intended as a beginner competition level, while Cowboy is designed for more experienced riders.

    Automatic programs help operators deliver consistent rides. They also reduce the need to create every spin and buck manually.

    However, a preset name does not replace operator judgment. The operator must still consider the rider’s age, size, comfort, physical ability, and experience.

    Timers and Competition Displays

    LED timers measure how long the rider remains on the bull. Some consoles show the current ride time and the best time achieved during an event.

    The timer usually starts when the ride begins and stops when the rider falls or releases the riding strap. Certain systems connect their automatic programs directly to digital clocks.

    The timer adds excitement, but it should never pressure an operator to increase the difficulty too quickly. A controlled ten-second ride teaches more than an uncontrolled three-second launch.

    Mechanical Bull Safety Controls

    Mechanical Bull Safety Controls

    Safety controls are not optional decorations. They allow the operator to stop movement before a minor loss of balance becomes a harder fall.

    Emergency Stop Button

    The emergency stop is usually a large, highly visible button. Pressing it cuts or interrupts power to the movement system.

    Some consoles use a keyed emergency stop. The key helps prevent unauthorized guests or children from activating the bull without a trained operator present.

    Before running a ride, the operator should know exactly where every stop control is located. That is not something to learn after the rider begins slipping.

    Automatic Stop Sensor

    Some machines include a sensor that stops the bull when the rider falls or releases the strap.

    Galaxy describes its Automatic Stop Sensor as a system that stops the ride when the rider comes off.

    This feature provides an additional layer of protection, but it does not replace an alert operator. Sensors can support safe operation. They cannot evaluate rider posture, fear, fatigue, or unsafe behavior.

    Spin and No-Spin Switch

    A spin-disable switch lets the operator remove the rotating motion while retaining controlled bucking.

    This setting is useful for first-time riders because rotation often causes immediate disorientation. Galaxy states that its spin/no-spin control can disengage spinning, including when accommodating younger riders.

    Removing spin also helps riders practice forward and backward weight shifts without managing sideways force.

    How Riders Control Their Bodies

    How Riders Control Their Bodies

    The rider cannot override the console. However, body position strongly affects how long the rider remains centered.

    Thigh Grip and Lower-Body Stability

    I use my inner thighs and knees to maintain contact with the bull’s body. The goal is a firm clamp, not a panicked squeeze.

    Over-gripping creates fatigue and stiffness. A steady thigh grip keeps the lower body secure while allowing the hips to move.

    The rider should sit close to the center instead of sliding toward the rear. A centered seat provides more room to respond in every direction.

    Riding-Hand Position

    The dominant hand normally holds the rope or leather strap.

    An overhand or underhand grip may be used, depending on the handle and rider preference. I keep my elbow slightly bent rather than locking the arm straight.

    That bend acts like a shock absorber. A rigid arm transfers every movement directly into the shoulder and upper body.

    The grip should feel secure but releasable. Riders should never wrap the rope around the wrist or hand.

    Free-Hand Counterbalance

    The non-gripping hand stays free and raised.

    This hand works as a counterweight. When the bull turns left, moving the free arm right can help keep the upper body centered. The movement should remain responsive rather than theatrical.

    I once assumed the raised hand was mainly part of the rodeo style. After riding, I realized it functions like the balancing pole used by a tightrope walker.

    Hip and Upper-Body Movement

    The hips should follow the bull while the upper body counters its direction.

    When the bull’s head drops, I shift my hips forward and allow my shoulders to move slightly back. When the front rises, I move forward enough to avoid falling behind the motion.

    Staying loose matters. A stiff rider becomes one solid lever that the machine can easily tip. A relaxed rider can absorb several smaller movements through the hips, knees, elbow, and shoulders.

    What a Beginner Ride Should Look Like

    What a Beginner Ride Should Look Like

    My preferred beginner sequence lasts about 20 seconds and adds one challenge at a time.

    During the first five seconds, the bull moves slowly without spinning. The rider checks the grip, seat position, and free hand.

    During the next five seconds, the operator adds a gentle forward and backward pitch. The rider practices moving the hips without pulling hard on the strap.

    The third stage introduces a slow turn. The operator watches whether the rider remains centered or begins leaning outside the rotation.

    Only during the final stage should the operator slightly increase one setting. Increasing bucking and spinning together makes it difficult to identify which movement caused the rider to lose balance.

    This staged approach is my original control test: change one variable, watch the response, and adjust only after the rider regains a centered position.

    Common Mechanical Bull Control Mistakes

    The most common operator mistake is increasing the intensity before the rider understands the current movement. Speed should follow control, not replace it.

    Another mistake is treating every rider equally. A tall adult, a smaller teenager, and an experienced rodeo rider respond differently to the same setting.

    Riders often make the opposite mistake. They try to overpower the machine by pulling the strap and squeezing with maximum force.

    That approach usually makes the body rigid. Better control comes from a stable lower body, a flexible hip hinge, a bent riding arm, and an active free hand.

    Operators should also avoid becoming distracted by the timer or crowd. Their attention belongs on the rider’s position, grip, comfort, and fall direction.

    Frequently Asked Questions

    1. What does the joystick control on a mechanical bull?

    The joystick typically controls pitching, bucking, spinning, or rolling, although the exact directional layout varies between manufacturers and models.

    2. What setting should a beginner use on a mechanical bull?

    A beginner should start with low-speed bucking and little or no spin while learning grip, posture, and weight-shifting techniques.

    3. Does a mechanical bull stop automatically when someone falls?

    Some commercial systems use automatic fall or strap-release sensors, but the operator must still watch the rider and use the stop control when needed.

    4. Are mechanical bull controls difficult to operate?

    The basic controls are straightforward, but safe operation requires manufacturer training, careful rider assessment, constant attention, and familiarity with emergency procedures.

    Easy Does It, Cowboy

    The biggest lesson from mechanical bull controls explained for beginners is that more speed does not create a better first ride. Better control does.

    The operator should introduce one motion at a time. The rider should focus on staying centered rather than fighting every movement.

    Start without spin, keep the bucking gentle, and practice for several short rounds. Once the rider can stay loose and balanced, the operator can add difficulty gradually. The goal is not to survive a surprise. It is to understand the movement before the bull turns up the attitude.

  • How Does a Mechanical Bull Work?

    How Does a Mechanical Bull Work?

    The first time I stood beside a mechanical bull, I assumed it simply rocked back and forth. After watching operators adjust speed, change movement patterns, and instantly stop the ride after every fall, I realized there was far more engineering involved. How does a mechanical bull work is a question that deserves more than a simple explanation.

    Modern mechanical bulls combine electric motors, computerized controls, heavy-duty steel construction, and multiple safety systems to recreate the unpredictable movements of a real bucking bull. Every spin, dip, and kick is carefully controlled so riders experience excitement without sacrificing safety.

    What Happens When the Ride Starts?

    The moment a rider climbs aboard, the operator takes control through a dedicated console. Unlike amusement rides that follow one fixed path, a mechanical bull constantly changes movement based on operator input or programmed sequences.

    The Role of the Operator

    An experienced operator watches the rider’s posture before increasing the difficulty. Beginners usually start with gentle rocking motions, while experienced riders may face faster spins and sharper bucks.

    The operator can instantly reduce intensity if the rider struggles or increase it gradually as confidence grows.

    How the Bull Creates Realistic Motion

    Instead of relying on one motor, the bull separates rotational movement from bucking movement. This combination prevents the ride from feeling repetitive and creates the unpredictable action riders expect at rodeos and Western-themed events.

    The Dual-Motor System Explained

    The Dual-Motor System Explained

    The heart of every professional mechanical bull is its dual-motor design. Each motor performs a separate task while working together over a central drive shaft.

    Spin Motor

    The first electric motor controls rotation.

    Using a heavy-duty gearbox, it spins the bull a full 360 degrees in either clockwise or counterclockwise directions. Because the direction changes frequently, riders cannot easily predict their next movement.

    Professional-grade gearboxes are built to withstand continuous operation during busy parties, festivals, and commercial events.

    Buck Motor

    Mounted directly above the spinning assembly sits the second electric motor.

    Instead of rotating, this motor controls pitch, roll, and vertical bucking. Mechanical pitch arms lift and lower different parts of the bull, producing realistic forward dips, backward kicks, and side-to-side rolls.

    The combination of spinning and bucking creates hundreds of possible movement patterns instead of repeating the same motion repeatedly.

    How Riders Experience Different Difficulty Levels

    How Riders Experience Different Difficulty Levels

    One reason mechanical bulls appeal to both children and experienced riders is the adjustable control system.

    Manual Controls

    Most commercial units include a joystick that lets the operator adjust movement in real time.

    Difficulty commonly ranges from Level 1 through Level 10. Lower levels emphasize gentle rocking, while higher levels introduce aggressive spins, rapid direction changes, and stronger bucking movements.

    The operator can react instantly instead of following a fixed program, making every ride unique.

    Pre-Programmed Ride Modes

    Many newer systems also include automated ride patterns.

    These programs combine spinning and bucking using preloaded algorithms, creating standardized rides for competitions, public events, and timed challenges.

    This consistency helps ensure riders compete under identical conditions while still enjoying realistic movement.

    What Makes a Mechanical Bull Safe?

    People often focus on falling off the bull, but professional machines are designed with multiple layers of protection.

    Automatic Stop Systems

    One of the most valuable safety features is the automatic stop mechanism.

    Many premium mechanical bulls use magnetic breakaway handles or optical sensors. The instant a rider releases the handle or falls away, the electrical circuit breaks.

    A quick-stop braking system immediately halts movement before the bull can continue spinning toward the fallen rider.

    This technology significantly reduces the chance of secondary impacts.

    Soft Components and Inflatable Landing Areas

    Although the bull’s body is typically built from rigid fiberglass for durability, the head and horns are much softer.

    Manufacturers often use high-density foam covered with realistic materials. The horns and head may even attach with magnets so they safely detach during harder impacts.

    Around the base sits a large inflatable vinyl cushion. Instead of hitting a hard floor, riders land on an air-filled surface designed to absorb impact energy.

    Combined with trained operators and proper supervision, these safety features make injuries relatively uncommon during properly managed events.

    What Happens Inside the Machine During a Ride?

    What Happens Inside the Machine During a Ride

    One interesting detail many riders never see is how both motors constantly communicate through the mechanical assembly.

    While the spin motor rotates the platform, the buck motor independently changes the bull’s angle several times each second. Because these actions occur simultaneously, riders experience movements that feel surprisingly natural instead of mechanical.

    After observing multiple commercial bulls in operation, I noticed skilled operators rarely rely on maximum speed. Small changes in timing often throw riders off balance faster than simply increasing intensity. That combination of rhythm and unpredictability makes experienced operators just as important as the machinery itself.

    If you’re planning your first ride, wearing the right clothing makes a surprising difference. Choosing What to wear riding a mechanical bull can improve grip, comfort, and confidence before the ride even begins.

    Common Myths About Mechanical Bulls

    Many people assume mechanical bulls are dangerous simply because riders fall frequently.

    In reality, professional systems are engineered to make falling expected and controlled. The ride stops almost immediately after a rider loses balance, and inflatable cushions absorb most of the impact.

    Another common myth is that every ride follows the same pattern.

    Modern control systems generate countless combinations of spins, tilts, and bucks. Even two consecutive riders rarely experience identical movement sequences.

    Saddle Up With Confidence

    Understanding how does a mechanical bull work makes the experience far less intimidating. Behind every thrilling ride is a carefully engineered machine using two independent motors, intelligent controls, trained operators, and multiple safety systems working together.

    The next time you climb onto a mechanical bull, you’ll know every spin, buck, and sudden direction change is the result of precise engineering rather than random movement. Knowing how the system works can help you ride with greater confidence and enjoy every second.

    Frequently Asked Questions

    1. How does a mechanical bull work using two motors?

    One motor controls spinning while the second controls bucking, pitching, and rolling to create realistic rodeo-style movement.

    2. Can operators control the speed of a mechanical bull?

    Yes. Operators adjust speed and difficulty instantly using a joystick or pre-programmed ride settings.

    3. Are mechanical bulls safe for beginners?

    Professional mechanical bulls include inflatable landing pads, automatic stop systems, and adjustable difficulty for safer beginner rides.

    4. Why does a mechanical bull stop immediately when someone falls?

    Most commercial machines use sensors or magnetic breakaway systems that activate a quick-stop brake as soon as the rider loses contact.

  • What to Wear Riding a Mechanical Bull: Safe Outfit

    What to Wear Riding a Mechanical Bull: Safe Outfit

    The wrong outfit can end a mechanical bull ride before the first serious spin. When deciding what to wear riding a mechanical bull, choose clothing that grips the saddle, covers your skin, stays secure, and lets you land comfortably.

    My simplest recommendation is long stretch jeans, a fitted breathable top, and closed-toe flat shoes. You can still create a fun Western look, but function should come before fringe, jewelry, or oversized belt buckles.

    The Best Mechanical Bull Riding Outfit

    The Best Mechanical Bull Riding Outfit

    A good riding outfit must survive sudden turns, forward dips, sideways motion, and an eventual fall onto the inflatable mat. Clothing that feels comfortable while standing may behave very differently once the bull begins moving.

    Choose Long, Stretchy Jeans

    Long jeans are usually the best pants for mechanical bull riding. Denim creates more useful friction against a vinyl saddle than smooth materials such as satin, silk, or lightweight athletic nylon.

    The jeans should fit closely without restricting your hips or knees. I prefer stretch denim because it moves with the body when the rider squeezes the bull or adjusts position. Extremely tight jeans can limit movement, while baggy jeans may bunch around the seat.

    High-rise or mid-rise jeans also tend to remain secure during vigorous movement. They reduce the risk of constant waistband adjustments and provide more coverage when the rider leans forward.

    Avoid shorts, even at summer events. Exposed thighs can rub against the saddle and develop uncomfortable abrasions. Friction is a known cause of superficial skin damage, making fabric coverage a simple protective measure.

    Wear a Secure and Breathable Top

    A fitted cotton T-shirt is hard to beat. It allows free movement, absorbs some sweat, and usually stays in place better than a loose blouse or low-cut party top.

    The shirt does not need to feel skin-tight. It should simply remain secure when you raise one arm, twist your torso, or lean forward. A tucked-in tee, fitted Western shirt, or secure long-sleeve top can all work well.

    Before riding, I use a quick movement test. I lift both arms, bend forward, and rotate from side to side. If the top shifts, exposes too much skin, or requires adjustment, I choose something else.

    Avoid long drawstrings, flowing sleeves, loose scarves, and dangling decorations. Although mechanical bulls differ from playground equipment, the Consumer Product Safety Commission warns that jewelry and loose clothing components can become caught in equipment. The same anti-entanglement principle makes sense here.

    Pick Closed-Toe Shoes That Stay On

    Closed-toe sneakers or low-heeled boots are the safest practical choices. They should fit securely and offer enough traction for approaching the bull, climbing onto it, and walking away across the inflatable surface.

    OSHA notes that footwear and surface conditions both affect slip resistance. Although its guidance concerns workplaces rather than amusement rides, the basic point remains useful: stable footwear matters on unpredictable surfaces.

    Choose sneakers with tied laces or boots that fit firmly around the foot. Cowboy boots can complete the theme, but select a low, wide heel. A tall or narrow heel may feel unstable when mounting or landing.

    Why Your Clothing Affects Your Ride

    Why Your Clothing Affects Your Ride

    Understanding what to wear riding a mechanical bull becomes easier when you consider the three stages of the experience: getting on, staying on, and falling off.

    Grip Matters More Than Western Style

    Mechanical bull riders stay mounted by maintaining body position and controlled leg pressure. Smooth clothes reduce helpful contact between the rider and the saddle.

    Denim, cotton blends, and lightly textured fabrics generally perform better than slippery party materials. However, extremely rough seams or decorative studs may cause discomfort and could damage the bull’s covering.

    A Western outfit can look great, but the costume should never interfere with movement. Keep the plaid shirt and boots. Skip the oversized buckle, metal chains, and dramatic fringe.

    Coverage Helps Prevent Scrapes

    Long pants create a barrier between your legs and the bull’s surface. That barrier becomes especially valuable when the machine changes direction and your body shifts across the saddle.

    A long-sleeve shirt offers more coverage, but it is not always necessary. At warm indoor venues, a breathable short-sleeve shirt may feel more comfortable. The key is protecting the areas that maintain the most contact with the bull.

    Your Outfit Must Handle the Landing

    Every rider should expect to fall. The inflatable mat reduces impact, but your outfit still affects how comfortably you land and stand up.

    Hard accessories can press into the body during a fall. Large belt buckles may dig into the stomach, while chunky rings can catch or press against the riding rope. Empty your pockets of keys, phones, and other hard objects before mounting.

    What Women Should Wear on a Mechanical Bull

    What Women Should Wear on a Mechanical Bull

    Women wondering what to wear riding a mechanical bull should prioritize secure coverage over restrictive fashion.

    Stretch jeans with a mid-rise or high-rise waist offer reliable movement and coverage. Pair them with a fitted crew-neck T-shirt, bodysuit, or buttoned Western shirt. Check that every button and strap remains secure during movement.

    A supportive undergarment can also improve comfort during sudden bouncing and spinning. Avoid strapless tops, loose halters, skirts, dresses, crop tops that ride upward, and tops with fragile shoulder ties.

    For footwear, choose lace-up sneakers, ankle boots, or low cowboy boots. A square or rounded toe usually offers more comfort than an extremely pointed design.

    What Men Should Wear on a Mechanical Bull

    Men can wear flexible straight-leg or slim-fit jeans with a tucked or fitted T-shirt. A lightweight Western shirt also works if it fits close enough to avoid catching or flapping.

    Do not wear a thick wallet, phone, multitool, or keys in your back pockets. These items can press into the hip or lower back while seated. Move essential belongings to a bag or leave them with a friend.

    Avoid stiff jeans that prevent you from opening your hips. Riders need enough mobility to grip with their legs while allowing the upper body to respond naturally.

    What Not to Wear Mechanical Bull Riding

    What Not to Wear Mechanical Bull Riding

    Several clothing choices create unnecessary discomfort or risk:

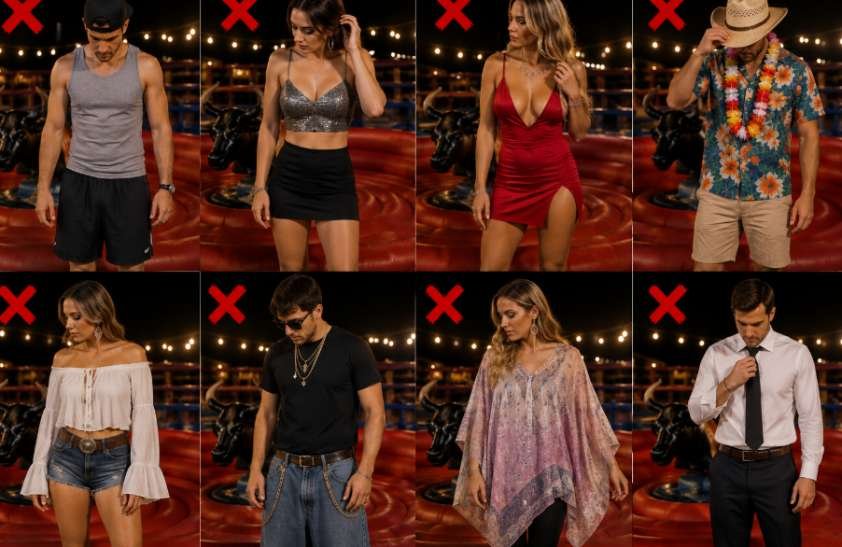
    • Shorts, skirts, and dresses that expose the legs
    • Flip-flops, slides, sandals, or high heels
    • Loose scarves, long necklaces, and dangling earrings
    • Oversized belt buckles and sharp metal decorations
    • Slippery satin, silk, or nylon pants
    • Loose tops, fragile straps, or unsecured buttons
    • Cowboy hats and sunglasses during the actual ride
    • Phones, keys, and hard objects inside pockets

    A cowboy hat is perfect for photographs before and after the ride. Hand it to a friend before climbing onto the bull.

    My Three-Part Outfit Test Before Riding

    My original “grip, coverage, and exit” test makes choosing what to wear riding a mechanical bull much easier.

    First, check grip. Sit on a firm chair and gently shift from side to side. If the fabric slides easily, it may also slide across the bull.

    Second, check coverage. Raise one arm as you would while riding, then lean forward and twist. Your shirt and waistband should remain secure.

    Third, check the exit. Jump lightly, squat, and take several quick steps. Your shoes should stay firmly attached, and nothing should strike or press into your body.

    This test takes less than one minute. It catches most outfit problems before the operator starts the machine.

    Your clothing can support your technique, but it cannot replace correct posture. Review How to balance on a mechanical bull before your event so you understand how your free arm, hips, legs, and eyes work together.

    Extra Clothing Tips for Parties and Events

    Bring a spare shirt if the venue is warm or you expect several rides. Mechanical bull riding can become physically demanding, especially during longer sessions.

    Tie long hair back with a simple elastic. Avoid clips with sharp edges or large decorative pieces. Remove rings, bracelets, necklaces, watches, and dangling earrings.

    Ask the operator about venue-specific rules. Some companies require closed-toe shoes, restrict certain clothing, or set rider height, age, and health requirements. The operator’s instructions should always take priority over general outfit advice.

    At larger parties, organizers should also plan how to manage crowds at events so riders can enter and leave the attraction safely without congestion around the inflatable area.

    Frequently Asked Questions

    1. Can I wear leggings on a mechanical bull?

    Thick athletic leggings may work, but durable stretch jeans usually provide better protection against friction and minor scrapes.

    2. Can you wear cowboy boots mechanical bull riding?

    Yes, provided the boots fit securely and have a low, wide heel that supports stable mounting and landing.

    3. Should I wear a helmet on a mechanical bull?

    Follow the operator’s rules because helmet requirements vary by venue, rider age, equipment design, and local regulations.

    4. What to wear riding a mechanical bull at a party?

    Wear fitted jeans, a secure breathable shirt, and closed-toe flat shoes, then remove hats, jewelry, and hard pocket items.

    Ride Bold, but Dress Smarter

    Knowing what to wear riding a mechanical bull is not about creating the most elaborate cowboy costume. It is about choosing an outfit that protects your skin, supports movement, stays secure, and lets you enjoy the ride without constant adjustments.

    Wear long stretch jeans, a fitted top, and dependable closed-toe shoes. Perform the one-minute grip, coverage, and exit test before leaving home. Then hand over your phone, remove your accessories, listen to the operator, and climb aboard with confidence.

  • How to Balance on a Mechanical Bull: Stay Centered

    How to Balance on a Mechanical Bull: Stay Centered

    The fastest way to lose your seat is to fight every movement with stiff arms and tense shoulders. Learning how to balance on a mechanical bull starts with a different approach: grip firmly below the waist while keeping everything above it loose and responsive.

    When I study successful rides, I notice that balance rarely comes from raw strength. It comes from staying centered, anticipating movement, and making small corrections before a larger correction becomes necessary.

    Why Mechanical Bull Balance Feels So Difficult

    A mechanical bull can pitch, turn, rise, drop, and change direction within seconds. Your body must respond to several forces without losing its connection to the saddle.

    Many beginners pull hard on the handle when they feel unstable. That reaction may feel secure, but it often stiffens the shoulders and shifts the rider away from the center.

    The goal is not to remain perfectly still. Good riders move constantly. They allow their hips and torso to absorb the motion while their thighs maintain a secure lower-body anchor.

    Falls also deserve serious attention. A study of mechanical bull injuries treated in US emergency departments estimated 27,903 injuries between 2000 and 2020. Falling or being thrown caused most cases, while sprains, fractures, and upper-extremity injuries appeared frequently.

    Build a Strong Lower-Body Anchor

    Understanding how to balance on a mechanical bull begins with your legs. Your thighs should hold you in position so your gripping arm does not carry your entire body weight.

    Squeeze With Your Thighs

    Press your inner thighs firmly against the bull. Maintain steady pressure rather than squeezing only when the ride becomes difficult.

    Think of your lower body as the roots of a tree. Your torso can sway, but your base must remain connected.

    Avoid locking your knees. A locked leg cannot absorb movement effectively. Keep a slight bend that allows your hips and knees to react together.

    Keep Your Feet Forward

    Move your lower legs slightly forward instead of letting them trail behind you. Turn your heels gently inward when the bull’s shape allows it.

    This position helps your thighs maintain contact. It also reduces the chance of your legs swinging outward during a spin.

    Do not hook your feet into unsafe gaps or wrap your legs around equipment. Follow the operator’s instructions and use only the intended riding position.

    Use the Correct Mechanical Bull Riding Posture

    Use the Correct Mechanical Bull Riding Posture

    Your starting position affects every movement that follows. A poor setup forces you to make large corrections as soon as the bull begins moving.

    Sit Close to the Center

    Place your weight over the middle of the bull rather than leaning far forward or sitting heavily near the rear.

    Keep your hips beneath your shoulders. Your head, chest, and pelvis should begin in a roughly vertical line.

    I recommend checking your position before the ride starts. Ask yourself whether you could lift your gripping shoulder without falling sideways. If not, you may already be leaning too far.

    Keep Your Upper Body Loose

    Relaxed does not mean weak. Keep your core active, but allow your shoulders and spine to move.

    A stiff torso behaves like a rigid board. When the bull changes direction, the whole board tips. A flexible torso behaves more like a spring and absorbs part of the movement.

    Breathe normally. Holding your breath can increase tension and slow your reactions.

    Turn Your Free Arm Into a Counterweight

    Hold the handle firmly with your dominant hand unless the operator advises another position. Test both an underhand and overhand grip before starting, then choose the position that feels secure without straining your wrist.

    Raise your free arm above shoulder height. Keep the elbow slightly bent and the hand open.

    Move that arm opposite the direction of your falling weight. If the bull pulls your body toward the right, move your free arm toward the left. This action creates a counterweight and helps return your chest toward the center.

    Do not wave the arm randomly. Controlled movement works better than large, frantic swings.

    These principles also support broader Mechanical bull riding tips, especially those involving posture, grip, reaction timing, and safe dismounts.

    Move With the Bull Instead of Fighting It

    Move With the Bull Instead of Fighting It

    The core skill behind how to balance on a mechanical bull is matching your response to the bull’s motion. I think of the rider and bull as opposite ends of a seesaw.

    Respond When the Bull Dips

    When the bull’s head drops, your upper body naturally wants to continue forward. Shift your shoulders slightly backward and keep your chest lifted.

    Do not make a dramatic backward lean. A small movement is usually enough when performed early.

    Keep squeezing with your thighs. Pulling only with your arm may twist your shoulder and place too much weight on the handle.

    Respond When the Bull Rises

    When the front rises, move your chest slightly forward and drive your hips toward the bull’s shoulders.

    This adjustment prevents your seat from sliding toward the back. Keep your chin level rather than looking upward.

    Imagine keeping your belt buckle connected to the bull. Your hips should follow the rise before your shoulders fall behind.

    Adjust During Spins

    During a turn, keep your chest facing toward the bull’s head as much as possible. Allow your hips to rotate while your free arm balances the outside pull.

    Avoid staring at the room. Watching the surroundings spin can make you feel disoriented and delay your next correction.

    Make several small adjustments rather than one dramatic lean. Small corrections preserve your center and use less energy.

    Watch the Bull’s Head to Improve Reaction Time

    Your eyes guide your balance. Look toward the bull’s head or the area just behind it.

    The head often shows the beginning of a pitch or directional change before the rest of your body feels the full movement. This gives you a brief chance to prepare.

    Looking at the floor can pull your head and shoulders downward. Watching the crowd may turn your torso away from the riding position.

    To improve how to balance on a mechanical bull, keep your gaze steady and let peripheral vision track the surrounding area.

    Beyond the ride itself, mechanical bulls can become social media friendly attractions because the movement, rider reactions, and crowd energy naturally create memorable photo and video moments.

    Use My Three-Second Balance Reset

    I use a simple mental check to evaluate a rider’s position: knees, hips, hand.

    First, check that your knees remain soft and close to the bull. Next, bring your hips back over the center. Finally, raise your free hand and move it opposite your shifting weight.

    This three-part reset can happen in about three seconds during a slow section of the ride.

    For example, imagine that a clockwise spin pulls your hips left. Squeeze your thighs, shift your hips slightly right, and extend your free arm right. Once centered, relax the shoulder again.

    The key is correcting the hips before making a large upper-body movement.

    Common Mechanical Bull Balance Mistakes

    The most common mistake is trying to hang from the handle. Your hand should support your position, but it should not replace your legs and hips.

    Beginners also lean too far in anticipation of the next movement. Guessing aggressively can place you off-center before the bull changes direction.

    Other frequent problems include staring at the floor, holding the breath, locking the knees, lowering the free arm, and riding at excessive speed too soon.

    Do not place your free hand on the bull. It cannot function as a counterweight there, and it may create an unsafe arm position during a fall.

    Practice Safely Before Increasing the Speed

    Ask the operator to begin slowly. Use the first part of the ride to test your grip, posture, and ability to respond to basic pitches.

    Only increase the speed when you can remain centered without hanging from the handle. A skilled operator should control the ride according to the rider’s ability and stop it when necessary.

    ASTM’s amusement ride standards address areas such as operation, maintenance, inspection, manufacturing, and design. IAAPA also identifies trained operators, inspections, operating procedures, and guest safety protocols as central parts of responsible ride operation.

    Ride only when the surrounding inflatable or padded area is fully set up. Remove loose objects from your pockets and follow posted age, height, health, clothing, and footwear requirements.

    Avoid riding while impaired. Stop immediately if you feel pain, dizziness, numbness, or unusual discomfort.

    Frequently Asked Questions

    1. How do beginners stay balanced on a mechanical bull?

    Beginners should squeeze with their thighs, sit centrally, keep their upper body loose, and use the free arm as a counterweight.

    2. Should I lean forward or backward on a mechanical bull?

    Lean slightly backward when the head drops and slightly forward when the front rises, using small movements rather than dramatic shifts.

    3. Where should I look while riding a mechanical bull?

    Look toward the bull’s head because it helps you anticipate pitches, turns, and changes in direction.

    4. Does upper-body strength help with how to balance on a mechanical bull?

    Some grip strength helps, but posture, thigh pressure, hip movement, timing, and relaxation matter more than pulling power.

    Stay Loose, Look Sharp, Ride Longer

    Once I understood how to balance on a mechanical bull as a coordination skill, the technique became much clearer. The legs create the anchor, the hips follow the machine, and the free arm brings the body back toward center.

    Start at a controlled speed and practice one correction at a time. Squeeze with your thighs, watch the bull’s head, and keep your shoulders loose. The rider who reacts smoothly usually lasts longer than the rider who simply holds tighter.

  • How to Ride a Mechanical Bull: Beginner Safety Tips

    How to Ride a Mechanical Bull: Beginner Safety Tips

    The secret to how to ride a mechanical bull is not overpowering the machine. It is staying centered while the bull tries to move your hips away from your shoulders.

    I approach every ride as a balance challenge, not a strength contest. A firm grip helps, but rhythm, posture, leg pressure, and quick weight shifts keep a rider aboard longer.

    What Makes a Mechanical Bull Difficult?

    A mechanical bull can pitch forward, rise backward, spin, or combine movements. Those directional changes move your center of gravity beyond the bull’s base.

    Many beginners respond by tightening every muscle. That reaction usually makes balance worse. A rigid upper body cannot follow the machine smoothly.

    Instead, I focus on keeping my lower body connected while allowing my torso to respond. The goal is controlled movement, not complete stillness.

    Mechanical bull riding still carries an injury risk. A study of emergency department cases found that sprains and strains were the most common injuries. Fractures and upper-extremity injuries were also reported.

    What to Do Before Riding

    What to Do Before Riding

    Preparation affects both performance and safety. I never treat the mounting area like an ordinary party game.

    Check the Ride and Operator

    A trained operator should control the speed and stop the bull when a rider loses control. The ride should also have a wide, unobstructed, padded landing area.

    Commercial inflatable amusement equipment is covered by standards addressing installation, operation, inspection, maintenance, and operator training.

    Before mounting, ask the operator to begin slowly. A gradual start gives you time to understand how that specific machine moves.

    Follow the operator’s posted height, weight, age, and health restrictions. Limits vary between machines and rental companies, so never assume every bull follows identical rules.

    Wear the Right Clothing

    Long pants protect the inside of your legs from rubbing against the bull. Jeans or other durable pants usually work well.

    Wear closed-toe shoes that remain secure during a fall. Sneakers and properly fitted boots are practical choices. Avoid flip-flops, loose sandals, high heels, skirts, dresses, dangling jewelry, and loose accessories.

    A glove may reduce friction on the gripping hand. However, it should not interfere with the ride’s safety mechanism or prevent you from releasing the handle.

    Know When Not to Ride

    Do not ride while intoxicated. Mechanical bull riding depends on coordination, judgment, balance, and reaction speed, all of which alcohol can impair.

    I would also stay off the ride after a recent concussion, fracture, surgery, joint injury, or serious back or neck problem. Pregnant guests and anyone with a condition affected by sudden movement should follow medical advice and the operator’s restrictions.

    How to Ride a Mechanical Bull Step by Step

    How to Ride a Mechanical Bull Step by Step

    Learning how to ride a mechanical bull becomes easier when each body part has a specific job.

    Mount Near the Front

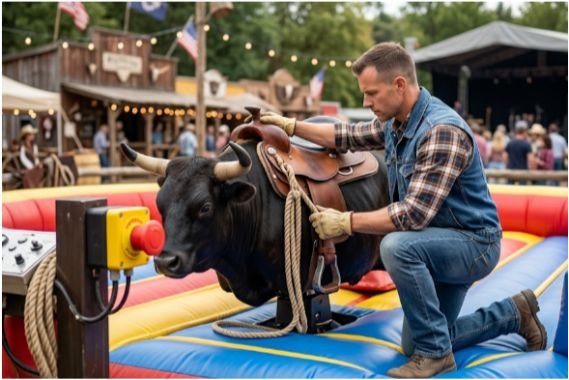
    Wait until the operator confirms that the machine has stopped. Use the designated entry point and avoid stepping on control cables, blowers, or inflatable walls.

    Sit slightly forward, near the base of the handle. Sitting too far back gives the bull more leverage over your hips.

    Center your weight evenly. Your shoulders, hips, and the bull’s centerline should initially form one vertical line.

    Build a Secure One-Handed Grip

    Hold the strap or handle with your dominant hand unless the operator instructs you differently. Close your fingers firmly without twisting the wrist into an extreme angle.

    I use enough pressure to stay connected, but I avoid a desperate “death grip.” Pulling constantly with the arm creates fatigue and can drag the shoulders out of position.

    Keep your gripping elbow bent. A locked elbow transfers more sudden movement into the wrist and shoulder.

    Some machines use a rider-operated safety switch, wrist cord, or magnetic control. Use that device exactly as the operator explains. Manufacturer instructions may require the rider’s safety magnet to remain correctly positioned for the machine to operate.

    Anchor Yourself With Your Legs

    Squeeze the bull with your inner thighs, knees, and calves. Your legs create the main physical connection to the body of the machine.

    Do not pinch only with your knees. That narrow grip can make your hips bounce. Spread the pressure along as much of your inner leg as the bull’s shape allows.

    Keep your feet clear of moving components. Never hook a foot beneath a strap, saddle edge, or structural part.

    Keep Your Hips Responsive

    Your hips should follow the bull while your shoulders remain closer to the center. Think of your waist as a hinge between a stable upper body and a moving seat.

    When the bull drops forward, allow your hips to follow while bringing your shoulders slightly back. When the front rises, move your hips forward rather than folding at the waist.

    The adjustment should remain small. Dramatic leaning often sends the rider beyond the point of recovery.

    Use Your Free Arm for Counterbalance

    Keep your non-gripping arm raised and relaxed. Move it naturally to counter the direction in which your body begins to fall.

    When your weight shifts right, the free arm can move left. When the machine pitches forward, the arm may move back slightly.

    Do not windmill wildly. Large arm swings can rotate your shoulders and make the imbalance worse.

    Look Forward

    Keep your head up and look toward the bull’s head or a fixed point beyond it. Looking down encourages your shoulders to collapse forward.

    A forward gaze also helps you notice changes in direction sooner. Your body responds faster when your eyes remain level.

    Mechanical Bull Balance Tips: The Three-Point Test

    My original three-point balance test gives beginners a fast way to diagnose their posture. During a slow practice round, check three contact points:

    1. Your gripping hand feels secure but not painfully tight.
    2. Both inner legs maintain steady contact with the bull.
    3. Your free arm can move without pulling your torso off-center.

    If one point fails, the other two must work harder. For example, weak leg pressure forces the gripping arm to carry too much load.

    The test also explains why strength alone rarely solves the problem. Efficient riders distribute control across several body parts instead of depending on one exhausted arm.

    How to React to Different Bull Movements

    Knowing how to ride a mechanical bull requires reacting to movement rather than trying to predict every motion.

    When the bull spins left, keep your chest near the center while allowing your hips to rotate with it. Move your free arm right to counter the turn.

    When the bull spins right, reverse the response. Avoid throwing your full upper body against the rotation.

    When the head dips, shift your shoulders back slightly and keep your hips connected. When the front rises, press the hips forward while keeping the chest open.

    Combined spinning and bucking creates the hardest challenge. During these movements, shorten your reactions. Small, fast corrections are more effective than one large lean.

    Common Mechanical Bull Riding Mistakes

    The most common mistake I see in beginner technique is trying to overpower every movement. The machine can change direction faster than a rider can pull against it.

    Other frequent errors include:

    • Sitting too far back
    • Looking at the floor
    • Locking the gripping elbow
    • Holding the handle with both hands without operator approval
    • Letting the knees spread apart
    • Leaning from the shoulders instead of moving the hips
    • Wearing unsuitable footwear
    • Refusing to release the handle after losing control

    Instructions can vary by equipment. Some operators require one-handed riding, while others may use different beginner rules or safety systems. Always follow the instructions for the actual machine rather than copying a technique from another venue.

    How to Fall From a Mechanical Bull More Safely

    Falling is part of the activity. A good exit matters as much as a long ride.

    Once you know you cannot recover, release the handle. Hanging on while your body falls away from the bull may place extra force on the wrist, elbow, or shoulder.

    Tuck your chin slightly and keep your limbs relaxed. Let the padded landing surface absorb the fall.

    Avoid extending a stiff arm toward the floor. Upper-extremity injuries were the most commonly affected body region in the emergency department study of mechanical bull injuries.

    After landing, pause before standing. Your balance may feel unsteady, and other riders should not enter until you have cleared the area.

    Seek medical attention after severe pain, visible deformity, loss of consciousness, confusion, breathing difficulty, numbness, weakness, or an inability to bear weight.

    How Long Should a Beginner Ride?

    A beginner should focus on control rather than a record-setting time. Ask for a slow round and stop before your grip, legs, or posture fail completely.

    My preferred progression has three stages:

    First, spend a short round learning the forward and backward motion. Next, add a slow spin. Only attempt faster combined movements after you can remain centered during both.

    Rest between attempts. Fatigued hands and inner thighs reduce control, even when the rider still feels confident.

    Frequently Asked Questions

    1. How do beginners ride a mechanical bull?

    Beginners should start slowly, sit forward, grip with one hand, squeeze with both legs, keep the free arm raised, and make small balance corrections.

    2. Should you lean forward or backward on a mechanical bull?

    Remain centered, then shift slightly opposite the pitch: shoulders back when the bull dips forward and hips forward when its front rises.

    3. How do you stay on a mechanical bull longer?

    Use steady leg pressure, a bent gripping arm, responsive hips, a level gaze, and small counterbalancing movements instead of pulling with brute force.

    4. Is riding a mechanical bull dangerous?

    Injuries can occur, so use a trained operator, follow all restrictions, ride sober, wear secure clothing, and confirm that the landing area is properly padded.

    Ride Smart, Cowboy

    Mastering how to ride a mechanical bull starts with accepting that the machine controls the speed, but you control your posture.

    I would choose one goal for the first ride: stay centered during a slow pitch. Once that feels natural, add spinning and faster changes. Keep the legs engaged, the upper body loose, and the ego outside the inflatable ring.