Author: Wyatt Harmon

  • What to Wear Riding a Mechanical Bull: Safe Outfit

    What to Wear Riding a Mechanical Bull: Safe Outfit

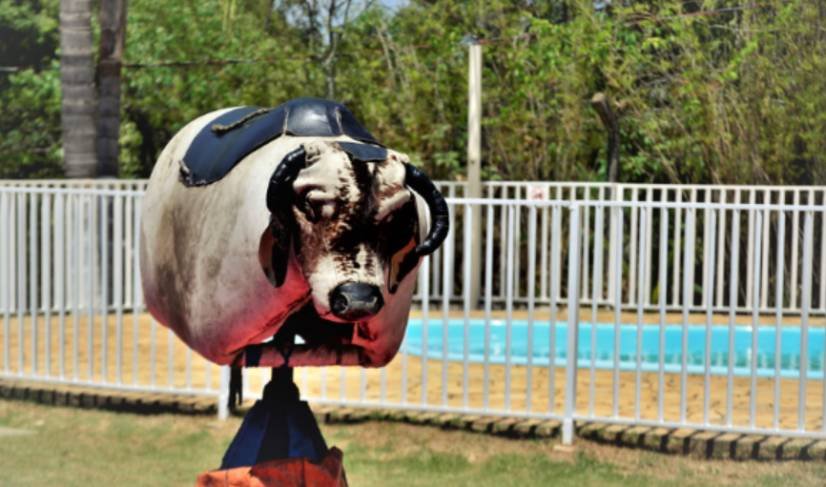
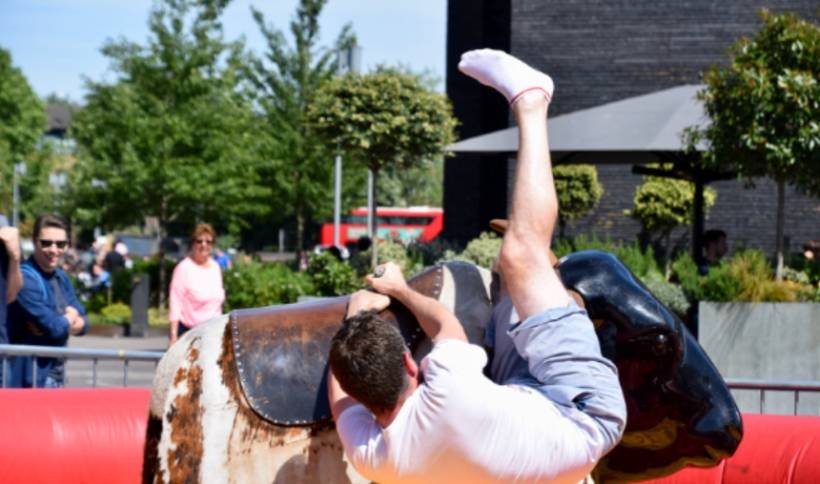
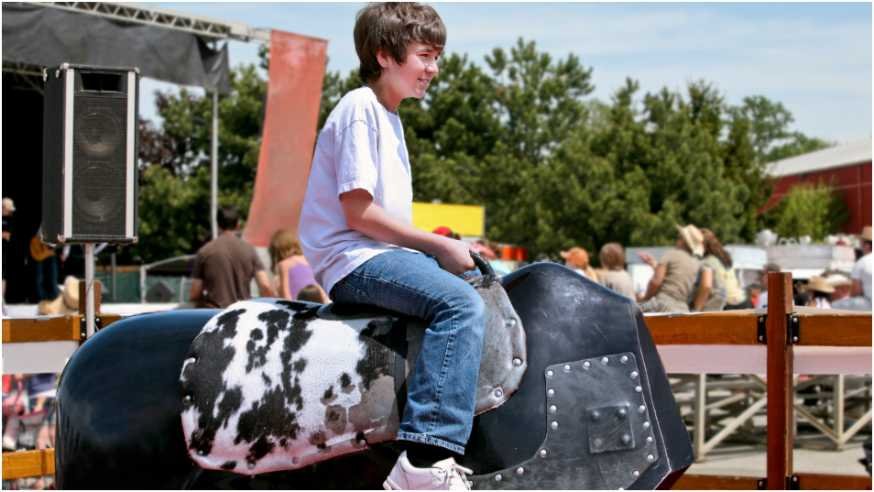
    The wrong outfit can end a mechanical bull ride before the first serious spin. When deciding what to wear riding a mechanical bull, choose clothing that grips the saddle, covers your skin, stays secure, and lets you land comfortably.

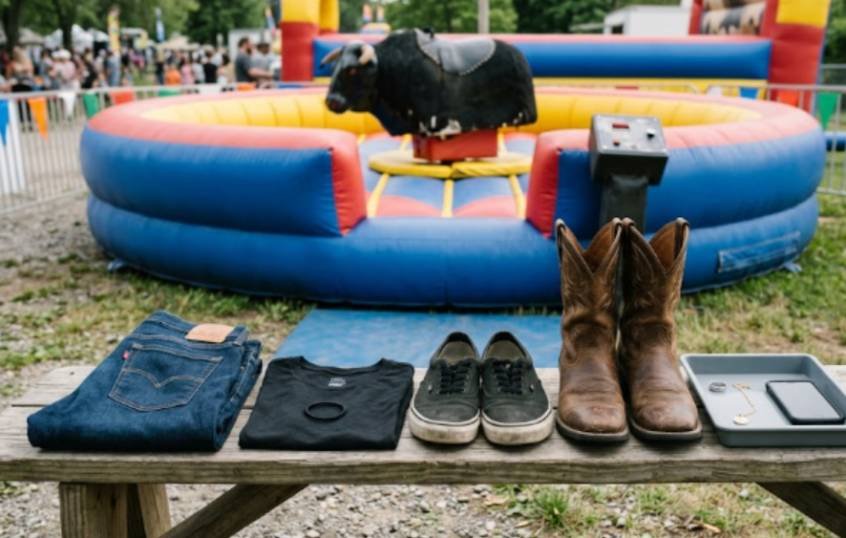
    My simplest recommendation is long stretch jeans, a fitted breathable top, and closed-toe flat shoes. You can still create a fun Western look, but function should come before fringe, jewelry, or oversized belt buckles.

    The Best Mechanical Bull Riding Outfit
    The Best Mechanical Bull Riding Outfit

    A good riding outfit must survive sudden turns, forward dips, sideways motion, and an eventual fall onto the inflatable mat. Clothing that feels comfortable while standing may behave very differently once the bull begins moving.

    Choose Long, Stretchy Jeans

    Long jeans are usually the best pants for mechanical bull riding. Denim creates more useful friction against a vinyl saddle than smooth materials such as satin, silk, or lightweight athletic nylon.

    The jeans should fit closely without restricting your hips or knees. I prefer stretch denim because it moves with the body when the rider squeezes the bull or adjusts position. Extremely tight jeans can limit movement, while baggy jeans may bunch around the seat.

    High-rise or mid-rise jeans also tend to remain secure during vigorous movement. They reduce the risk of constant waistband adjustments and provide more coverage when the rider leans forward.

    Avoid shorts, even at summer events. Exposed thighs can rub against the saddle and develop uncomfortable abrasions. Friction is a known cause of superficial skin damage, making fabric coverage a simple protective measure.

    Wear a Secure and Breathable Top

    A fitted cotton T-shirt is hard to beat. It allows free movement, absorbs some sweat, and usually stays in place better than a loose blouse or low-cut party top.

    The shirt does not need to feel skin-tight. It should simply remain secure when you raise one arm, twist your torso, or lean forward. A tucked-in tee, fitted Western shirt, or secure long-sleeve top can all work well.

    Before riding, I use a quick movement test. I lift both arms, bend forward, and rotate from side to side. If the top shifts, exposes too much skin, or requires adjustment, I choose something else.

    Avoid long drawstrings, flowing sleeves, loose scarves, and dangling decorations. Although mechanical bulls differ from playground equipment, the Consumer Product Safety Commission warns that jewelry and loose clothing components can become caught in equipment. The same anti-entanglement principle makes sense here.

    Pick Closed-Toe Shoes That Stay On

    Closed-toe sneakers or low-heeled boots are the safest practical choices. They should fit securely and offer enough traction for approaching the bull, climbing onto it, and walking away across the inflatable surface.

    OSHA notes that footwear and surface conditions both affect slip resistance. Although its guidance concerns workplaces rather than amusement rides, the basic point remains useful: stable footwear matters on unpredictable surfaces.

    Choose sneakers with tied laces or boots that fit firmly around the foot. Cowboy boots can complete the theme, but select a low, wide heel. A tall or narrow heel may feel unstable when mounting or landing.

    Why Your Clothing Affects Your Ride
    Why Your Clothing Affects Your Ride

    Understanding what to wear riding a mechanical bull becomes easier when you consider the three stages of the experience: getting on, staying on, and falling off.

    Grip Matters More Than Western Style

    Mechanical bull riders stay mounted by maintaining body position and controlled leg pressure. Smooth clothes reduce helpful contact between the rider and the saddle.

    Denim, cotton blends, and lightly textured fabrics generally perform better than slippery party materials. However, extremely rough seams or decorative studs may cause discomfort and could damage the bull’s covering.

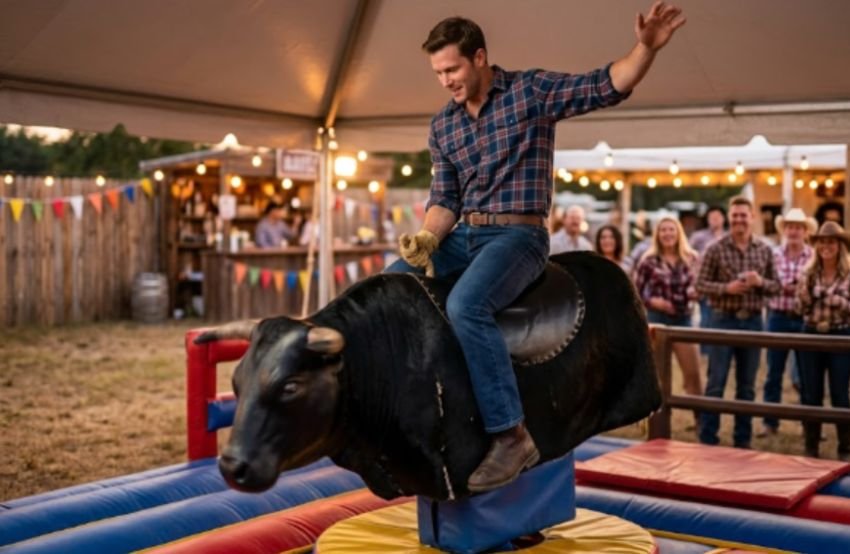
    A Western outfit can look great, but the costume should never interfere with movement. Keep the plaid shirt and boots. Skip the oversized buckle, metal chains, and dramatic fringe.

    Coverage Helps Prevent Scrapes

    Long pants create a barrier between your legs and the bull’s surface. That barrier becomes especially valuable when the machine changes direction and your body shifts across the saddle.

    A long-sleeve shirt offers more coverage, but it is not always necessary. At warm indoor venues, a breathable short-sleeve shirt may feel more comfortable. The key is protecting the areas that maintain the most contact with the bull.

    Your Outfit Must Handle the Landing

    Every rider should expect to fall. The inflatable mat reduces impact, but your outfit still affects how comfortably you land and stand up.

    Hard accessories can press into the body during a fall. Large belt buckles may dig into the stomach, while chunky rings can catch or press against the riding rope. Empty your pockets of keys, phones, and other hard objects before mounting.

    What Women Should Wear on a Mechanical Bull
    What Women Should Wear on a Mechanical Bull

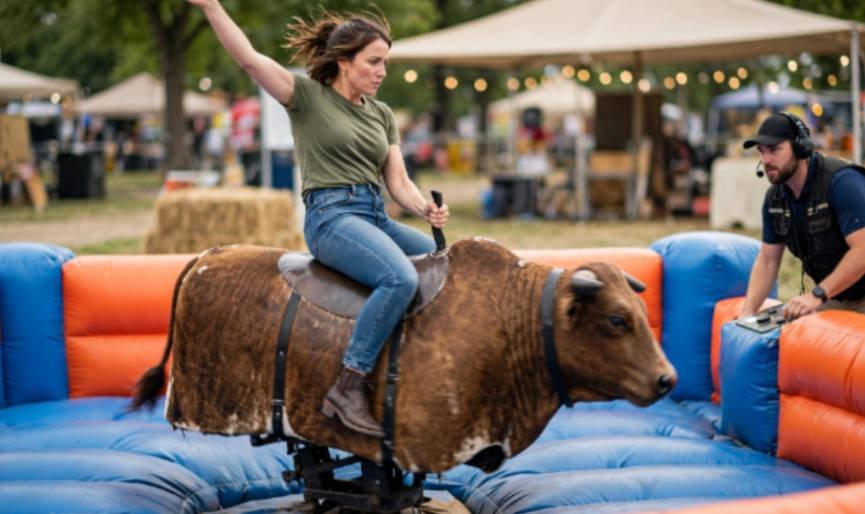
    Women wondering what to wear riding a mechanical bull should prioritize secure coverage over restrictive fashion.

    Stretch jeans with a mid-rise or high-rise waist offer reliable movement and coverage. Pair them with a fitted crew-neck T-shirt, bodysuit, or buttoned Western shirt. Check that every button and strap remains secure during movement.

    A supportive undergarment can also improve comfort during sudden bouncing and spinning. Avoid strapless tops, loose halters, skirts, dresses, crop tops that ride upward, and tops with fragile shoulder ties.

    For footwear, choose lace-up sneakers, ankle boots, or low cowboy boots. A square or rounded toe usually offers more comfort than an extremely pointed design.

    What Men Should Wear on a Mechanical Bull

    Men can wear flexible straight-leg or slim-fit jeans with a tucked or fitted T-shirt. A lightweight Western shirt also works if it fits close enough to avoid catching or flapping.

    Do not wear a thick wallet, phone, multitool, or keys in your back pockets. These items can press into the hip or lower back while seated. Move essential belongings to a bag or leave them with a friend.

    Avoid stiff jeans that prevent you from opening your hips. Riders need enough mobility to grip with their legs while allowing the upper body to respond naturally.

    What Not to Wear Mechanical Bull Riding

    What Not to Wear Mechanical Bull Riding

    Several clothing choices create unnecessary discomfort or risk:

    • Shorts, skirts, and dresses that expose the legs
    • Flip-flops, slides, sandals, or high heels
    • Loose scarves, long necklaces, and dangling earrings
    • Oversized belt buckles and sharp metal decorations
    • Slippery satin, silk, or nylon pants
    • Loose tops, fragile straps, or unsecured buttons
    • Cowboy hats and sunglasses during the actual ride
    • Phones, keys, and hard objects inside pockets

    A cowboy hat is perfect for photographs before and after the ride. Hand it to a friend before climbing onto the bull.

    My Three-Part Outfit Test Before Riding

    My original “grip, coverage, and exit” test makes choosing what to wear riding a mechanical bull much easier.

    First, check grip. Sit on a firm chair and gently shift from side to side. If the fabric slides easily, it may also slide across the bull.

    Second, check coverage. Raise one arm as you would while riding, then lean forward and twist. Your shirt and waistband should remain secure.

    Third, check the exit. Jump lightly, squat, and take several quick steps. Your shoes should stay firmly attached, and nothing should strike or press into your body.

    This test takes less than one minute. It catches most outfit problems before the operator starts the machine.

    Your clothing can support your technique, but it cannot replace correct posture. Review How to balance on a mechanical bull before your event so you understand how your free arm, hips, legs, and eyes work together.

    Extra Clothing Tips for Parties and Events

    Bring a spare shirt if the venue is warm or you expect several rides. Mechanical bull riding can become physically demanding, especially during longer sessions.

    Tie long hair back with a simple elastic. Avoid clips with sharp edges or large decorative pieces. Remove rings, bracelets, necklaces, watches, and dangling earrings.

    Ask the operator about venue-specific rules. Some companies require closed-toe shoes, restrict certain clothing, or set rider height, age, and health requirements. The operator’s instructions should always take priority over general outfit advice.

    At larger parties, organizers should also plan how to manage crowds at events so riders can enter and leave the attraction safely without congestion around the inflatable area.

    Frequently Asked Questions

    1. Can I wear leggings on a mechanical bull?

    Thick athletic leggings may work, but durable stretch jeans usually provide better protection against friction and minor scrapes.

    2. Can you wear cowboy boots mechanical bull riding?

    Yes, provided the boots fit securely and have a low, wide heel that supports stable mounting and landing.

    3. Should I wear a helmet on a mechanical bull?

    Follow the operator’s rules because helmet requirements vary by venue, rider age, equipment design, and local regulations.

    4. What to wear riding a mechanical bull at a party?

    Wear fitted jeans, a secure breathable shirt, and closed-toe flat shoes, then remove hats, jewelry, and hard pocket items.

    Ride Bold, but Dress Smarter

    Knowing what to wear riding a mechanical bull is not about creating the most elaborate cowboy costume. It is about choosing an outfit that protects your skin, supports movement, stays secure, and lets you enjoy the ride without constant adjustments.

    Wear long stretch jeans, a fitted top, and dependable closed-toe shoes. Perform the one-minute grip, coverage, and exit test before leaving home. Then hand over your phone, remove your accessories, listen to the operator, and climb aboard with confidence.
  • The Best Unforgettable Attractions for Corporate Events for Every Company Size

    The Best Unforgettable Attractions for Corporate Events for Every Company Size

    I’ve attended corporate events that were planned down to the smallest detail, yet people still spent most of the evening standing in small groups, checking their phones, or leaving early. It made me realize that great food and a nice venue can only do so much when there isn’t something that genuinely brings people together.

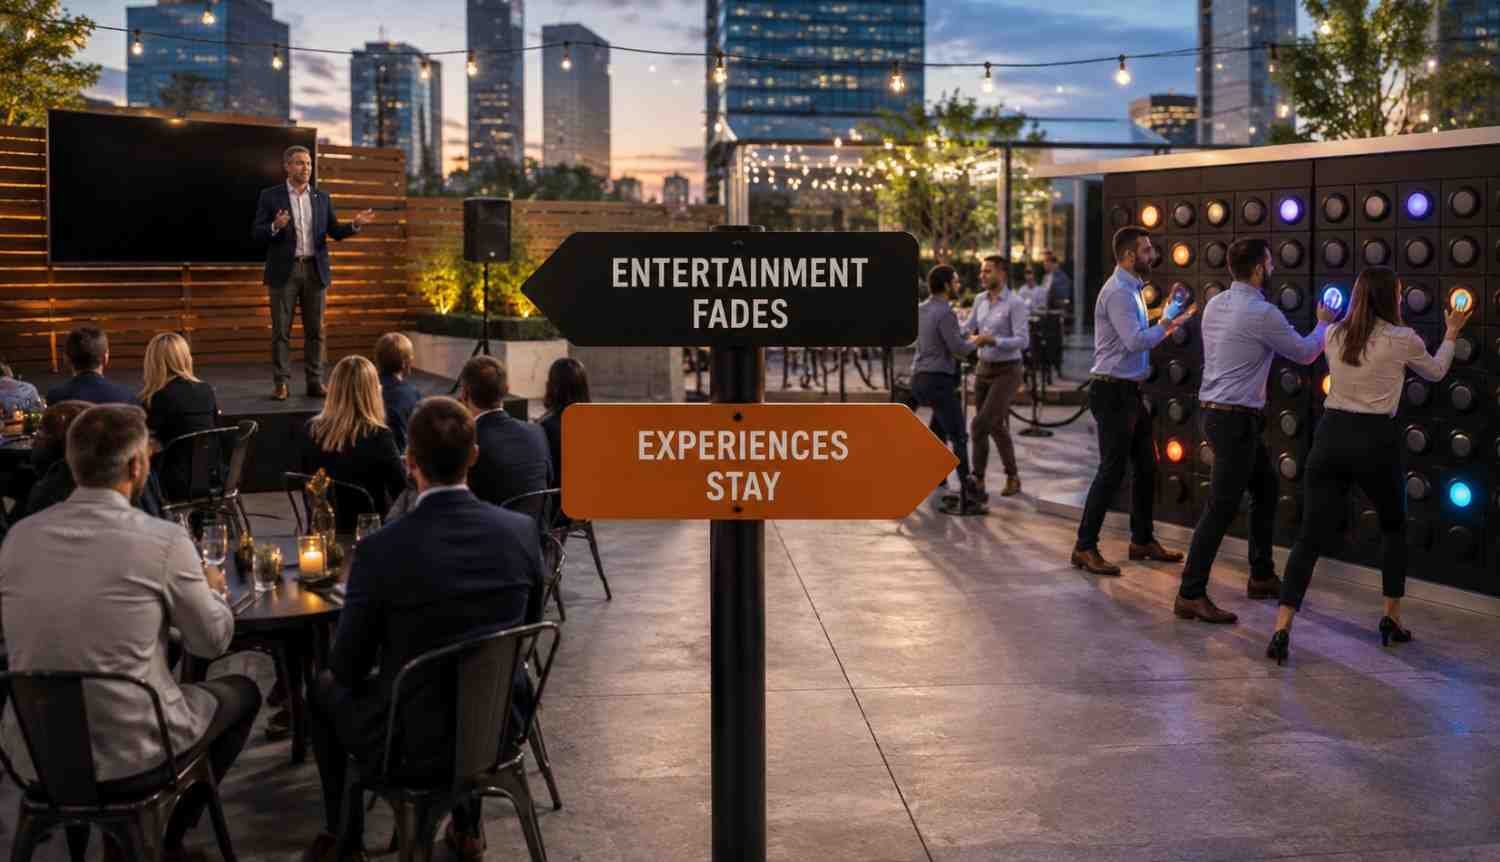
    I also started noticing that the events people remembered months later almost always had one thing in common. They featured an experience everyone could talk about afterward. Whether it was a friendly competition, an interactive attraction, or a larger-than-life activity, those shared moments made the event feel worthwhile instead of just another date on the calendar.

    Why Attractions Matter More Than Entertainment Alone

    Why Attractions Matter More Than Entertainment Alone

    Corporate events have changed significantly over the last few years. Companies no longer host gatherings simply to celebrate milestones or reward employees. They’re looking for experiences that encourage conversation, strengthen workplace relationships, and leave a lasting impression.

    Interactive attractions naturally achieve those goals because they invite participation rather than passive observation. Instead of watching a performance for an hour, guests become part of the experience. That participation often leads to better networking, stronger employee engagement, and memories that extend well beyond the event itself.

    The best attractions also support company culture. They encourage departments to interact, help new employees feel included, and create photo-worthy moments that employees are excited to share.

    The Best Attractions for Small Corporate Events

    Smaller companies have one major advantage: every employee has the opportunity to participate without feeling lost in a crowd. Attractions that require teamwork and communication tend to produce the strongest results.

    Immersive virtual reality arenas are becoming increasingly popular because they transform small groups into teams working toward a shared objective. Full-body tracking and cooperative challenges encourage problem-solving while adding plenty of excitement.

    Interactive gaming spaces that combine projection mapping, touch-screen walls, and motion tracking also create memorable experiences without requiring massive venues.

    Hands-on creative workshops are another excellent choice. Activities like glassblowing, collaborative mural painting, or craft production encourage conversations that rarely happen during a normal workday. Employees leave with something they helped create, making the event feel more personal than traditional entertainment.

    Mid-Sized Companies Have the Most Flexibility

    Mid-Sized Companies Have the Most Flexibility

    Companies with 50 to 250 employees have the freedom to create multiple activity zones without overwhelming guests.

    App-based scavenger hunts continue to grow in popularity because they encourage employees from different departments to work together while exploring a city or large venue. Teams solve puzzles, complete creative challenges, and compete in a way that feels energetic rather than overly competitive.

    Live game shows also work exceptionally well for this company size. Fast-paced trivia rounds, strategy games, and audience participation keep energy levels high while giving everyone opportunities to contribute.

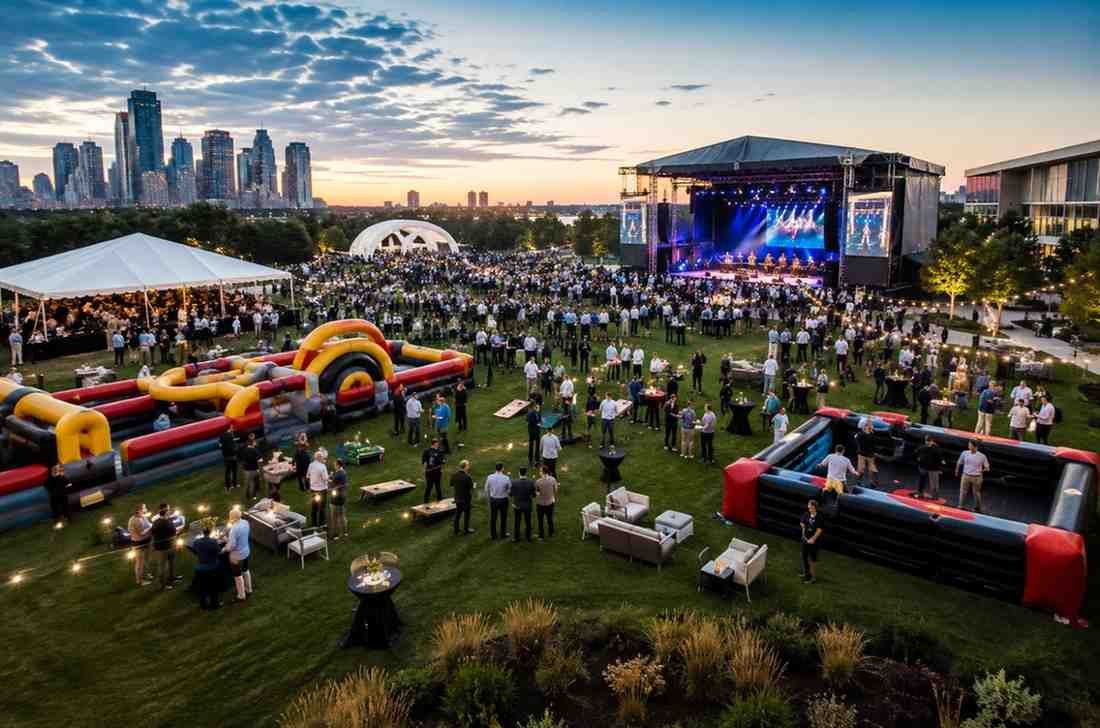
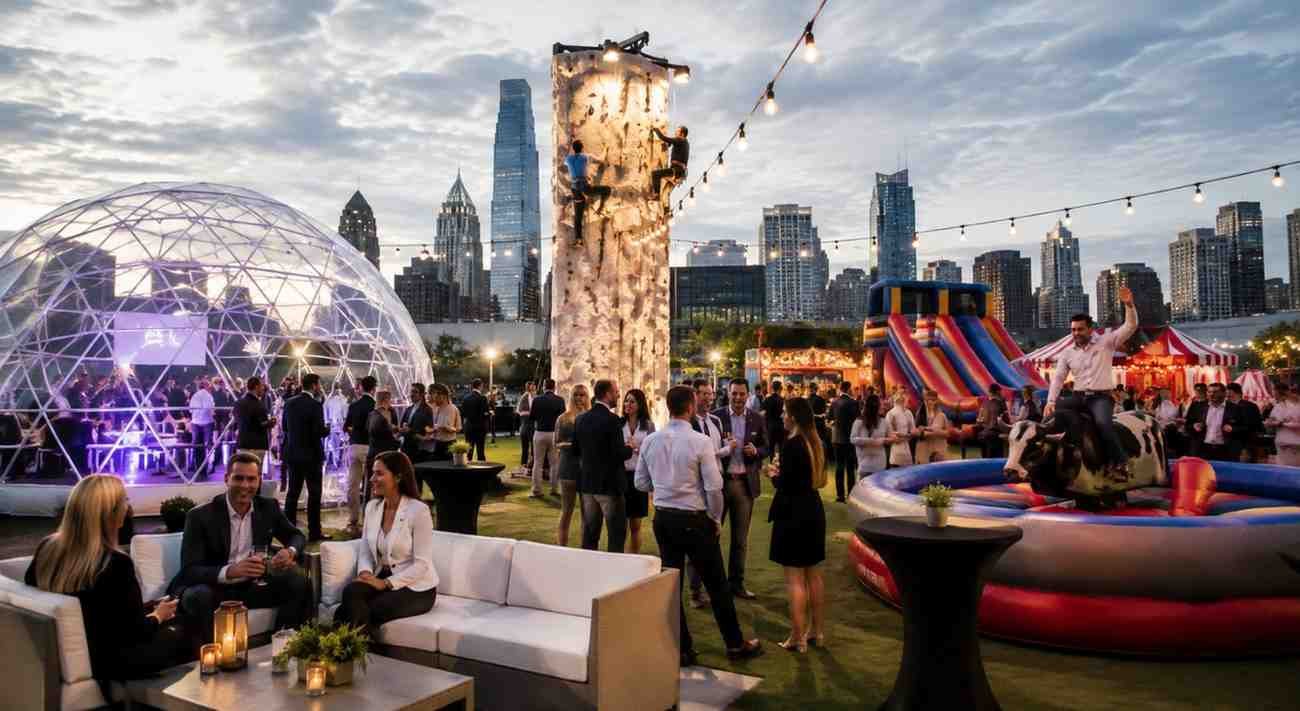
    Many organizations also choose lifestyle venues that combine indoor and outdoor entertainment. Lawn games, casual seating, food stations, and private meeting areas allow employees to move naturally between networking and entertainment without feeling confined to one activity.

    Large Corporate Events Need Signature Experiences

    Large enterprises face a different challenge. Thousands of attendees require attractions that remain engaging throughout the day while supporting smooth crowd movement.

    Create a Visual Experience People Remember

    Projection mapping has become one of the most impressive event technologies available. Entire venues can transform into immersive digital environments where walls, stages, and ceilings become part of the experience.

    These large-scale visual installations work particularly well for conferences, product launches, annual celebrations, and corporate galas because they reinforce branding while delivering an unforgettable atmosphere.

    Offer Activities That Handle Large Crowds

    Offer Activities That Handle Large Crowds

    Office Olympics, charity build events, and large obstacle challenges provide structured participation for hundreds or even thousands of employees.

    Fitness-based corporate challenges also continue gaining popularity because they combine wellness, teamwork, and community involvement into one event. Instead of watching from the sidelines, employees actively contribute to a shared goal that reflects the organization’s culture.

    Attractions That Appeal to Every Guest

    Not every attendee wants high-energy activities, and that’s perfectly normal. The strongest corporate events offer a variety of experiences so guests can participate in ways that feel comfortable.

    A balanced event may include:

    • Interactive rides, midway games, and team competitions for energetic guests.
    • Relaxed social spaces with lawn games, photo booths, live music, and comfortable seating for those who prefer casual networking.

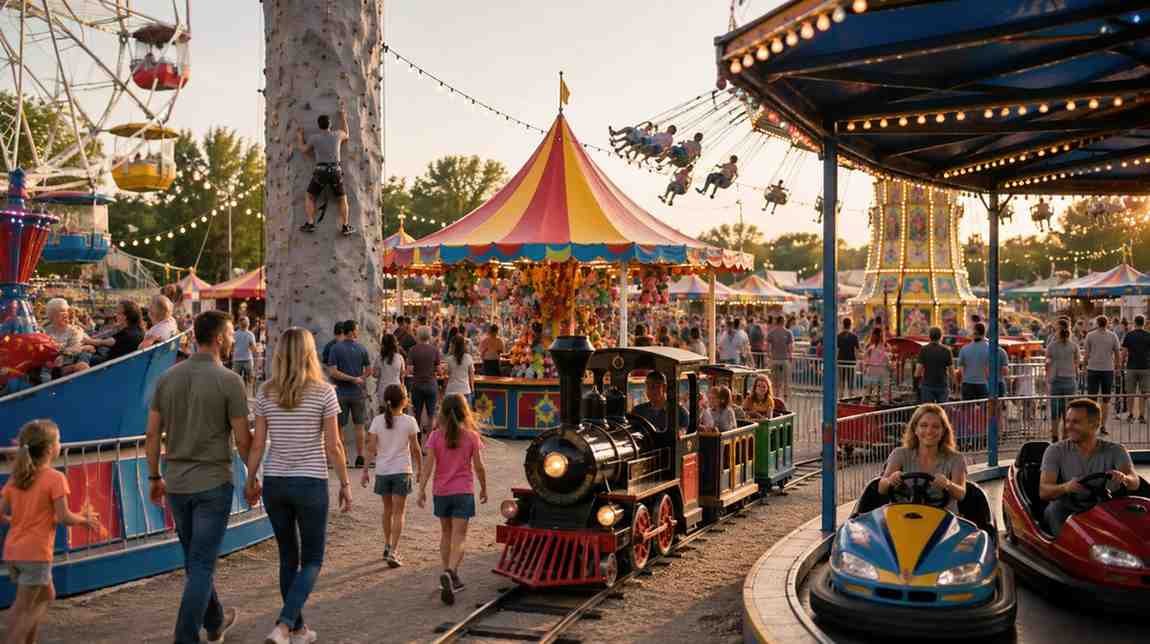
    This balance helps ensure everyone finds something enjoyable regardless of age, personality, or physical ability. Many planners also take inspiration from best carnival attractions for community events because those experiences are designed to engage large, diverse audiences while remaining accessible and inclusive.

    Common Mistakes That Can Limit Your Event

    Common Mistakes That Can Limit Your Event

    Choosing attractions simply because they’re trending doesn’t always produce the best experience.

    One common mistake is selecting activities that only appeal to a small percentage of attendees. Another is overlooking venue logistics, including power requirements, available space, guest flow, and weather contingency plans.

    It’s equally important to consider timing. Placing every attraction in one area often creates long lines while leaving other spaces underused. Spreading attractions throughout the venue encourages movement and creates a more balanced event experience.

    Finally, don’t underestimate the value of clear communication. Employees should understand where attractions are located, how activities work, and whether registration is required before the event begins.

    FAQs: The Best Unforgettable Attractions for Corporate Events for Every Company Size

    1. What are the most popular attractions for corporate events?

    Interactive attractions such as virtual reality experiences, scavenger hunts, carnival games, game shows, obstacle courses, and projection mapping consistently attract high participation.

    2. How do I choose attractions based on company size?

    Smaller companies benefit from collaborative experiences, mid-sized organizations perform well with multiple activity zones, and large enterprises need scalable attractions that efficiently accommodate bigger crowds.

    3. Are carnival attractions suitable for professional events?

    Yes. Modern carnival attractions can be customized for corporate audiences and provide interactive entertainment that encourages networking and employee engagement.

    4. How far in advance should attractions be booked?

    Many premium attractions are reserved several months in advance, especially during peak corporate event seasons. Early booking provides more flexibility and availability.

    Why Shared Experiences Stay With People Longer

    Employees may forget the menu, the decorations, or even the keynote presentation, but they rarely forget the moments when they laughed together, solved a challenge as a team, or experienced something completely unexpected. Those shared memories strengthen workplace relationships in ways that meetings and presentations simply can’t.

    The right attraction doesn’t just fill part of an agenda. It becomes the experience everyone remembers long after the event has ended.

  • Foolproof Guide: How to Write Event Safety Plan That Works

    Foolproof Guide: How to Write Event Safety Plan That Works

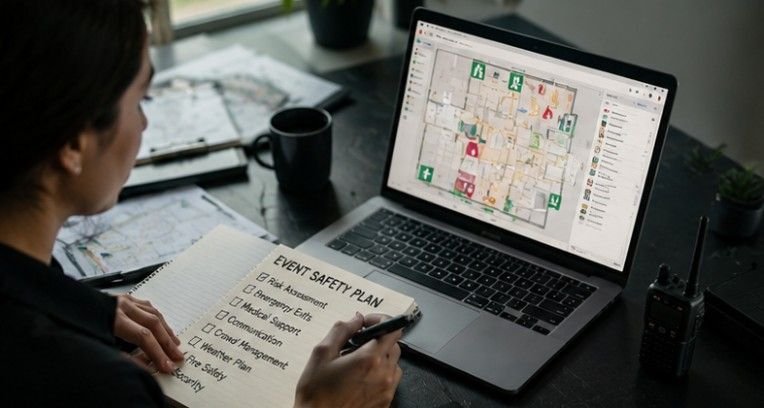
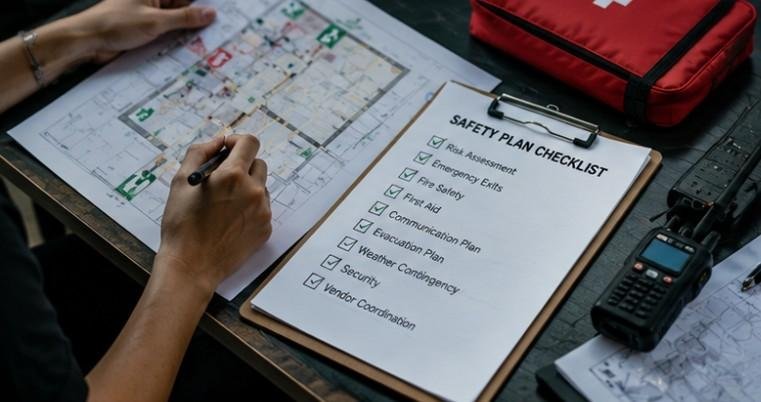
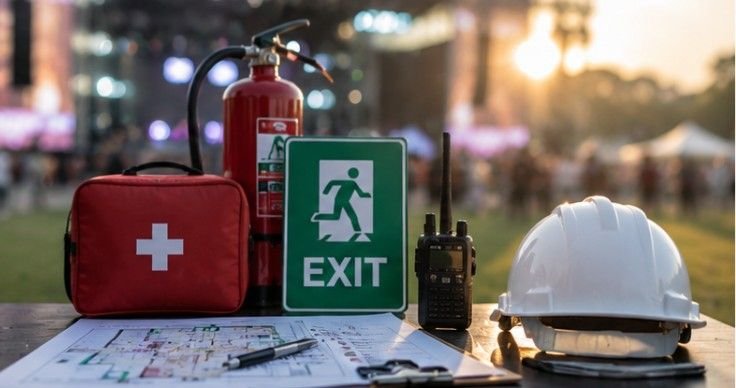
    Gathering thousands of eager fans for a live concert or local festival brings unmatched energy, but keeping everyone secure requires a clear blueprint. Learning how to write event safety plan frameworks turned our chaotic production schedule into a seamless, worry-free operation. You do not need a degree in crisis management to protect your crowd and venue staff effectively.

    With a practical strategy in hand, you can easily anticipate potential hazards, organize your staff, and satisfy local municipal compliance standards. We are here to walk you through every single step with zero jargon. Let us transform complex security requirements into a straightforward playbook that keeps your next big gathering completely safe.

    Essential Core Components for Your Event Blueprint

    Laying a solid foundation begins with gathering essential venue details and assigning clear operational leadership.

    Event Overview and Foundational Details

    Every successful security strategy starts with a comprehensive event overview. You need to record basic administrative data, including the official event name, exact physical location, operating schedule, and primary organizer contact details. Recording these core facts gives external partners and emergency services immediate clarity on your venue layout and event scope.

    Top institutions like Arizona State University highlight the importance of documenting site parameters early in their Event Safety Plan (ESP) Template. Defining whether your event takes place indoors or outdoors helps determine structural setup needs, generator placements, and environmental risk exposure. Keeping this basic overview accurate ensures all subsequent risk management steps align perfectly with your actual site footprint.

    Roles and Responsibilities for Key Personnel

    Organizing your staff around defined responsibilities is critical for maintaining order. Your documentation must list clear decision-makers, lead security managers, and medical coordinators along with their direct mobile phone numbers. When an unexpected incident occurs, team members must know exactly who holds the authority to pause performances or call for emergency support.

    Following guidelines from the Event Safety and Planning Checklist, delegating specific oversight duties prevents duplicated efforts during fast-moving situations. Assign dedicated captains to monitor entry gates, vendor areas, and parking zones. Providing every team member with a clear operational hierarchy ensures that safety protocols are executed swiftly and without hesitation.

    Comprehensive Risk Assessment and Hazard Scoring

    Identifying site hazards in advance allows you to mitigate risks before attendees arrive.

    A thorough risk assessment serves as the proactive engine of your safety document. You must evaluate every potential hazard, from unstable staging and exposed wiring to extreme weather exposure and medical emergencies. Scoring these hazards based on how likely they are to happen and how severe their impact would be helps prioritize your security budget.

    Adhering to MIT EHS guidelines ensures your team addresses both common and high-severity operational threats. A high-probability, low-impact risk like a minor slip might require simple salt distribution, while a low-probability, high-impact risk like a structural failure demands immediate professional engineering oversight. Matrix scoring keeps your resource allocation balanced and effective.

    Mastering Crowd Management and Site Access Protocols

    Regulating crowd movement and monitoring entrance gates maintains venue stability throughout your event.

    Mastering Crowd Management and Site Access Protocols

    Perimeter Security and Entry Screening

    Establishing strong perimeter security is your first line of defense against potential safety breaches. Define clear physical boundaries using temporary fencing, barricades, and clearly marked entry points. Implementing organized bag checks and metal detection screening at main gates prevents hazardous items from entering your venue space.

    Structured screening procedures also reassure attendees that their well-being is being actively protected. Staffing entrance lanes with trained personnel keeps lines moving efficiently while maintaining thorough checks. Clear signage outlining prohibited items prior to the screening area reduces gate friction and keeps security checkpoints operating smoothly.

    Maximum Capacity Limits and Flow Control

    Overcrowding poses severe risks to crowd safety and venue infrastructure. You must calculate precise venue capacity limits based on local fire codes and available square footage. Monitoring attendee counts at all entry and exit gates ensures your site never exceeds safe density thresholds during peak hours.

    Designing wide pedestrian thoroughfares and using serpentine queuing systems keeps crowd flow steady around main stages and concessions. Placing staff at potential choke points allows you to redirect foot traffic before dangerous surges occur. Proper space planning guarantees that attendees move freely while keeping clear access lanes for medical teams.

    Real-World Action Steps

    Translating planning concepts into clear operational documentation requires a systematic step-by-step approach.

    Real-World Action Steps

    Drafting Actionable Step-by-Step Response Guides

    Writing an actionable safety plan starts with organizing your protocols into chronological sections. Begin by detailing pre-event setup checks, followed by active-event monitoring steps, and concluding with post-event breakdown procedures. Using clean, plain language ensures that any staff member or volunteer can understand their duties without needing technical training.

    Resource guides such as the SIRV Security Plan Event Template emphasize using simple response templates for specific scenarios. Outline exact procedures for lost children, suspicious packages, power outages, and severe weather delays. Having standardized, step-by-step instructions pre-written eliminates panic and ensures consistent performance across your entire operational team.

    Conducting Staff Briefings and Training Drills

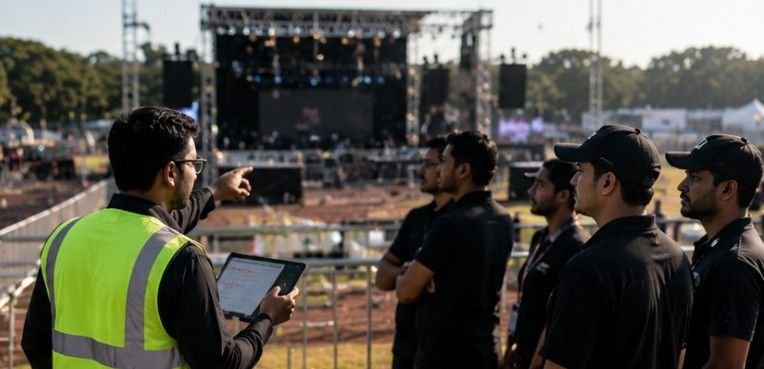
    A well-written document is only effective if your team understands how to execute it on the ground. Host mandatory pre-event briefings with all staff, security personnel, and key vendors to review emergency procedures. Running brief mock scenario drills helps identify communication gaps and clarifies individual responsibilities before gates open to the public.

    Distributing concise reference cards to field staff gives them immediate access to emergency phone numbers and evacuation maps. Encouraging open feedback during training sessions helps refine operational steps based on real-world staff observations. Thorough preparation builds a confident team capable of handling any situation calmly.

    Emergency Response and Medical Support Systems

    Preparing comprehensive medical and evacuation procedures ensures attendee protection during critical health or weather events.

    Emergency Response and Medical Support Systems

    Medical Support and First-Aid Station Setup

    Establishing accessible medical support stations across your venue layout is essential for public safety. Clearly mark all first-aid tents with elevated signage so attendees can locate medical help instantly from anywhere on-site. Stock stations with essential supplies, automated external defibrillators, and fully certified medical professionals based on total management of crowd size.

    Positioning medical posts near high-density areas allows for rapid response times when injuries occur. Contracting professional emergency medical services ensures seamless handoffs if an attendee requires transport to a local hospital. Maintaining detailed medical incident logs helps identify recurring venue hazards during the event.

    Evacuation Routes and Assembly Point Mapping

    An effective evacuation strategy requires clearly mapped exit routes that remain unobstructed throughout your entire event. Designate multiple primary and secondary assembly points located safely outside your venue perimeter. Ensure all emergency exits feature brightly illuminated signage and crash-bar hardware for quick manual operation.

    Consulting resources like the National Weather Service Event Ready Guide helps you plan dedicated access corridors for incoming emergency vehicles. Keeping designated emergency lanes completely clear of vendor trucks and pedestrian crowds allows fire and rescue teams to reach critical zones instantly. Clear physical mapping saves vital minutes during time-sensitive evacuations.

    Multi-Channel Communication Systems

    Maintaining uninterrupted communication across your entire team is essential during fast-moving events. Utilize dedicated two-way radio channels, assigning separate frequencies for general operations, security personnel, and medical responders. Establishing a strict radio protocol prevents channel clutter and keeps emergency communication lines open at all times.

    Incorporate public address systems and digital display screens to deliver clear instructions to attendees during unexpected disruptions. Pre-scripting announcement messages for weather delays or evacuations prevents panic and delivers authoritative guidance. Seamless communication ensures every part of your safety network moves as a unified team.

    Frequently Asked Questions 

    1. How to write a safety plan?

    Learning how to write event safety plan documentation involves identifying venue hazards, scoring potential risks, and assigning key roles. You must map exit routes, detail medical protocols, establish clear communication channels, and coordinate directly with local emergency services.

    2. What are the five C’s of event planning?

    The five C’s are Concept, Control, Coordination, Cultivation, and Closeout. The Control phase focuses on risk management, vendor compliance, crowd monitoring, and safety execution to keep your event safe and seamless.

    3. How to write an event plan?

    Write an event plan by outlining goals, schedules, budgets, and venue layouts. Include dedicated sections for staffing responsibilities, vendor management, promotional strategy, crowd flow, and a complete emergency safety protocol.

    4. What are some ideas for safety events?

    Great ideas include conducting interactive CPR workshops, hosting pre-event mock evacuation drills, offering fire extinguisher practice, and setting up guest safety awareness booths. Interactive training keeps staff prepared for unexpected emergencies.

    Ready to Throw the Safest Party on the Planet?

    Creating an outstanding safety strategy gives you the confidence to host unforgettable gatherings without stressing over unexpected crises. By assessing venue hazards, assigning clear staff roles, and mastering how to write event safety plan documents, you protect your crowd and reputation simultaneously. Put these proven steps into action today, empower your operational crew, and launch your next big event with complete peace of mind!

  • How to Manage Wedding Planning Stress Naturally Without Losing the Joy

    How to Manage Wedding Planning Stress Naturally Without Losing the Joy

    One minute, you are saving dreamy venue photos and imagining the perfect celebration. The next, you are comparing contracts at midnight, answering family group chats, and wondering why choosing napkin colors feels like a major life decision. 

    I learned that how to manage wedding planning stress naturally is not about forcing myself to stay calm every second. It is about creating enough structure, space, and support to enjoy the engagement without letting the planning process take over.

    Why Does Wedding Planning Cause So Much Stress?

    A wedding brings together money, family relationships, personal expectations, and time-sensitive decisions. You may need to compare dozens of vendors while managing opinions from parents, friends, and social media.

    Decision fatigue can make even small choices feel emotionally draining. After comparing venues, photographers, invitation styles, flowers, and seating arrangements, your brain may struggle to evaluate another option. Social media adds pressure by presenting elaborate weddings as everyday standards.

    I find it helpful to identify the specific source of stress instead of labeling the entire wedding “overwhelming.” Ask whether the main problem is the budget, family conflict, vendor uncertainty, too many choices, or an unequal division of labor. A specific problem is much easier to address.

    How Can I Set Wedding-Planning Boundaries That Work?

    Time-Box Your Weekly Planning Sessions

    Choose one recurring planning window each week and limit it to approximately one hour. Use that meeting to review deadlines, make urgent decisions, assign responsibilities, and update your budget.

    You may need occasional additional sessions as the wedding approaches, but a default time limit prevents planning from spreading into every evening. The Knot and David’s Bridal similarly recommend setting boundaries and stepping away from wedding-related tasks regularly.

    Schedule No-Wedding Dates

    Schedule No-Wedding Dates

    Protect certain evenings, dates, or weekends from wedding conversations. During that time, do something you enjoyed together before becoming engaged. Watch a movie, visit a new restaurant, meet friends, or spend an afternoon outdoors.

    Couples in online wedding communities frequently describe mental distractions and no-wedding dates as helpful ways to create breathing room. These experiences are anecdotal, but they reinforce an important principle: your relationship needs time that is not centered on event management.

    Limit Your Inspiration Folder

    Pinterest, Instagram, and TikTok can inspire creative ideas, but they can also encourage comparison and perfectionism. Select 10 to 15 images that best represent your vision, then stop adding new ones.

    When making a specific decision, narrow your choices to three realistic options that suit your priorities and budget. More choices do not necessarily produce a better wedding; they often create decision paralysis.

    Create a Digital FAQ Hub for Guests

    Use your wedding website to answer recurring questions about travel, hotel blocks, dress codes, parking, registries, plus-one rules, and event times. A clear FAQ page can reduce repeated texts and calls while helping guests find accurate information independently.

    What Natural Techniques Calm Wedding Anxiety?

    Practice Exhale-Focused Breathing

    Try a physiological sigh when tension rises: inhale through your nose, take a second shorter inhale, and follow it with a slow, extended exhale through your mouth. Repeat gently for several rounds.

    Avoid claims that breathing instantly lowers cortisol. However, research suggests that five minutes of daily exhale-focused cyclic sighing may improve mood and reduce respiratory rate and feelings of anxiety.

    Move Your Body Every Day

    Move Your Body Every Day

    Walking, running, dancing, strength training, yoga, or another enjoyable activity can give physical tension a healthy outlet and support your mood. You do not need an intense workout. A phone-free walk can interrupt repetitive thoughts and create distance from a frustrating vendor email or family disagreement.

    Try Five Minutes of Mindfulness

    Use a meditation app such as Insight Timer or Headspace, follow a free guided session, or simply sit quietly and notice your breathing. Five to 10 minutes can help you reconnect with the present instead of mentally rehearsing every possible wedding problem.

    Mindfulness should support your planning routine, not become another task you feel pressured to perform perfectly.

    Protect Sleep, Meals, and Hydration

    Late-night planning often feels productive, but it can reduce concentration and increase irritability the following day. Set a firm stopping time and write unfinished thoughts in a notebook rather than reopening your laptop.

    Eat regular meals with protein, fiber, and satisfying carbohydrates, especially on busy appointment days. Drink water throughout the day and reduce caffeine when you feel unusually restless or struggle to sleep. Hitched also highlights hydration, caffeine limits, adequate sleep, and breaks from planning as practical wedding stress-management habits.

    Practice Radical Acceptance

    Accept that minor problems will happen. A guest may cancel, the weather may change, or a decoration may look slightly different from the inspiration photo.

    Acceptance does not mean ignoring preventable issues. It means recognizing that a meaningful wedding does not require flawless execution. Decide what truly matters, prepare reasonable backup plans, and allow small imperfections to remain small.

    How Should Couples Divide Wedding-Planning Responsibilities?

    Avoid asking your partner to “help” with a project that still belongs entirely to you. Instead, divide full areas of ownership according to your strengths.

    One partner might handle vendor communication, transportation, and music, while the other manages the budget, stationery, and catering. The person who owns a category should track its deadlines and follow-ups without requiring constant reminders.

    You can also delegate discrete tasks to eager relatives or wedding-party members. Ask someone to research hotel room blocks, collect family addresses, confirm transportation details, or organize welcome bags. Give each person a clear task, deadline, budget, and expected outcome.

    When your budget allows, consider hiring a full-service planner, partial planner, or day-of coordinator. Professional support can reduce the logistical workload, but discuss the scope carefully so you know which responsibilities remain yours.

    How Can I Handle Family Pressure and Budget Anxiety?

    How Can I Handle Family Pressure and Budget Anxiety

    Set boundaries early when relatives offer repeated opinions. You might say, “We appreciate the suggestion, but we have already chosen what works for us.” You do not need to share every price, disagreement, or unfinished decision.

    For financial stress, review your total budget, deposits, remaining balances, and emergency cushion before approving new expenses. Choose three priorities that matter most to you and your partner. Spending according to shared values can make it easier to decline upgrades that do not improve your experience.

    What Is a Five-Minute Wedding Stress Reset?

    When you feel overwhelmed, stop checking messages and step away from social media. Take several slow breaths, write the exact problem in one sentence, and ask whether it requires action today. Choose one manageable next step and postpone all nonurgent decisions until you feel calmer.

    This brief reset prevents one unexpected problem from turning into an exhausting evening of rushed choices.

    Frequently Asked Questions (FAQs)

    1. How do I stop thinking about wedding planning constantly?

    Keep every task in one central planning hub, schedule designated planning hours, batch vendor emails, and protect wedding-free evenings. Writing down unfinished tasks can also help you mentally release them.

    2. How can I manage wedding planning stress naturally every day?

    Use regular movement, exhale-focused breathing, adequate sleep, balanced meals, hydration, mindfulness, clear boundaries, and realistic planning limits. Consistent habits usually provide more support than waiting until burnout develops.

    3. Can wedding planning damage a relationship?

    Stress can expose differences in communication, spending, family boundaries, and responsibility sharing. Weekly check-ins, complete task ownership, honest conversations, and no-wedding dates can reduce resentment.

    4. When should I get professional help for wedding anxiety?

    Consider speaking with a licensed mental health professional if anxiety consistently disrupts your sleep, appetite, work, relationships, or daily functioning. Persistent panic, hopelessness, or severe conflict deserves appropriate support.

    Creating a Calmer Engagement Experience

    When I think about how to manage wedding planning stress naturally, I focus on progress rather than perfection. A structured schedule, clear boundaries, physical stress regulation, and an equal division of labor can make the process feel far more manageable.

    Your wedding deserves thoughtful planning, but your well-being should remain a non-negotiable part of the budget and timeline. That includes thinking ahead about how to avoid heat exhaustion at a summer wedding while protecting your relationship and accepting that minor imperfections will happen. With the right mindset, planning can feel like a shared experience rather than an extended test of endurance.

  • Temporary Structure Safety for Events Ultimate Setup Playbook

    Temporary Structure Safety for Events Ultimate Setup Playbook

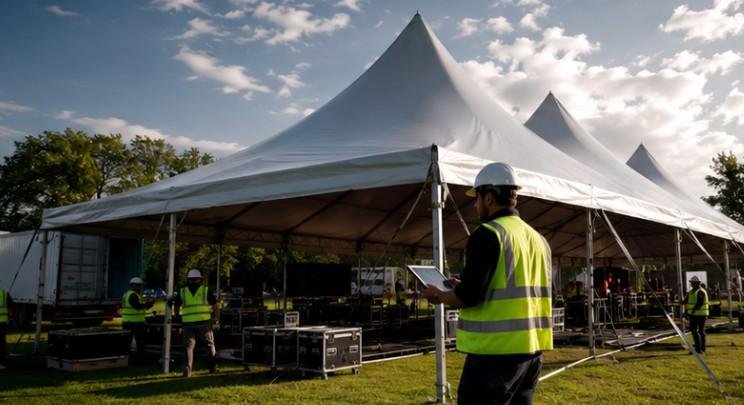
    We all love the electric energy of an outdoor festival, but behind every great concert or corporate rally lies a massive commitment to temporary structure safety for events. Nothing ruins a celebration faster than a shifting stage or a loose marquee when the wind picks up. We are here to guide you through every essential safety step so your gatherings stay fully compliant, rock-solid, and completely worry-free.

    Key Takeaways

    1. Calculating vertical structural loads ensures heavy staging, lighting rigs, and sound equipment remain fully supported without risk of tipping or collapse.
    2. Following national standards like ANSI E1.21-2024 guarantees that temporary outdoor stages withstand live loads, dynamic forces, and unexpected environmental changes.
    3. Monitoring real-time wind speeds with on-site anemometers allows teams to take swift action before high gusts compromise open-air tents and trusses.
    4. Matching ground anchoring options to specific soil types prevents dangerous structural shifting during heavy rainfall or intense foot traffic.
    5. Securing formal handover certificates from independent inspectors provides verifiable proof that your event site is officially safe for public entry.

    Structural Loads and Engineering Design Rules

    Setting up temporary event venues requires deep technical planning to guarantee every frame, stage, and overhead truss remains balanced under heavy loads.

    Calculating Vertical Structural Loads

    Vertical loads represent the total combined weight pushing directly down on your event foundations. We always factor in the self-weight of structural steel frames, subflooring, heavy concrete ballast, and massive suspended gear like speakers and LED video walls. Neglecting any component can cause uneven weight distribution that compromises overall structural integrity.

    When planning complex stage designs, we refer strictly to updated technical framework standards like ANSI E1.21-2024 for temporary structures. These engineering guidelines outline exact weight allowances and dynamic motion forces generated by moving equipment or performing artists. Applying these precise calculations upfront prevents structural sagging and catastrophic frame failures during showtime.

    Engineering Data and Certified Drawings

    Every major temporary installation requires verified engineering documentation prepared by a qualified structural professional. We never rely on guesswork or basic visual estimates when erecting large clearspan tents or elevated spectator grandstands. Professional engineering drawings specify exact load boundaries, connection details, and stress limits tailored to your specific event site footprint.

    Reviewing these technical documents before construction gives your setup crew a clear roadmap for safe assembly. Certified drawings also provide clear evidence to local authorities that your temporary build meets rigorous engineering practices. Keeping these stamped structural plans accessible on site ensures complete transparency during official municipal inspections.

    Navigating Building Code Regulations

    Navigating Building Code Regulations

    Local building codes dictate strict legal parameters for temporary gathering spaces to protect public safety. We pay close attention to Chapter 31 specifications covering tents, grandstands, and special structures within the International Building Code framework. These regulations define mandatory height limits, fire resistance standards, exit capacities, and maximum allowable operational durations.

    Complying with Chapter 31 regulations ensures your venue satisfies both municipal fire safety rules and structural building guidelines. Failing to secure the right permits can result in costly project delays or total event shutdowns right before doors open. Building strong working relationships with local inspectors early guarantees a smooth approval process for your temporary venue.

    Anchoring and Smart Weather Management

    Unpredictable outdoor weather poses a constant threat to temporary installations, making secure ground ties and real-time atmospheric tracking absolutely essential.

    Tracking Real-Time Wind Limits

    Wind forces can turn large canvas tents and stage scrims into giant sails if maximum wind load thresholds are exceeded. We establish clear operational wind speed limits during the planning phase and install calibrated digital anemometers directly on top of structural trusses. Continuous wind tracking allows us to receive instant alerts when sudden gusts approach critical engineering limits.

    Having pre-established action levels ensures our crew knows exactly when to lower hanging video screens or remove side curtains. If wind speeds surpass safe operational boundaries, clear protocols dictate immediate stage evacuation procedures to protect artists and audience members. Proactive weather monitoring removes dangerous surprises and keeps everyone safe during unexpected storms.

    Securing Heavy Ground Anchors

    Anchoring systems must provide sufficient hold-down resistance to counteract vertical uplift and lateral sliding forces caused by wind. We select specialized ground security methods, including heavy-duty steel stakes, water-filled weight containers, or massive concrete ballast blocks. The chosen method must directly match the specific soil density or pavement condition at your venue.

    Driving steel pins deep into compact earth offers superior holding power compared to surface weights on smooth asphalt. When using concrete blocks on concrete surfaces, we always calculate surface friction coefficients to prevent weights from sliding under lateral pressure. Proper anchoring guarantees your temporary structures remain firmly planted regardless of ground shifts or wind stress.

    Essential Industry Safety Guidelines

    Staying informed on modern safety recommendations requires referencing established industry health and safety publications. We regularly review health and safety advice from HSE Temporary Demountable Structures alongside expert technical breakdowns published in Structure Magazine. These authoritative resources share vital insights regarding hardware wear, fatigue limits, and real-world failure prevention tactics.

    Integrating these expert recommendations into your standard operating procedures elevates your overall site safety management. Continuous education keeps build crews aligned with global best practices for rigging, framing, and anchoring temporary venues. Prioritizing ongoing training ensures your team identifies potential structural hazards long before they threaten public safety.

    Executing Erection Inspections and Handover Sign-Offs

    Verifying structural stability through formal inspection processes ensures every fastener, cable, and baseplate is completely secure before public entry.

    Executing Erection Inspections and Handover Sign-Offs

    Rigorous Build Check Inspections

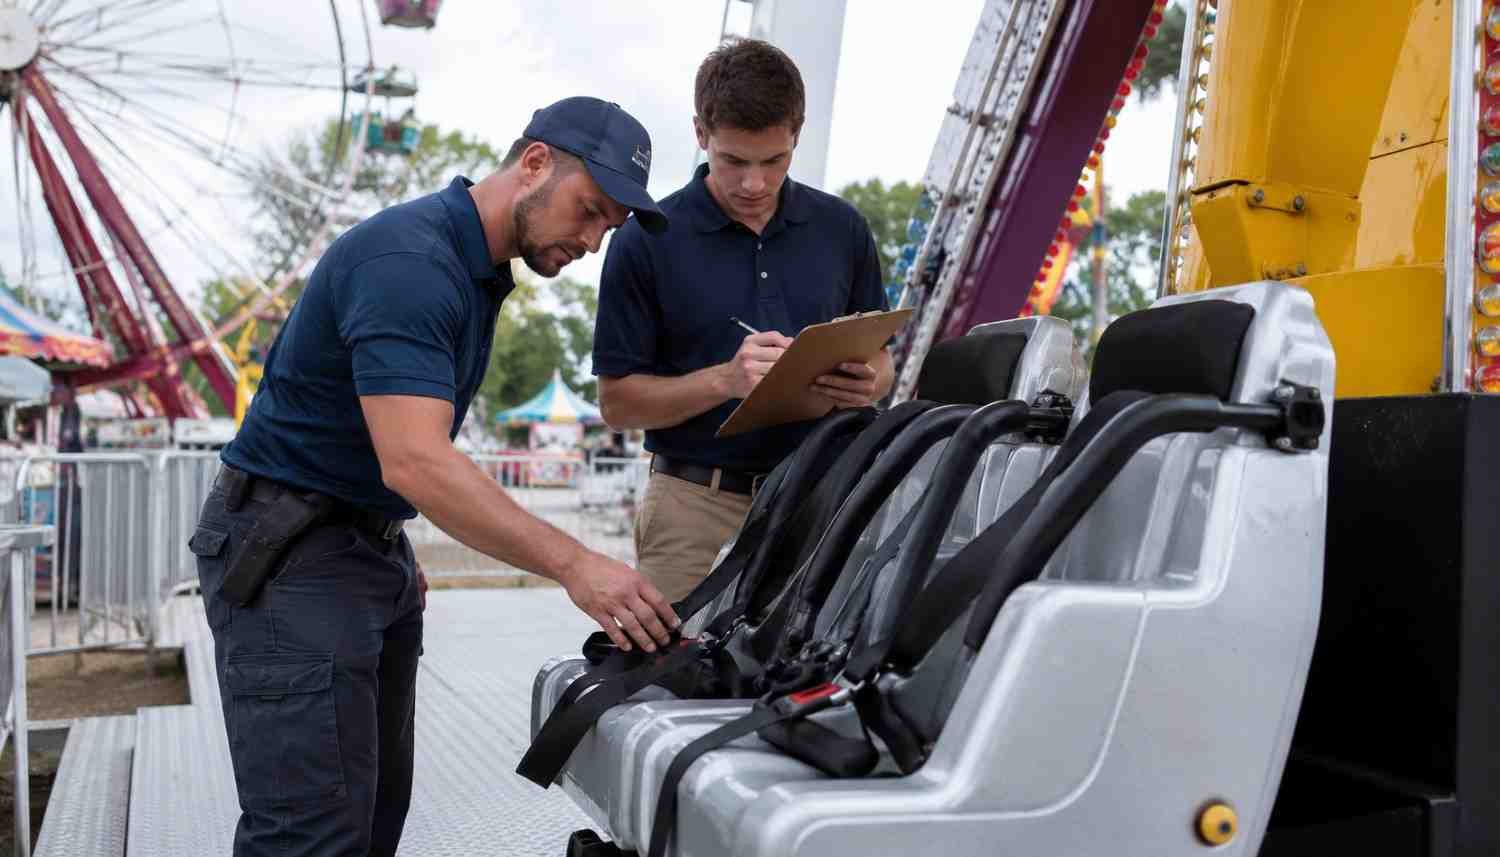
    Once structural assembly is finished, we require a trained, independent professional to perform an exhaustive erection check across the entire venue site. This independent inspector meticulously examines truss pins, guy wires, ballast connections, scaffolding clamps, and structural alignment. Independent reviews eliminate bias and catch subtle assembly mistakes that busy setup crews might overlook during fast-paced builds.

    Systematic physical walkthroughs ensure that all temporary installations strictly match certified engineering drawings and manufacturer guidelines. Inspectors verify that guardrails, handrails, and non-slip ramp surfaces are firmly secured to prevent accidental falls. Completing this rigorous check guarantees your event space stands fully prepared for intense crowds and dynamic operational use.

    Securing Official Handover Certificates

    The final step of the erection process involves obtaining a signed completion or handover certificate from your qualified structural inspector. This official document formally confirms that the temporary structure is safe, fully compliant, and ready to welcome guests. Receiving this written sign-off establishes a clear operational boundary between the construction phase and live event operations.

    Storing signed handover certificates in your event management records provides vital documentation for insurance carriers and municipal officials. It proves that your organization exercised full due diligence and adhered strictly to professional engineering standards. Having this written verification gives event hosts complete peace of mind as attendees begin entering the gates.

    How Can You Ace Temporary Structure Safety?

    Executing temporary structure safety for events requires a systematic operational workflow that begins long before setup day and continues until final teardown. 

    How Can You Ace Temporary Structure Safety

    First, conduct an extensive site assessment to inspect ground slope, soil stability, overhead power lines, and underground utility corridors. Documenting physical layout constraints early allows engineering teams to adjust ballast calculations and structural placement to match exact ground conditions seamlessly.

    Next, coordinate directly with certified rigging teams, structural engineers, and local building officials to secure all mandatory permits and stamped approval drawings. Establish strict build schedules that allow adequate time for assembly, ballast placement, and secondary safety checks without rushing the crew. Clear communication across all technical departments ensures every frame, truss, and tie-down strap is installed according to exact manufacturer specifications.

    Finally, execute pre-show walkthroughs, monitor live weather feeds continuously throughout the event, and maintain detailed safety logs on site. Assign dedicated safety marshals to monitor structural load shifts, wind speeds, and exit clearings while attendees are present. Following these systematic steps ensures your temporary event build remains stable, fully compliant, and completely safe from initial setup to final site restoration.

    Frequently Asked Questions

    1. How do I know if my event stage requires a local building permit?

    Most local municipalities require formal building permits if your stage stands over thirty inches off the ground or features an overhead roof structure. Always verify local municipal codes at least sixty days prior to your setup date.

    2. What is the minimum required height for guardrails on elevated stages?

    Standard building codes and safety regulations require elevated stages, access ramps, and public platforms to feature guardrails that stand at least forty-two inches high. These barriers must withstand specified lateral force pressures to prevent falls.

    3. At what specific wind speed should an outdoor stage be evacuated?

    Stage evacuation protocols usually initiate when wind gusts reach thirty-five miles per hour, but certified engineering manuals state precise limits. High-wind items like video walls and scrims must be lowered before reaching critical limits.

    4. Can concrete ballast blocks effectively replace traditional ground stakes?

    Concrete blocks can replace ground stakes when properly engineered and weighted. However, because surface friction varies on smooth ground, you must calculate friction coefficients and often use significantly heavier ballast weight than driven stakes.

    Party On Safely With Zero Structural Stress

    Mastering temporary structure safety for events gives you the ultimate confidence to host unforgettable gatherings without constant worry. By focusing on certified engineering calculations, real-time wind tracking, proper ballast anchoring, and official handover inspections, you create a rock-solid environment for every guest. Keep structural safety at the center of your event planning blueprint, and watch your celebrations shine safely every time!

  • How to Balance on a Mechanical Bull: Stay Centered

    How to Balance on a Mechanical Bull: Stay Centered

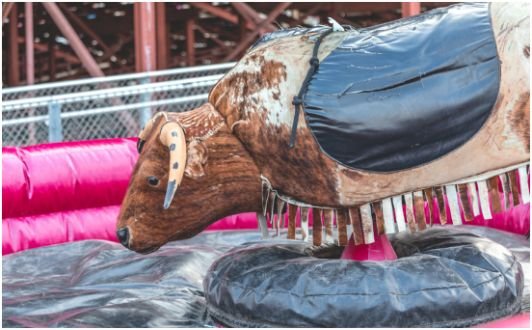
    The fastest way to lose your seat is to fight every movement with stiff arms and tense shoulders. Learning how to balance on a mechanical bull starts with a different approach: grip firmly below the waist while keeping everything above it loose and responsive.

    When I study successful rides, I notice that balance rarely comes from raw strength. It comes from staying centered, anticipating movement, and making small corrections before a larger correction becomes necessary.

    Why Mechanical Bull Balance Feels So Difficult

    A mechanical bull can pitch, turn, rise, drop, and change direction within seconds. Your body must respond to several forces without losing its connection to the saddle.

    Many beginners pull hard on the handle when they feel unstable. That reaction may feel secure, but it often stiffens the shoulders and shifts the rider away from the center.

    The goal is not to remain perfectly still. Good riders move constantly. They allow their hips and torso to absorb the motion while their thighs maintain a secure lower-body anchor.

    Falls also deserve serious attention. A study of mechanical bull injuries treated in US emergency departments estimated 27,903 injuries between 2000 and 2020. Falling or being thrown caused most cases, while sprains, fractures, and upper-extremity injuries appeared frequently.

    Build a Strong Lower-Body Anchor

    Understanding how to balance on a mechanical bull begins with your legs. Your thighs should hold you in position so your gripping arm does not carry your entire body weight.

    Squeeze With Your Thighs

    Press your inner thighs firmly against the bull. Maintain steady pressure rather than squeezing only when the ride becomes difficult.

    Think of your lower body as the roots of a tree. Your torso can sway, but your base must remain connected.

    Avoid locking your knees. A locked leg cannot absorb movement effectively. Keep a slight bend that allows your hips and knees to react together.

    Keep Your Feet Forward

    Move your lower legs slightly forward instead of letting them trail behind you. Turn your heels gently inward when the bull’s shape allows it.

    This position helps your thighs maintain contact. It also reduces the chance of your legs swinging outward during a spin.

    Do not hook your feet into unsafe gaps or wrap your legs around equipment. Follow the operator’s instructions and use only the intended riding position.

    Use the Correct Mechanical Bull Riding Posture

    Use the Correct Mechanical Bull Riding Posture

    Your starting position affects every movement that follows. A poor setup forces you to make large corrections as soon as the bull begins moving.

    Sit Close to the Center

    Place your weight over the middle of the bull rather than leaning far forward or sitting heavily near the rear.

    Keep your hips beneath your shoulders. Your head, chest, and pelvis should begin in a roughly vertical line.

    I recommend checking your position before the ride starts. Ask yourself whether you could lift your gripping shoulder without falling sideways. If not, you may already be leaning too far.

    Keep Your Upper Body Loose

    Relaxed does not mean weak. Keep your core active, but allow your shoulders and spine to move.

    A stiff torso behaves like a rigid board. When the bull changes direction, the whole board tips. A flexible torso behaves more like a spring and absorbs part of the movement.

    Breathe normally. Holding your breath can increase tension and slow your reactions.

    Turn Your Free Arm Into a Counterweight

    Hold the handle firmly with your dominant hand unless the operator advises another position. Test both an underhand and overhand grip before starting, then choose the position that feels secure without straining your wrist.

    Raise your free arm above shoulder height. Keep the elbow slightly bent and the hand open.

    Move that arm opposite the direction of your falling weight. If the bull pulls your body toward the right, move your free arm toward the left. This action creates a counterweight and helps return your chest toward the center.

    Do not wave the arm randomly. Controlled movement works better than large, frantic swings.

    These principles also support broader Mechanical bull riding tips, especially those involving posture, grip, reaction timing, and safe dismounts.

    Move With the Bull Instead of Fighting It

    Move With the Bull Instead of Fighting It

    The core skill behind how to balance on a mechanical bull is matching your response to the bull’s motion. I think of the rider and bull as opposite ends of a seesaw.

    Respond When the Bull Dips

    When the bull’s head drops, your upper body naturally wants to continue forward. Shift your shoulders slightly backward and keep your chest lifted.

    Do not make a dramatic backward lean. A small movement is usually enough when performed early.

    Keep squeezing with your thighs. Pulling only with your arm may twist your shoulder and place too much weight on the handle.

    Respond When the Bull Rises

    When the front rises, move your chest slightly forward and drive your hips toward the bull’s shoulders.

    This adjustment prevents your seat from sliding toward the back. Keep your chin level rather than looking upward.

    Imagine keeping your belt buckle connected to the bull. Your hips should follow the rise before your shoulders fall behind.

    Adjust During Spins

    During a turn, keep your chest facing toward the bull’s head as much as possible. Allow your hips to rotate while your free arm balances the outside pull.

    Avoid staring at the room. Watching the surroundings spin can make you feel disoriented and delay your next correction.

    Make several small adjustments rather than one dramatic lean. Small corrections preserve your center and use less energy.

    Watch the Bull’s Head to Improve Reaction Time

    Your eyes guide your balance. Look toward the bull’s head or the area just behind it.

    The head often shows the beginning of a pitch or directional change before the rest of your body feels the full movement. This gives you a brief chance to prepare.

    Looking at the floor can pull your head and shoulders downward. Watching the crowd may turn your torso away from the riding position.

    To improve how to balance on a mechanical bull, keep your gaze steady and let peripheral vision track the surrounding area.

    Beyond the ride itself, mechanical bulls can become social media friendly attractions because the movement, rider reactions, and crowd energy naturally create memorable photo and video moments.

    Use My Three-Second Balance Reset

    I use a simple mental check to evaluate a rider’s position: knees, hips, hand.

    First, check that your knees remain soft and close to the bull. Next, bring your hips back over the center. Finally, raise your free hand and move it opposite your shifting weight.

    This three-part reset can happen in about three seconds during a slow section of the ride.

    For example, imagine that a clockwise spin pulls your hips left. Squeeze your thighs, shift your hips slightly right, and extend your free arm right. Once centered, relax the shoulder again.

    The key is correcting the hips before making a large upper-body movement.

    Common Mechanical Bull Balance Mistakes

    The most common mistake is trying to hang from the handle. Your hand should support your position, but it should not replace your legs and hips.

    Beginners also lean too far in anticipation of the next movement. Guessing aggressively can place you off-center before the bull changes direction.

    Other frequent problems include staring at the floor, holding the breath, locking the knees, lowering the free arm, and riding at excessive speed too soon.

    Do not place your free hand on the bull. It cannot function as a counterweight there, and it may create an unsafe arm position during a fall.

    Practice Safely Before Increasing the Speed

    Ask the operator to begin slowly. Use the first part of the ride to test your grip, posture, and ability to respond to basic pitches.

    Only increase the speed when you can remain centered without hanging from the handle. A skilled operator should control the ride according to the rider’s ability and stop it when necessary.

    ASTM’s amusement ride standards address areas such as operation, maintenance, inspection, manufacturing, and design. IAAPA also identifies trained operators, inspections, operating procedures, and guest safety protocols as central parts of responsible ride operation.

    Ride only when the surrounding inflatable or padded area is fully set up. Remove loose objects from your pockets and follow posted age, height, health, clothing, and footwear requirements.

    Avoid riding while impaired. Stop immediately if you feel pain, dizziness, numbness, or unusual discomfort.

    Frequently Asked Questions

    1. How do beginners stay balanced on a mechanical bull?

    Beginners should squeeze with their thighs, sit centrally, keep their upper body loose, and use the free arm as a counterweight.

    2. Should I lean forward or backward on a mechanical bull?

    Lean slightly backward when the head drops and slightly forward when the front rises, using small movements rather than dramatic shifts.

    3. Where should I look while riding a mechanical bull?

    Look toward the bull’s head because it helps you anticipate pitches, turns, and changes in direction.

    4. Does upper-body strength help with how to balance on a mechanical bull?

    Some grip strength helps, but posture, thigh pressure, hip movement, timing, and relaxation matter more than pulling power.

    Stay Loose, Look Sharp, Ride Longer

    Once I understood how to balance on a mechanical bull as a coordination skill, the technique became much clearer. The legs create the anchor, the hips follow the machine, and the free arm brings the body back toward center.

    Start at a controlled speed and practice one correction at a time. Squeeze with your thighs, watch the bull’s head, and keep your shoulders loose. The rider who reacts smoothly usually lasts longer than the rider who simply holds tighter.

  • Smart Ways to Pick Carnival Attractions That Work for All Age Groups

    Smart Ways to Pick Carnival Attractions That Work for All Age Groups

    I’ve been to community festivals where the kids were having the time of their lives while the adults stood off to the side with nothing to do. I’ve also seen the opposite, where the activities appealed more to older guests and younger children lost interest within minutes. The events people remember most are usually the ones where everyone finds something worth enjoying together.

    I also noticed that successful carnival planning isn’t about booking the biggest ride or filling every corner with attractions. It comes down to choosing experiences that match different comfort levels, encourage families to spend time together, and keep the energy flowing from the first guest to the last.

    Why Age-Inclusive Carnival Attractions Matter

    Why Age-Inclusive Carnival Attractions Matter

    The best carnival isn’t measured by how many rides it has. It’s measured by how many people stay engaged throughout the event.

    When attractions appeal to toddlers, teenagers, parents, and grandparents alike, guests spend more time exploring instead of splitting into separate groups. Families make memories together, conversations happen naturally, and the event feels welcoming from start to finish.

    Instead of organizing attractions strictly by age, think about different activity levels. Some guests love fast rides, while others prefer slower experiences or interactive games. Offering a balanced mix gives everyone a reason to participate.

    Start With One Signature Attraction

    Every memorable carnival benefits from having one attraction that immediately draws attention. It becomes the centerpiece that guests photograph, talk about, and use as a meeting place.

    A Giant Ferris Wheel is one of the strongest examples because it offers something different for every generation. Younger children enjoy the excitement of riding high above the fairgrounds, while adults appreciate the relaxing pace and scenic views. Grandparents often find it comfortable compared to more intense rides.

    The Grand Carousel is another timeless favorite. Children enjoy choosing colorful horses, while parents and grandparents appreciate its gentle movement and nostalgic charm. Many modern carousels also include stationary benches, making them accessible for guests who prefer not to mount a moving animal.

    Choosing one recognizable attraction creates excitement before guests even explore the rest of the event.

    Mix Different Attraction Styles Instead of Similar Rides

    Mix Different Attraction Styles Instead of Similar Rides

    One common planning mistake is selecting several attractions that provide nearly identical experiences.

    A stronger strategy is to balance different activity types.

    Classic rides create nostalgia and encourage families to ride together. Interactive attractions invite friendly competition. Walk-through experiences appeal to guests who may not enjoy traditional rides but still want to participate.

    Some of the most successful combinations include:

    • Ferris Wheel
    • Grand Carousel
    • Giant Slide
    • Mirror Maze
    • Obstacle Course
    • Midway skill games

    This variety keeps guests moving throughout the carnival instead of waiting in one section for similar attractions.

    Think Beyond Ride Intensity

    Rather than separating attractions by age, organize them by comfort level.

    Low-speed classics appeal to guests who enjoy relaxing experiences without sudden movement.

    Moderate spinning attractions add excitement while remaining approachable for many families.

    High-thrill rides satisfy adrenaline seekers without overwhelming younger children or older guests who prefer calmer entertainment.

    This tiered approach helps families decide together which experiences fit everyone’s comfort level.

    Add Games That Everyone Can Enjoy

    Not every memorable carnival moment happens on a ride.

    Skill-based games encourage interaction between generations while giving guests a chance to win prizes and celebrate small victories together.

    The Duck Pond remains one of the simplest attractions for toddlers because every participant leaves with a prize. Meanwhile, Balloon Dart challenges older children, teenagers, and adults who enjoy testing their aim.

    Water Racer games are especially effective because multiple family members compete side by side instead of taking turns. Friendly competition often becomes just as entertaining for spectators as the players themselves.

    Games also help reduce wait times around major rides by spreading guests across different activity zones.

    Check Ride Requirements Before Event Day

    Check Ride Requirements Before Event Day

    Nothing disappoints a child faster than waiting in line only to discover they cannot ride.

    Review attraction requirements before finalizing your rentals.

    Measure younger children at home while wearing shoes if minimum height requirements apply. Some attractions also have maximum height limits designed specifically for younger riders.

    Many family rides require an accompanying adult, while certain kiddie rides only allow children. Understanding these details early helps parents plan their day without unexpected surprises.

    Accessibility should also be part of the planning process. Wide pathways, seating areas, and attractions that accommodate different mobility needs make the event more enjoyable for everyone.

    Plan the Day Around Energy Levels

    Even the best attractions become less enjoyable if they’re scheduled at the wrong time.

    Morning is usually the ideal opportunity for popular rides because crowds are smaller and temperatures are more comfortable.

    As the afternoon becomes warmer, shaded activity tents, indoor entertainment, and slower attractions provide a welcome break.

    Once evening arrives, many guests naturally slow down. This is the perfect time for illuminated rides, casual games, live entertainment, and relaxed family walks through the carnival.

    Matching attractions to guests’ energy throughout the day creates a smoother experience instead of overwhelming everyone at once.

    Build Experiences Instead of Filling Space

    Build Experiences Instead of Filling Space

    It’s easy to believe that adding more attractions automatically creates a better carnival. In reality, thoughtful planning usually delivers stronger results.

    Guests appreciate events where attractions complement one another instead of competing for attention. A balanced layout encourages movement, reduces congestion, and creates natural gathering places where families can relax between activities.

    Planning with this mindset also makes it easier to include unforgettable attractions for corporate events, especially when companies host employee appreciation days or family celebrations that welcome guests of every generation. The right mix of rides, games, and shared experiences creates lasting memories without making anyone feel left out.

    FAQs: Smart Ways to Pick Carnival Attractions That Work for All Age Groups

    1. Which carnival attraction appeals to the widest range of ages?

    Ferris wheels and carousels consistently attract guests of all generations because they combine gentle movement with a shared experience.

    2. How many attractions should a family carnival include?

    That depends on attendance, venue size, and event length. A balanced selection of rides, games, and interactive activities usually performs better than simply increasing the number of attractions.

    3. Are carnival games as important as rides?

    Yes. Games encourage participation, reduce congestion around major rides, and provide entertainment for guests who prefer less intense activities.

    4. How can organizers prevent long wait times?

    Spread attractions throughout the venue, mix high-capacity rides with games, and encourage guests to rotate between different activity zones during the day.

    Why Shared Experiences Leave the Biggest Impression

    People rarely remember every ride they went on, but they remember laughing together in a mirror maze, racing family members at a carnival game, or watching the sunset from the top of a Ferris wheel. Those moments happen when attractions are chosen with every guest in mind instead of focusing on just one age group. A thoughtful balance of rides, games, and gathering spaces creates an event where everyone feels included from beginning to end.

    When every generation leaves smiling, the carnival becomes more than entertainment. It becomes an experience people look forward to returning to year after year.

  • How to Book Carnival Attractions for a Festival That Everyone Will Remember

    How to Book Carnival Attractions for a Festival That Everyone Will Remember

    I’ve attended festivals where the rides were packed, families stayed for hours, and every corner seemed to have something worth experiencing. I’ve also seen events where attractions felt randomly placed, long lines frustrated guests, and the excitement faded much earlier than expected. The difference usually wasn’t the size of the budget. It was the planning behind every booking decision.

    I also noticed that memorable festivals rarely rely on one spectacular ride alone. Instead, they combine entertainment, thoughtful layouts, and attractions that appeal to different age groups. When every part of the event works together, guests leave with stories they want to share long after the festival ends.

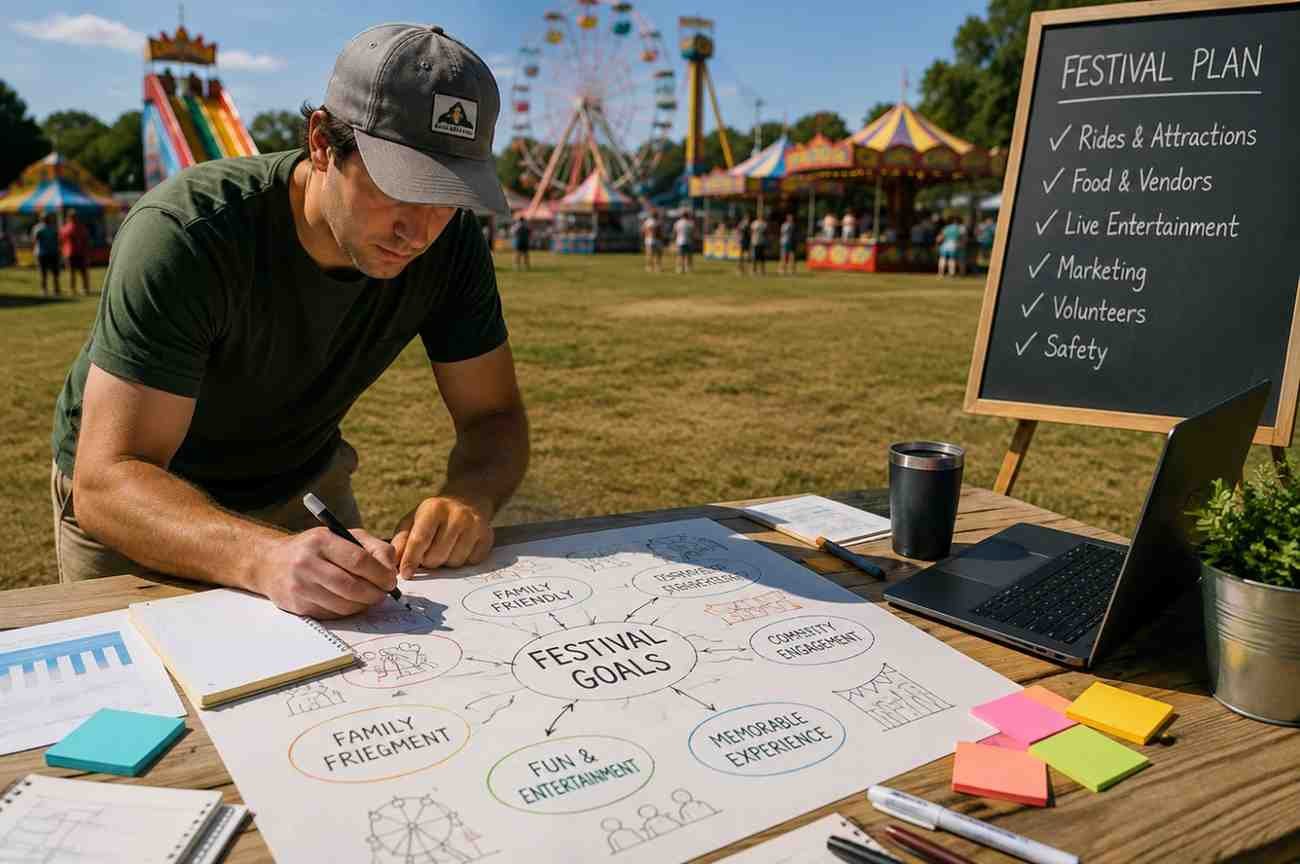
    Start by Defining Your Festival Goals

    Start by Defining Your Festival Goals

    Booking carnival attractions becomes much easier once you know exactly what kind of experience you want to create. Before contacting rental companies, decide who your audience is, how many people you expect, and what your budget allows.

    A neighborhood festival with young families requires a very different attraction lineup than a corporate celebration or community fundraiser. Younger children usually enjoy inflatable play zones, trackless trains, and classic carousel rides, while teenagers and adults often look for more interactive entertainment such as climbing walls or mechanical thrill rides.

    Budget planning should also happen early. Smaller festivals often spend between $2,000 and $5,000 on inflatables, lawn games, and family entertainment. Larger community festivals with signature rides like Ferris wheels or multiple mechanical attractions can easily exceed $10,000 and continue climbing depending on the scale of the event.

    Having realistic financial expectations helps narrow your options before discussions with vendors begin.

    Choose Attractions That Work Together

    The most memorable festivals don’t simply book the biggest rides available. They create a balanced entertainment mix that keeps guests engaged throughout the day.

    Large mechanical rides naturally become visual landmarks. A Ferris wheel attracts attention from across the venue and creates stunning evening photo opportunities, while a carousel appeals to multiple generations and adds timeless charm to the festival atmosphere.

    Interactive attractions keep visitors actively participating instead of simply watching. Inflatable obstacle courses, mobile rock-climbing walls, and dunk tanks encourage movement while reducing congestion around larger rides. These attractions also accommodate more participants over shorter periods, helping improve overall guest flow.

    Traditional midway games continue to be crowd favorites because they add friendly competition and give visitors something to take home. Ring toss, balloon pop, basketball shootouts, and milk bottle knockdown booths remain popular because they’re simple, familiar, and fun for nearly every age group.

    Rather than filling every available space with attractions, focus on creating variety. Guests appreciate having multiple ways to enjoy the event without feeling overwhelmed.

    Match Attractions to Your Audience

    Match Attractions to Your Audience

    Understanding your audience prevents expensive booking mistakes.

    Families with toddlers appreciate gentle attractions where children can participate safely with parents nearby. Community festivals often benefit from petting zoos, train rides, inflatable playgrounds, and interactive activity stations that encourage longer visits.

    Teenagers usually seek excitement. Mechanical bulls, spinning rides, zipline attractions, and larger obstacle courses naturally become gathering points because they create energy while encouraging spectators to join the excitement.

    Corporate events often benefit from attractions that promote friendly competition. Team challenges, carnival games, and interactive activities help coworkers connect in a relaxed environment without requiring everyone to participate in high-thrill rides.

    Creating different entertainment zones also supports immersive celebration experiences, allowing every guest to discover attractions that match their interests while reducing overcrowding in one area.

    Plan the Site Before Booking Attractions

    One of the biggest planning mistakes happens before the first ride even arrives.

    Large carnival attractions require more than open space. They often need dedicated power sources, accessible loading areas, level ground, and sufficient room for guests to move comfortably between attractions.

    Mechanical rides frequently require generators capable of supporting three-phase electrical systems rather than standard power outlets. Vendors should review your site map in advance to determine electrical needs and recommend appropriate equipment.

    Ground conditions matter as well. Asphalt, concrete, or dry compacted grass provides better support than muddy or uneven surfaces. Access gates must also be wide enough for trucks transporting large rides to enter without difficulty.

    Local permits, fire marshal inspections, and municipal approvals may also be required depending on the event location. Completing these steps early prevents delays as the festival approaches.

    Build a Booking Timeline That Reduces Stress

    Build a Booking Timeline That Reduces Stress

    Successful festival organizers rarely wait until the last minute.

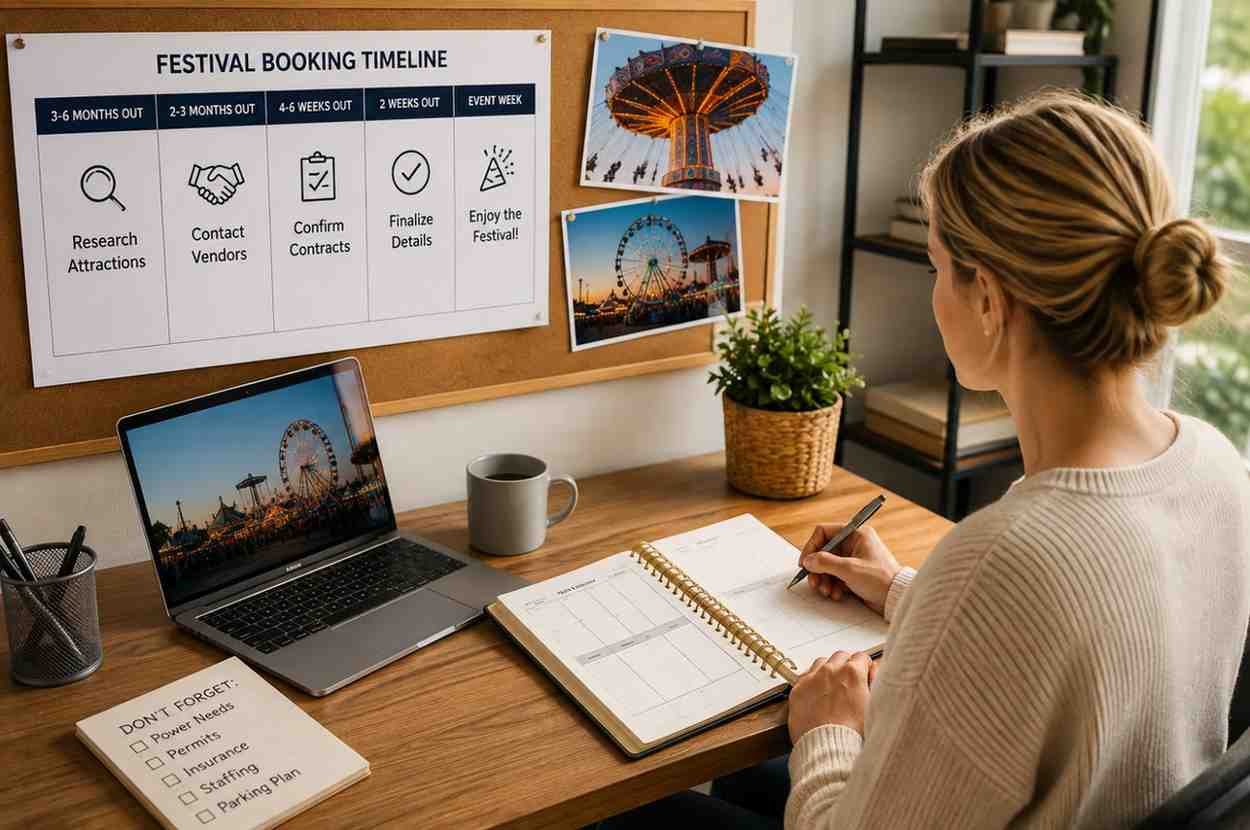
    Around six to twelve months before the event, begin researching vendors, comparing attraction packages, reviewing contracts, and paying deposits to secure popular dates during peak festival season.

    About three months before opening day, finalize permits, confirm municipal approvals, and review insurance documentation. This is also the ideal time to revisit your event layout and adjust attraction placement if attendance estimates change.

    During the final month, confirm arrival schedules, setup windows, equipment locations, staffing assignments, and teardown plans with every vendor involved.

    Following a structured timeline gives organizers time to solve problems before they become emergencies while ensuring attractions arrive exactly as expected.

    Small Details Guests Remember the Most

    While spectacular rides attract attention, thoughtful details often shape lasting memories.

    Comfortable seating areas, shaded rest zones, clear directional signs, short wait times, and organized pathways all improve the guest experience without dramatically increasing costs. Photo-worthy decorations around signature attractions also encourage visitors to share their experience online, helping extend the festival’s reach long after the event ends.

    When attractions, logistics, and guest comfort work together, visitors spend more time exploring, participating, and creating memories instead of navigating avoidable frustrations.

    FAQs: How to Book Carnival Attractions for a Festival That Everyone Will Remember

    1. How early should carnival attractions be booked?

    Most large festivals reserve attractions six to twelve months in advance, especially for weekends and seasonal events when availability becomes limited.

    2. What should I ask before hiring a carnival rental company?

    Verify insurance coverage, ride inspections, trained operators, setup requirements, cancellation policies, and arrival schedules before signing any agreement.

    3. How do I choose the right attractions?

    Consider your audience, available space, expected attendance, and budget. A balanced mix of thrill rides, interactive attractions, and midway games usually creates the best experience.

    4. Do carnival attractions require special permits?

    Many cities require permits, safety inspections, and fire marshal approvals for larger rides. Requirements vary by location, so check local regulations early in the planning process.

    The Festivals People Talk About Long After They End

    The most successful festivals aren’t remembered simply because they featured the tallest ride or the biggest entertainment budget. They’re remembered because every attraction felt intentional, guests always had something to explore, and the event flowed naturally from one experience to the next. Careful planning, reliable vendors, and thoughtful attraction choices create an atmosphere where families, friends, and communities genuinely enjoy spending time together.

    When every booking decision supports the overall experience, your festival becomes more than an event. It becomes a tradition people look forward to year after year.

  • How to Ride a Mechanical Bull: Beginner Safety Tips

    How to Ride a Mechanical Bull: Beginner Safety Tips

    The secret to how to ride a mechanical bull is not overpowering the machine. It is staying centered while the bull tries to move your hips away from your shoulders.

    I approach every ride as a balance challenge, not a strength contest. A firm grip helps, but rhythm, posture, leg pressure, and quick weight shifts keep a rider aboard longer.

    What Makes a Mechanical Bull Difficult?

    A mechanical bull can pitch forward, rise backward, spin, or combine movements. Those directional changes move your center of gravity beyond the bull’s base.

    Many beginners respond by tightening every muscle. That reaction usually makes balance worse. A rigid upper body cannot follow the machine smoothly.

    Instead, I focus on keeping my lower body connected while allowing my torso to respond. The goal is controlled movement, not complete stillness.

    Mechanical bull riding still carries an injury risk. A study of emergency department cases found that sprains and strains were the most common injuries. Fractures and upper-extremity injuries were also reported.

    What to Do Before Riding

    What to Do Before Riding

    Preparation affects both performance and safety. I never treat the mounting area like an ordinary party game.

    Check the Ride and Operator

    A trained operator should control the speed and stop the bull when a rider loses control. The ride should also have a wide, unobstructed, padded landing area.

    Commercial inflatable amusement equipment is covered by standards addressing installation, operation, inspection, maintenance, and operator training.

    Before mounting, ask the operator to begin slowly. A gradual start gives you time to understand how that specific machine moves.

    Follow the operator’s posted height, weight, age, and health restrictions. Limits vary between machines and rental companies, so never assume every bull follows identical rules.

    Wear the Right Clothing

    Long pants protect the inside of your legs from rubbing against the bull. Jeans or other durable pants usually work well.

    Wear closed-toe shoes that remain secure during a fall. Sneakers and properly fitted boots are practical choices. Avoid flip-flops, loose sandals, high heels, skirts, dresses, dangling jewelry, and loose accessories.

    A glove may reduce friction on the gripping hand. However, it should not interfere with the ride’s safety mechanism or prevent you from releasing the handle.

    Know When Not to Ride

    Do not ride while intoxicated. Mechanical bull riding depends on coordination, judgment, balance, and reaction speed, all of which alcohol can impair.

    I would also stay off the ride after a recent concussion, fracture, surgery, joint injury, or serious back or neck problem. Pregnant guests and anyone with a condition affected by sudden movement should follow medical advice and the operator’s restrictions.

    How to Ride a Mechanical Bull Step by Step

    How to Ride a Mechanical Bull Step by Step

    Learning how to ride a mechanical bull becomes easier when each body part has a specific job.

    Mount Near the Front

    Wait until the operator confirms that the machine has stopped. Use the designated entry point and avoid stepping on control cables, blowers, or inflatable walls.

    Sit slightly forward, near the base of the handle. Sitting too far back gives the bull more leverage over your hips.

    Center your weight evenly. Your shoulders, hips, and the bull’s centerline should initially form one vertical line.

    Build a Secure One-Handed Grip

    Hold the strap or handle with your dominant hand unless the operator instructs you differently. Close your fingers firmly without twisting the wrist into an extreme angle.

    I use enough pressure to stay connected, but I avoid a desperate “death grip.” Pulling constantly with the arm creates fatigue and can drag the shoulders out of position.

    Keep your gripping elbow bent. A locked elbow transfers more sudden movement into the wrist and shoulder.

    Some machines use a rider-operated safety switch, wrist cord, or magnetic control. Use that device exactly as the operator explains. Manufacturer instructions may require the rider’s safety magnet to remain correctly positioned for the machine to operate.

    Anchor Yourself With Your Legs

    Squeeze the bull with your inner thighs, knees, and calves. Your legs create the main physical connection to the body of the machine.

    Do not pinch only with your knees. That narrow grip can make your hips bounce. Spread the pressure along as much of your inner leg as the bull’s shape allows.

    Keep your feet clear of moving components. Never hook a foot beneath a strap, saddle edge, or structural part.

    Keep Your Hips Responsive

    Your hips should follow the bull while your shoulders remain closer to the center. Think of your waist as a hinge between a stable upper body and a moving seat.

    When the bull drops forward, allow your hips to follow while bringing your shoulders slightly back. When the front rises, move your hips forward rather than folding at the waist.

    The adjustment should remain small. Dramatic leaning often sends the rider beyond the point of recovery.

    Use Your Free Arm for Counterbalance

    Keep your non-gripping arm raised and relaxed. Move it naturally to counter the direction in which your body begins to fall.

    When your weight shifts right, the free arm can move left. When the machine pitches forward, the arm may move back slightly.

    Do not windmill wildly. Large arm swings can rotate your shoulders and make the imbalance worse.

    Look Forward

    Keep your head up and look toward the bull’s head or a fixed point beyond it. Looking down encourages your shoulders to collapse forward.

    A forward gaze also helps you notice changes in direction sooner. Your body responds faster when your eyes remain level.

    Mechanical Bull Balance Tips: The Three-Point Test

    My original three-point balance test gives beginners a fast way to diagnose their posture. During a slow practice round, check three contact points:

    1. Your gripping hand feels secure but not painfully tight.
    2. Both inner legs maintain steady contact with the bull.
    3. Your free arm can move without pulling your torso off-center.

    If one point fails, the other two must work harder. For example, weak leg pressure forces the gripping arm to carry too much load.

    The test also explains why strength alone rarely solves the problem. Efficient riders distribute control across several body parts instead of depending on one exhausted arm.

    How to React to Different Bull Movements

    Knowing how to ride a mechanical bull requires reacting to movement rather than trying to predict every motion.

    When the bull spins left, keep your chest near the center while allowing your hips to rotate with it. Move your free arm right to counter the turn.

    When the bull spins right, reverse the response. Avoid throwing your full upper body against the rotation.

    When the head dips, shift your shoulders back slightly and keep your hips connected. When the front rises, press the hips forward while keeping the chest open.

    Combined spinning and bucking creates the hardest challenge. During these movements, shorten your reactions. Small, fast corrections are more effective than one large lean.

    Common Mechanical Bull Riding Mistakes

    The most common mistake I see in beginner technique is trying to overpower every movement. The machine can change direction faster than a rider can pull against it.

    Other frequent errors include:

    • Sitting too far back
    • Looking at the floor
    • Locking the gripping elbow
    • Holding the handle with both hands without operator approval
    • Letting the knees spread apart
    • Leaning from the shoulders instead of moving the hips
    • Wearing unsuitable footwear
    • Refusing to release the handle after losing control

    Instructions can vary by equipment. Some operators require one-handed riding, while others may use different beginner rules or safety systems. Always follow the instructions for the actual machine rather than copying a technique from another venue.

    How to Fall From a Mechanical Bull More Safely

    Falling is part of the activity. A good exit matters as much as a long ride.

    Once you know you cannot recover, release the handle. Hanging on while your body falls away from the bull may place extra force on the wrist, elbow, or shoulder.

    Tuck your chin slightly and keep your limbs relaxed. Let the padded landing surface absorb the fall.

    Avoid extending a stiff arm toward the floor. Upper-extremity injuries were the most commonly affected body region in the emergency department study of mechanical bull injuries.

    After landing, pause before standing. Your balance may feel unsteady, and other riders should not enter until you have cleared the area.

    Seek medical attention after severe pain, visible deformity, loss of consciousness, confusion, breathing difficulty, numbness, weakness, or an inability to bear weight.

    How Long Should a Beginner Ride?

    A beginner should focus on control rather than a record-setting time. Ask for a slow round and stop before your grip, legs, or posture fail completely.

    My preferred progression has three stages:

    First, spend a short round learning the forward and backward motion. Next, add a slow spin. Only attempt faster combined movements after you can remain centered during both.

    Rest between attempts. Fatigued hands and inner thighs reduce control, even when the rider still feels confident.

    Frequently Asked Questions

    1. How do beginners ride a mechanical bull?

    Beginners should start slowly, sit forward, grip with one hand, squeeze with both legs, keep the free arm raised, and make small balance corrections.

    2. Should you lean forward or backward on a mechanical bull?

    Remain centered, then shift slightly opposite the pitch: shoulders back when the bull dips forward and hips forward when its front rises.

    3. How do you stay on a mechanical bull longer?

    Use steady leg pressure, a bent gripping arm, responsive hips, a level gaze, and small counterbalancing movements instead of pulling with brute force.

    4. Is riding a mechanical bull dangerous?

    Injuries can occur, so use a trained operator, follow all restrictions, ride sober, wear secure clothing, and confirm that the landing area is properly padded.

    Ride Smart, Cowboy

    Mastering how to ride a mechanical bull starts with accepting that the machine controls the speed, but you control your posture.

    I would choose one goal for the first ride: stay centered during a slow pitch. Once that feels natural, add spinning and faster changes. Keep the legs engaged, the upper body loose, and the ego outside the inflatable ring.

  • How to Avoid Heat Exhaustion at a Summer Wedding Without Missing the Fun

    How to Avoid Heat Exhaustion at a Summer Wedding Without Missing the Fun

    A summer wedding should leave you remembering the vows, the music, and the late-evening dancing—not the moment the heat made you dizzy beside the ceremony aisle. Outdoor venues can look stunning in photos, but intense sunlight, high humidity, formal clothing, alcohol, and long stretches without shade can quietly push the body toward overheating. 

    Knowing how to avoid heat exhaustion at a summer wedding allows you to enjoy every part of the celebration while protecting yourself, your guests, and the wedding party from a preventable medical emergency.

    I approach hot-weather weddings with the same care I would give any outdoor event: I check the heat index, hydrate before arriving, dress for airflow, and identify the nearest shaded or air-conditioned area. Whether you are exchanging vows, taking photographs, serving guests, or attending as a friend, a few thoughtful choices can keep the day elegant, comfortable, and safe.

    What Makes an Outdoor Summer Wedding Dangerous?

    Temperature alone does not reveal the complete risk. Humidity can make the air feel significantly hotter because sweat evaporates less effectively, adding another concern when managing wedding-planning stress in hot weather. 

    The National Weather Service uses the heat index to describe how hot conditions feel when temperature and humidity are combined. Direct sunlight may increase the apparent heat even further.

    Outdoor ceremonies often require guests to sit in direct sun while wearing suits, layered dresses, shapewear, or heavy fabrics. The wedding party may also spend hours posing for photographs, while photographers, musicians, caterers, and coordinators work continuously without enough cooling breaks.

    Older adults, young children, pregnant guests, and people with certain medical conditions may face greater heat-related risks. Couples should provide easy access to air conditioning, water, shade, and transportation rather than expecting every guest to tolerate the same conditions.

    When Should You Schedule a Summer Wedding Ceremony?

    When Should You Schedule a Summer Wedding Ceremony?

    For many US locations, scheduling the outdoor ceremony after 4:00 p.m. or closer to sunset can reduce direct exposure during the hottest part of the day. However, couples should check the hourly forecast because peak heat can continue into the evening, particularly in states such as Arizona, Texas, Nevada, and Florida.

    Review the temperature, humidity, heat index, and National Weather Service alerts several days before the event and again on the wedding morning. An Extreme Heat Warning signals dangerously hot conditions and may justify moving the ceremony indoors.

    Build air-conditioned breaks into the timeline before the ceremony, between photography sessions, and before the reception. The wedding party and vendors should never feel pressured to remain outside merely to keep the schedule moving.

    How Can Hosts Create a Cooler Wedding Venue?

    Open-sided tents can provide shade while allowing cross-breezes, but enclosed tents may trap heat unless they have suitable ventilation or portable air conditioning. Commercial misting stations, outdoor evaporative coolers, and high-capacity fans can make waiting and reception areas more comfortable.

    Place fabric cushions on metal or dark wooden chairs that may become hot in direct sunlight. Provide shaded seating near the ceremony, cocktail area, food service, and transportation pickup point. Couples should also maintain an accessible indoor cooling room for anyone who starts feeling unwell.

    How Should Guests Hydrate Before and During the Wedding?

    Maintain steady hydration before the event rather than consuming large amounts of water immediately before leaving home. Bring a refillable bottle when permitted and drink regularly throughout the ceremony and reception. OSHA emphasizes water, rest, and shade as essential protections against heat-related illness.

    Hosts should set up clearly visible water stations at the venue entrance so guests can drink before taking their seats. Offer chilled water, fruit-infused water, and electrolyte beverages in multiple locations rather than requiring guests to visit the bar.

    Electrolyte drinks may be useful after prolonged heavy sweating, but ordinary water is generally appropriate for shorter periods of light activity. Guests with kidney disease, heart disease, diabetes, fluid restrictions, or medication concerns should follow personalized medical advice.

    Does Alcohol Increase Heat-Exhaustion Risk?

    Does Alcohol Increase Heat-Exhaustion Risk?

    Alcohol may contribute to dehydration, impair judgment, and make it harder to recognize early symptoms. Avoid starting the celebration with several alcoholic drinks while sitting in direct sun. Alternate alcoholic beverages with water, eat regular meals, and slow down when temperatures remain high.

    Chilled appetizers, cucumber bites, fruit skewers, watermelon, frozen fruit pops, and light salads can make the menu feel refreshing. These foods complement hydration but do not replace drinking water.

    What Should You Wear to a Hot Summer Wedding?

    Choose lightweight, breathable, loose-fitting attire whenever the dress code allows it. Linen, cotton, chiffon, organza, seersucker, and breathable blends may feel cooler than polyester, nylon, heavy wool, or tightly layered formalwear.

    Light colors generally absorb less solar heat than dark shades. Men may feel more comfortable in unlined jackets and moisture-wicking undershirts, while other guests can choose flowing dresses, breathable undergarments, and comfortable shoes.

    An updo, braid, or shorter hairstyle can keep hair away from the neck and improve airflow. Sweat-resistant sunscreen, polarized sunglasses, and a small parasol provide additional protection during outdoor ceremonies. Powder-based or airbrushed makeup may hold up better than heavy cream products, although cosmetics cannot prevent heat illness.

    What Should Guests Pack for a Hot Outdoor Wedding?

    A compact wedding cooling kit can include a reusable water bottle, battery-powered fan, paper fan, cooling towel, sunscreen, sunglasses, blotting sheets, deodorant, face mist, electrolyte packet, and spare undershirt.

    Instant cold packs may provide temporary relief, but wrap them in fabric before applying them to the skin. Cooling only the wrists or neck is not a substitute for moving into shade or air conditioning when symptoms appear.

    What Are the Warning Signs of Heat Exhaustion?

    What Are the Warning Signs of Heat Exhaustion?

    Watch for heavy sweating, headache, dizziness, nausea, unusual weakness, muscle cramps, thirst, irritability, pale or clammy skin, faintness, or difficulty walking. Never assume these symptoms result only from nerves, hunger, uncomfortable shoes, or champagne.

    Move the affected person to a cooler area immediately. Loosen or remove unnecessary outer clothing, use fans and wet cloths to cool the skin, and offer small sips of water when the person is alert and can swallow safely. The American Red Cross recommends moving someone with heat exhaustion into a cooler environment with circulating air and beginning active cooling.

    Call 911 if the person becomes confused, has a seizure, loses consciousness, cannot drink, repeatedly vomits, or continues getting worse. Heat stroke is life-threatening and requires immediate emergency treatment and rapid cooling.

    Frequently Asked Questions (FAQs)

    1. What is the best way to avoid heat exhaustion at a summer wedding?

    The best approach combines steady hydration, breathable clothing, reduced alcohol intake, shaded seating, cooling breaks, weather monitoring, and early recognition of heat-illness symptoms.

    2. Is 90°F too hot for an outdoor wedding?

    A temperature of 90°F may become dangerous when humidity, direct sunlight, limited airflow, formal clothing, and a long ceremony are involved. Review the heat index and local weather alerts rather than relying only on air temperature.

    3. Should a wedding provide electrolyte drinks?

    Electrolyte beverages can help guests or vendors who have been sweating heavily for an extended period. However, the venue should continue providing plenty of cool drinking water.

    4. What should I do if I feel dizzy during the ceremony?

    Leave the sun immediately, sit or lie down in an air-conditioned or shaded area, loosen unnecessary clothing, cool your skin, and ask someone to stay with you. Seek medical assistance if symptoms worsen or fail to improve.

    Celebrate Without Letting the Heat Take Over

    I believe an outdoor wedding can still feel joyful and elegant during the summer, but safety must influence every decision. I would check the heat index, hydrate consistently, choose breathable clothing, limit alcohol, and take cooling breaks before symptoms begin.

    Couples can protect everyone by adjusting the timeline, providing structural shade, renting appropriate cooling equipment, placing water throughout the venue, and creating an emergency plan. With thoughtful preparation, guests can remember the vows, music, and celebration—not the oppressive heat.